The following describes how to establish a Remote Desktop (RDP) connection to a server that requires you to enter a ticket ID.
To establish an RDP connection to a server that requires you to enter a ticket ID
-
Open your Remote Desktop client application.
-
Enter the ticket ID into your Remote Desktop client application into the User name field, before or after the regular content (for example, your username) of the field. You must provide the ticket ID in the following format:
ticket_id~<your-ticket-id>%
Replace <your-ticket-id> with your actual ticket number. For example:
ticket_id~12345%Administrator
NOTE: Your plugin may use a different name for the key ticket_id shown in the example. Plugins work with key-value pairs and the names of keys are entirely up to individual plugins.
To encode additional data, you can use the following special characters:
For example, to add a token ID before your username, use the following format:
domain\token_id~12345%Administrator
Note how domain information is provided. If your server is in a domain, make sure that you specify the domain in this format: putting it in front, followed by a backslash (\).
-
Connect to the server.
-
Authenticate on the server.
-
If the authentication is successful, you can access the server.
On the default log level, One Identity Safeguard for Privileged Sessions (SPS) logs everything that the plugin writes to stdout and stderr. Log message lines are prefixed with the session ID of the proxy, which makes it easier to find correlating messages.
To transfer information between the methods of a plugin (for example, to include data in a log message when the session is closed), you can use a cookie.
If an error occurs while executing the plugin, SPS automatically terminates the session.
NOTE: This error is not visible in the verdict of the session. To find out why the session was terminated, you have to check the logs.
One Identity Safeguard for Privileged Sessions (SPS) periodically creates reports on the activity of the administrators, its system information, as well as the processed traffic. In addition, you can use the connection database for creating custom reports from connection statistics.
You can specify the following access rights on the Reporting > Configuration page:
- Reporting > Configuration allows you to configure new reports.
- Reporting > Content subchapters allows you to access and create content-based report subchapters.
- Reporting > Search subchapters allows you to access and create search-based report subchapters.
- Reporting > Advanced statistics allows you to access and create advanced statistics report subchapters.
- Reporting > Reports allows you to create the available reports.
For more information on configuring user rights, see Managing user rights and usergroups.
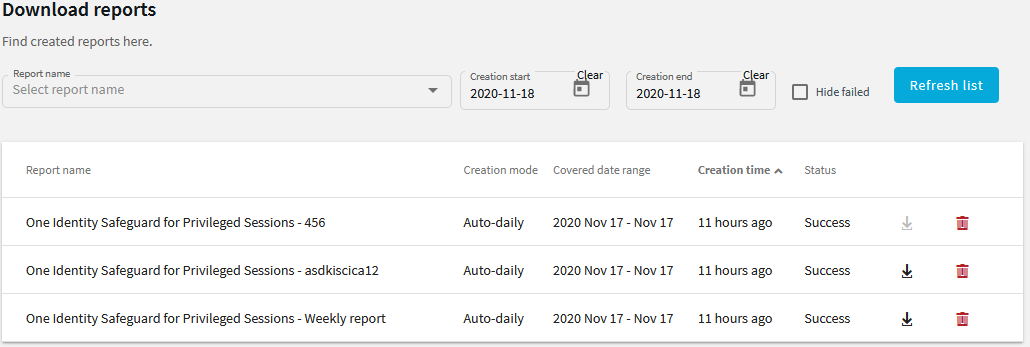
To access reports, select Reporting > Download reports from the Main Menu. The reports are displayed on a search interface. For more information on using and customizing this interface, see Using the internal search interface.
The reports are also sent to the email address set at Basic Settings > Management > Mail settings > Send reports to, unless specified otherwise in the configuration of the report.
NOTE: If the Basic Settings > Management > Mail settings > Send reports to address is not set, the system report is sent to the SPS administrator's email address.
Figure 323: Reporting > Download reports — Browsing reports
Reports can be generated for fixed periods:
-
Daily reports are generated every day at 00:01.
-
Weekly reports are generated every week on Monday at 00:01.
-
Monthly reports are generated on the first day of every month at 00:01.
To access the reports from the SPS web interface, the user must have the appropriate privileges (for custom reports, the default requirement is membership in the search group). In addition, individual reports might have different access requirements configured. For more information on configuring user rights, see Managing user rights and usergroups.
