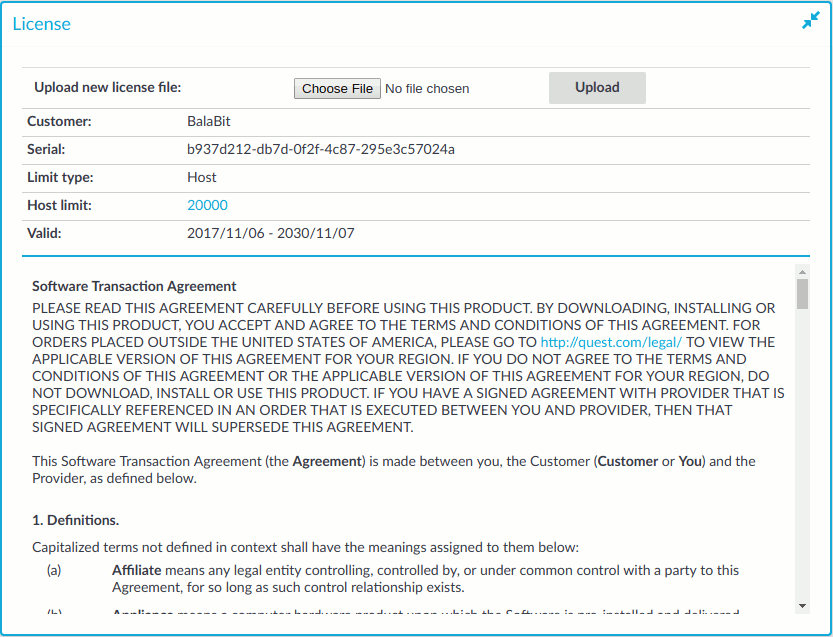
Information of the current license of One Identity Safeguard for Privileged Sessions (SPS) is displayed on the Basic Settings > System > License page. The following information is displayed:
Figure 129: Basic Settings > System > License — Updating the license
-
Customer: The company permitted to use the license (for example Example Ltd.).
-
Serial: The unique serial number of the license.
-
Limit type:
-
Host: Limits the number of servers (individual IP addresses) that can be connected through SPS.
-
Session: Limits the number of concurrent sessions (parallel connections) that can pass through SPS at a time (for example 25). SPS will reject additional connection requests until an already established connection is closed.
-
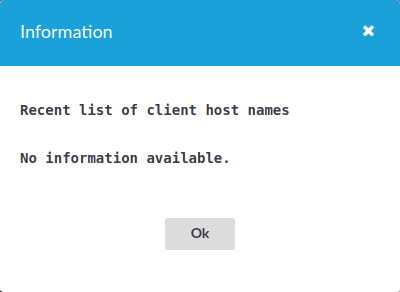
Limit: The actual value of the session or host limit. To list which hosts SPS counts against this limit, click the on the value of the limit.
-
Valid: The period in which the license is valid. The dates are displayed in YYYY/MM/DD format.
The full text of the End User License Agreement is also displayed here.
SPS starts sending automatic alerts daily, 60 days before the license expires. An alert is sent also when the number of protected servers exceeds 90% of the limit set in the license.
The SPS license must be updated before the existing license expires or when you purchase a new license.
To update the license
-
Navigate to Basic Settings > System > License.
-
Click Browse and select the new license file.
NOTE: It is not required to manually decompress the license file. Compressed licenses (for example .zip archives) can also be uploaded.
-
Click Upload, then  .
.
-
|

|
Caution:
This step terminates all controlled connections going through SPS. Disconnect your clients from the protected servers before proceeding. |
To activate the new license, navigate to Traffic control > All services and click Restart.
Connecting to One Identity Safeguard for Privileged Sessions (SPS) locally or remotely using Secure Shell (SSH) allows you to access the console menu of SPS. The console menu provides access to the most basic configuration and management settings of SPS. It is mainly used for troubleshooting purposes, the primary interface of SPS is the web interface.
The console menu is accessible to the root user using the password set during completing the Welcome Wizard.
Figure 130: The console menu
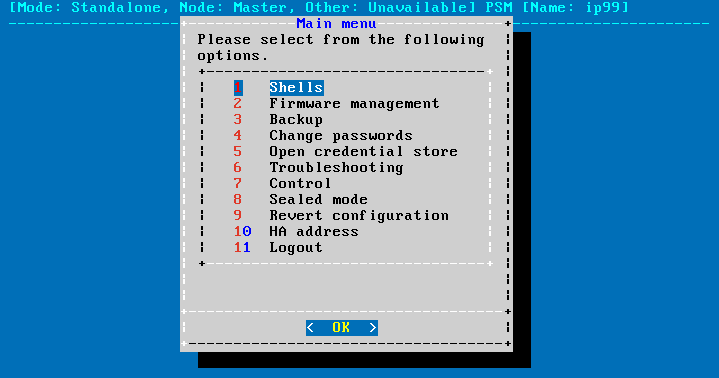
The console menu provides allows you to perform the following actions.
Access the local core and boot shells.
This is usually not recommended and only required in certain troubleshooting situations. Select the boot/core shell's keyboard layout for the local console. This will not affect the keyboard layout if you have accessed the shell via SSH.
The boot firmware boots up SPS, provides High Availability support, and starts the core firmware. The core firmware, in turn, handles everything else: provides the web interface, manages the connections, and so on.
Select the active firmware, and delete unneeded firmwares.
Accessing the firmware management is useful if after an update the new firmware does not operate properly and the web interface is not available to activate the previous firmware.
Start backup processes.
For more information about backup processes, see Data and configuration backups.
Change the passwords of the root and admin users.
For details, see Changing the root password of One Identity Safeguard for Privileged Sessions (SPS).
Access the network-troubleshooting functions and display the available log files.
If the web interface is inaccessible, it can be the result of an internal locking error. To resolve this issue, delete the lock files. After deletion, they are archived, and included in the support bundle if they are not older than 30 days. To create a support bundle, if the web interface is inaccessible, select Create support bundle.
Reboot and shutdown the system.
For details, see Controlling One Identity Safeguard for Privileged Sessions (SPS): reboot, shutdown.
Enable and disable sealed mode.
For details, see Sealed mode.
Set the IP address of the HA interface.
For more information about assigning an IP address to the HA interface of a node, see Resolving an IP conflict between cluster nodes.
NOTE: Note that logging in to the console menu automatically locks the SPS interface, meaning that users cannot access the web interface while the console menu is used. The console menu can be accessed only if there are no users accessing the web interface. The connection of web-interface users can be terminated to force access to the console menu.
