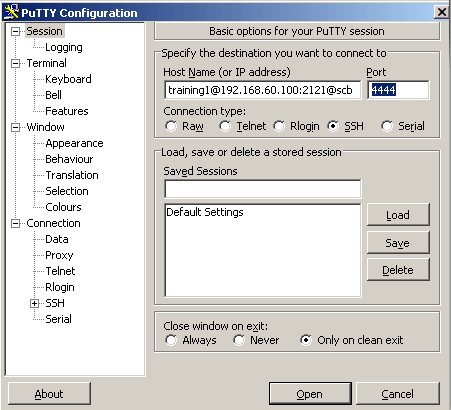
To establish an SSH connection through One Identity Safeguard for Privileged Sessions (SPS), follow these steps:
-
Enter the following command:
# ssh <username>@<server>@<scb>
...where <username> is the username, <server> is the target server's hostname (or IP address), and <scb> is the hostname (or IP address) of SPS.
If you do not specify the username or the address in nontransparent SSH and Telnet connections, One Identity Safeguard for Privileged Sessions (SPS) displays an interactive prompt where you can enter the username and the server address.
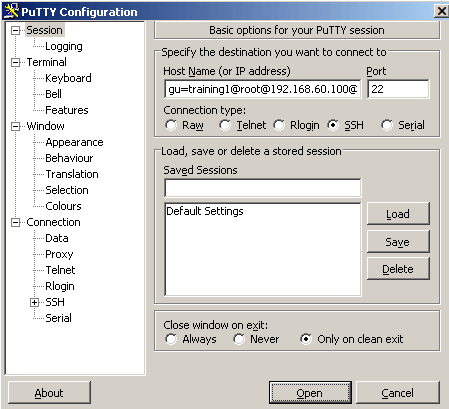
Example
Assuming the following values:
-
The username is training1
-
The target server is linux.training.example
-
The SPS server is scb
You can enter the following command:
# ssh training1@linux.training.example@scb
-
-
Alternative approach:
-
Enter only the hostname (or IP address, depending on your configuration) of SPS:
# ssh <scb>
-
At the login prompt, provide the username on the target server, and the target server's hostname (or IP address) using the <username>@<server> format
-