Wizard for entering database queries
The wizard helps you to formulate a condition (where clause) for database queries. The complete database query is composed internally. It always refers to the database table, which is preset when the Where clause wizard starts.
Figure 16: WHERE clause wizard.
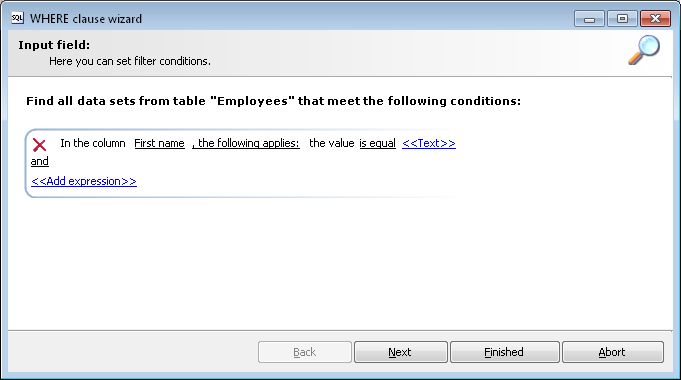
There are predefined operators to make it easier to create conditions. The operators are underlined. Operators with a help entry for the permitted value (such as column selection, data input or free text) are shown in parentheses (<<Operator>>).
To create a database query using the WHERE clause wizard
-
Start the WHERE clause wizard with the  button.
-
Create the database query.
-
When you hover over an operator, the cursor changes to a hand symbol.
-
If an operator has only two permitted values you can click to switch between the values.
-
Click an operator with more than two permissible values to open a menu listing the permissible operator values.
Click to select the required entry and then use the button to confirm the selection.
- OR -
Double-click an entry to select the value.
-
A selection window opens in which you can select all database columns of the base object and its related objects. Use SQL name to switch between the display name and the technical name of tables and columns.
-
For complex database queries, you have the option of linking several conditions together. After each condition there is a row showing the logical operator for the connection, followed by another row for the next condition. Use the button in front of a condition to delete it from the query.
-
Use the Expert view button to switch to direct entry of the query in SQL syntax. Use the Wizard view button to switch back to the simple input mode.
-
Click Continue.
The preview shows all the entries that meet the defined condition.
-
Click Continue.
The database query condition is shown in SQL syntax.
-
Click Finished.
Filter designer
The filter designer helps you formulate a condition for database queries. The complete database query is composed internally. The database query always references the Person table.
Figure 17: Filter designer

To create a database query using the filter designer
-
Start the wizard by pressing  .
.
-
Using the all operator, specify whether at least one or all of the conditions defined below must be fulfilled.
-
When you hover over the operator, the cursor changes to a hand symbol.
-
By clicking the operator, switch between the all and at least one values.
-
Create the conditions.
-
In the first menu, specify the condition type.
Depending on the condition type, other menus are displayed.
Table 27: Permitted condition types
|
Property |
Employee object properties. The drop-down menu with permitted properties is already restricted to the most important employee properties. |
|
For the account with the target system type |
Employee’s user account. Valid user account properties depend on which target system is selected.
You can only select columns that are shown in the Unified Namespace and for which the Display in the filter designer option is enabled. |
|
For entitlements with the target system type |
Employee target system group. Valid group properties depend on which target system is selected.
You can only select columns that are shown in the Unified Namespace and for which the Display in the filter designer option is enabled. |
|
SQL Query |
Free choice of SQL query (WHERE clause). To use the WHERE clause wizard, click . |
-
From the additional menus, select the object attributes for the condition.
All other controls are operators and properties that you require to formulate the condition. You can only select one entry from the drop-down menu. You can select more entries from extended drop-down menus, where the properties are displayed hierarchically and then added to the condition using an "or" operator. You may enter text directly into input fields. Pop-up menus and input fields are shown and hidden dynamically.
-
To insert another condition, click  . All partial conditions are linked by an AND link.
-
To delete a condition, click  .
.
-
To the preview window, click  . All objects determined by the condition are displayed.
Entering custom filter conditions
At certain points you can define custom filter conditions. The filter conditions are formulated like a condition (WHERE clause) for a database query.
You can enter database queries directly or put them together with a wizard. Use the  and buttons to switch to the relevant view.
-
The comparison operators =, <>, <, >, <=, >=, and like are supported for defining conditions.
-
To link condition you can use the logical operators AND, OR, and NOT.
-
You can use variables in your condition definitions. Variable must be masked.
Syntax: '$<variable>$'
NOTE: If the condition contains a dollar sign, which is not labeling a variable, it must be masked with $.
Example: '300 $$' compared to the value '300 $'
TIP: If you enter a condition directly, you can access predefined variables with the  button.
Each condition is displayed in a special control in the wizard. The controls contain connection points to logically join single conditions or delete single conditions. The connection points are set if you mouse over the edge of the respective control.
Figure 18: Wizard for entering filters

To create a filter with a wizard
-
Click Create condition.
This inserts a control for the first condition.
-
Enter the condition.
-
Click the left-hand part of the condition and select the property to filter by.
The properties for filtering are listed in the menu. You can also define other properties and use variables.
-
Specify the comparison operator. Click the comparison operator to change it.
The comparison operators =, <>, <, >, <=, >=, and like are supported for defining conditions.
-
Specify the comparison value on the right-hand side of the condition.
You can enter a string for a comparison value or select a property from the list. You can also use variables.
NOTE: To switch back to the input field again, select Input field from the menu.
-
To link condition you can use the logical operators AND, OR, and NOT.
-
Mouse over the edge of the control to which you wish to create a link.
The connection points appear.
-
Mouse over a connection point and select the connection.
This adds a new control for the next condition.
NOTE: To remove a control, select the Delete connection point.
Selecting from lists
Use the menu to select an element.
NOTE: You can add to some menus, in which case an entry selection appears in the list.
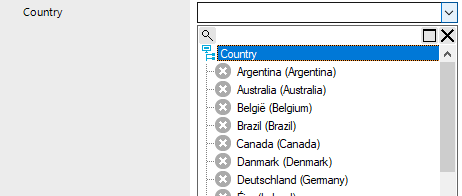
The extended menu links to elements from a different database table. To better display your hierarchical structures, from this menu you can select from hierarchy trees as well as flat structures.
Figure 19: Extended menus
To select a value form an extended menu
-
Open the menu by clicking the arrow.
-
Enable or disable an entry using a single click and close the menu.
- OR -
Enable or disable an entry by double-clicking.
The menu closes automatically.
Tip: As you enter text in the input field, the system filters the selection data for you. When you open the menu you can see the entries that contain the text you entered. If the entered text is unique, you can also select the relevant entry using the tab.
To search in the menu
-
Click the magnifying glass in the menu title bar to open the search dialog.
-
Enter your search term.
-
Set the option Case sensitive if required.
-
Start the search with the Search or Enter button.
-
Use F3 to continue searching.
-
End the search with Esc.
