Tree Editing Options
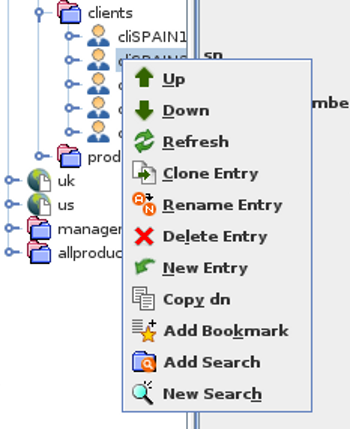
Once you have a connection open, you will be able to navigate to different points in the Directory Tree, by expanding nodes in the Navigation Panel. At any point in the Tree, you are able to edit the Tree structure. To do so, you can either make use of the tools in the Edit Menu of the Menu Bar, or use the Control Buttons in the Control Toolbar. You are also able to right click on any entry in the Navigation Panel to select any of the Tree editing tools.
Fig-15: The Context menu when you right click an entry in the Navigation panel
Add an Entry
The Add Entry option in the Edit Menu and Control Toolbar, will allow you to add an Entry at any point in the Tree. In order to create an Entry, you should always click on the 'parent' node that will contain the entry, and then click on the Add Entry option.
When adding an entry, a popup dialog box will appear that will require you to select the ObjectClasses that you wish to use to define the entry and its attributes. For each ObjectClass that you intend to use, you will need to click on the class listed in list of Available classes in the panel on the left of the dialog. You can then click on the top button (>>) to move the class across to the list of Selected classes in the panel on the right of the dialog.
Fig-16: Adding an Entry will present a wizard which will allow you to define ObjectClasses and Attributes, as well as their values
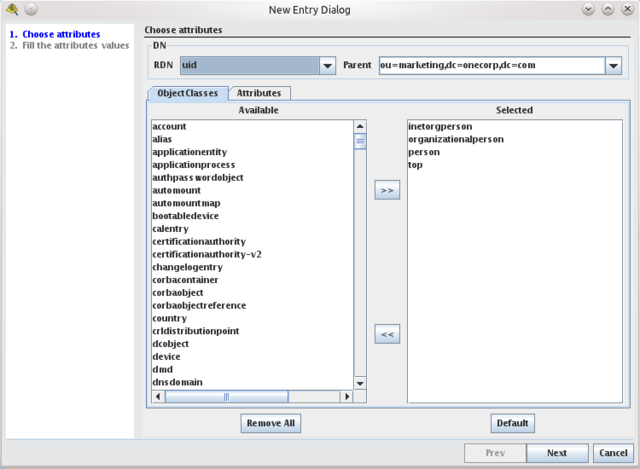
If you have added a class to the Selected classes list, that you do not wish to use, you can move it back into the Available classes list by clicking on it to select it, and then clicking on the bottom button (<<).
When you select an ObjectClass, the RDN dropdown box at the top left of the screen in the DN section, will be populated with the list of all available attributes. You will then be able to select the attribute that you wish to use as the naming attribute for the entry.
The Parent DN or Suffix that is presented at the top of the screen will usually contain the DN of the node in the tree that was selected when you opted to add an entry. This field contains a drop down box that usually contains a number of other likely intended parent DN's for the entry that you wish to add. The field is also editable, so that if the DN that is presented does not match the intended parent suffix, you can type it in manually.
Once you have selected at least one ObjectClass, you can click on the Attributes tab to list the available attributes for the classes that you have selected. Mandatory attributes will automatically be added to the list of Selected attributes in the panel on the right. To add other optional attributes that you wish to use for the entry that you are creating, select the attribute from the Available Attributes list in the panel on the left, and then click on the button at the top (>>) to move the attribute into the Selected Attributes list in the panel on the right. Note that the list of attributes that are available will only contain the attributes available for the ObjectClasses that you have already selected. You can click on the All Attributes checkbox to list all of the available attributes defined in the schema. If you select an attribute for an ObjectClass that you have not already added, you will be prompted to add the ObjectClass that contains it.
As with the ObjectClasses, if you have added an Attribute that you do not want to use, you can move it back into the Available Attributes list by clicking the attribute in the list, and then clicking on the button at the bottom (<<).
When you have selected the ObjectClasses and Attributes that you wish to use for the new entry, you can click the Next button at the bottom of the dialog window. You will now be presented with a second screen that contains a list of the attributes that you have selected to add for the new entry. You will need to enter values for each of the attributes listed.
When you have finished adding values to the attributes for the new entry, you can click on the Finish button to submit the modification request. If you have sufficient privileges to write to the parent node in the LDAP tree, the modification request will be processed and the changes will be written to the directory.
Note that you will not be able to add an entry if the server that you have connected to has not reported a schema, as the browser will be unable to present you with the options to add or edit ObjectClasses and Attributes. Although this sort of scenario is not common, it may occur when making use of Virtual Tree structures in an LDAP Proxy or Virtual Directory Server type product.
Clone an Entry
The Clone Entry option in the Edit Menu and Control Toolbar, will allow you to replicate any Entry within the Directory Tree. In order to clone an Entry, you should always click on the entry that you wish to clone, and then click on the Clone Entry option.
Any entry in the Directory Tree can potentially be cloned. In this operation, the cloned entry will be copied with an identical set of attributes and values, except that the naming attribute will have an integer appended to the end of its value, which will be incremented for each clone created. Any 'child' entries stored beneath the entry that is being cloned will not be copied to the new entry.
The cloned entry will be stored under the same parent node in the directory tree.
Rename an Entry
The Rename Entry option in the Edit Menu of the Menu Bar, will allow you to quickly change the value for the naming attribute of any Entry within the Directory Tree. In order to rename an Entry, you should always click on the entry that you wish to rename, and then click on the Rename Entry option.
Fig-17: To rename an entry, you can specify a new value for the naming attribute
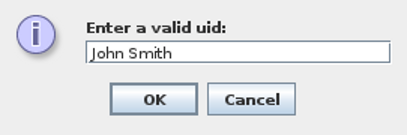
When you choose to rename an entry, a dialog box will appear that requires you to type a replacement value for the naming attribute defined for the entry.
It is possible to Cancel out of an entry renaming operation by clicking on the Cancel button.
Delete an Entry
The Delete Entry option in the Edit Menu and Control Toolbar, allows you to delete any entry within the Directory Tree. In order to delete an Entry, you should always click on the entry that you wish to delete, and then click on the Delete Entry option.
Note that when you click on the Delete Entry option, you will receive a warning that the entry will be deleted. If you have the appropriate privileges and confirm the Delete operation, the entry will be removed immediately. If an entry has children, most LDAP servers will not allow you to delete the entry directly. Currently LB does not support recursive deletion, but this functionality is available through VDS.
Copy DN
The Copy DN option in the Edit Menu and Control Toolbar, simply allows you to quickly copy the DN for the entry that is currently selected, to your clipboard. This is useful for a number of editing operations, and for troubleshooting purposes.
Editing Entries
Depending on the privileges that you have as an authenticated user, you are able to edit any entry in the Directory Tree by clicking on it to select it. Once selected, you will be able to view the attributes for the entry in one of the three possible view panels on the right hand side of the browser display. At the bottom of the view panels, there is an Edit button that will allow you to edit the attributes and objectclasses for any entry.
The editing options available depend on the view that you are using.
Field-Value
Fig-18: The Field-Value view in Edit mode
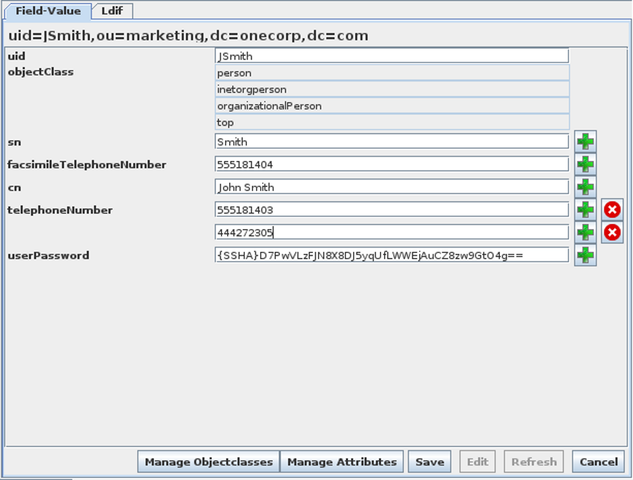
When Editing in the Field-Value view, you are only able to edit the values for the attributes that already exist for any entry. When in Edit mode, the values that you are able to edit will highlight in white, and you will be able to click into them to edit the value stored for each attribute. Some directories, such as Active Directory, may present values for attributes that are set as 'read-only' or flagged with 'NO_USER_MODIFICATION'. In these cases, attributes will be presented but will not be editable, even when in Edit mode. This will help you to avoid errors when trying to save an entry modification.
If an attribute can contain multiple values, you are also able to Add a Value or Remove a Value. These options are indicated with a + icon (to add a value) and an x icon (to remove a value) which are positioned on the right of any of these values. To add a value click on the + icon and then enter the value in the new field that will be provided. If the attribute already has multiple values, then an x icon will appear next to each value to allow you to select a value to remove.
When you have completed making changes, you can submit the modification request by clicking on the Save button.
You are able to click on the Cancel button to exit from Edit mode without storing any changes that you may have made to the attribute values.
When in the Field-Value view, you are able to add or remove ObjectClasses attached to an entry by clicking on the Manage ObjectClasses button. This will open the Manage ObjectClasses dialog. This dialog window is composed of two list panels. In the panel on the left, you will see a list of available ObjectClasses as defined within the server schema. In the panel on the right, a list of ObjectClasses currently used by the entry is presented. Between the two panels are buttons marked with the symbols (>>) and (<<). You can use these buttons to move ObjectClasses from one list to the other. When you have finished editing the list of ObjectClasses that you wish to use for the entry, click on the 'Finish' button. Note that you can click the 'Cancel' button to leave the dialog without actioning any changes that you have made.
You are also able to add or remove Attributes for an entry by clicking on the Manage Attributes button. The Manage Attributes dialog will open. This dialog window is composed of two list panels. In the panel on the left, you will see a list of the Attributes that are available for the ObjectClasses that are defined for the entry. In the panel on the right is a list of Attributes that are currently used by the entry. Between the two panels are buttons marked with the symbols (>>) and (<<). You can use these buttons to move Attributes from one list to the other. When you have finished editing the list of Attributes that you wish to use for the entry, click on the 'Finish' button. Note that you can click the 'Cancel' button to leave the dialog without actioning any changes that you have made. It is also possible to remove an attribute from an entry by simply delete all of the contents for any value given to that attribute.
Note that in the rare cases where no schema is reported by the server that you have connected to, the Manage ObjectClasses and Manage Attributes buttons will be disabled. You will also find that although you are able to edit existing values for an entry, you will not have the option to add new values or delete values. Although this sort of scenario is not common, it may occur when making use of Virtual Tree structures in an LDAP Proxy or Virtual Directory Server type product.
LDIF
Fig-19: The LDIF View
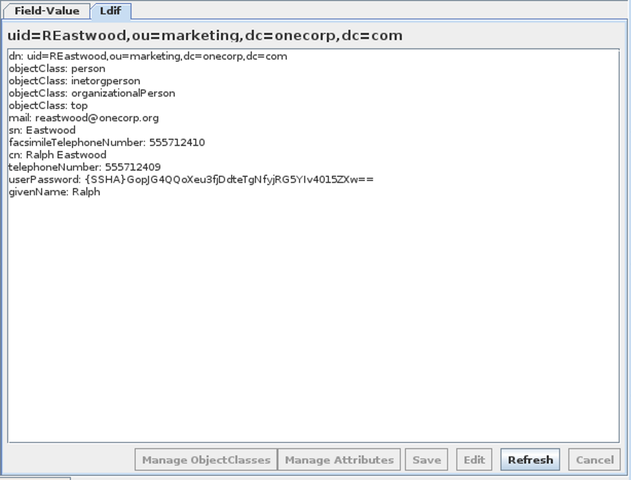
It is not possible to edit entries while in the LDIF view. This view is useful to allow you to copy the LDIF text to use with other applications. Note that at any point, you are able to also export the full LDIF Tree, or a sub-tree using the LDIF export options. See LDIF Export Options for more on this topic.
Searches
Searches allow you to construct LDAP filtered queries within a friendly interface and to store these for future use. Each Search query can be named and stored, so that they will be listed in the Search Menu in the menu toolbar. Searches are organized according to connection name, and you are able to create your own folders to store them according to your own particular organizational preference.
New Search
The New Search option allows you to quickly perform a search without having to store it permanently, however once a search has been performed, you will still have the option to save it for later use. When performing a search, you can click on the branch within the Directory Tree to help limit the base DN for the search. You can initiate a search by clicking on the New Search option in the Search Menu. This will cause the New Search dialog to open.
Fig-20: The New Search Dialog
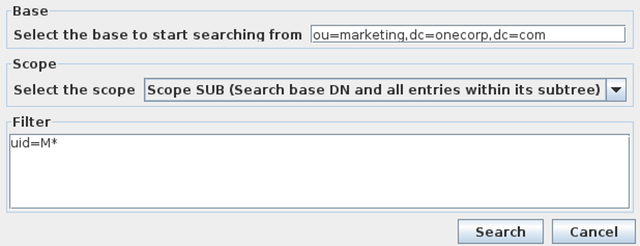
The New Search dialog will require you to enter the base DN or suffix that should be used within the search. By default, this will be populated with the DN for the branch or entry that was last selected in the Navigation Panel, although the field can be edited manually to specify an alternate branch if required.
You can specify one of three alternative Scope settings for the search. The scope defines how deep the search request will go. The scope options are as follows:
-
Scope Base: Only searches the Base DN specified for the search.
-
Scope One: Searches for entries stored one level beneath the specified Base DN.
-
Scope Sub: Searches recursively through all levels beneath the specified Base DN.
In general, within the browser, you are likely to select a Scope of either One or Sub.
Finally, you will need to specify a filter for the search criteria. Search filters follow a standard format as specified by RFC2254)")
Table 1:Commonly used search filter operators.
| Logical operator | Description |
|---|---|
| = | Equal to |
| {}= | Approximately equal to |
| <= | Lexicographically less than or equal to |
| >= | Lexicographically greater than or equal to |
| & | AND |
| | | OR |
| ! | NOT |
| * | Wildcard (e.g. cn=J* ) |
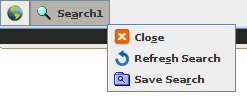
When you click on the Search button, a new view will be displayed in the Navigation Panel, limiting the Directory Tree according to the criteria specified in your Search. See the Search Results section below for further information on viewing search results. Note that the Search view will be labelled as Search1 with the value appended to the name being incremented for each subsequent search that you perform. For any new search, you are able to save the search for future use, by either clicking on the Save Search As option in the Searches menu, or by right clicking on the search button in the view bar at the bottom of the browser, and selecting the Save Search As button from the popup context menu that will appear.
Fig-21: A New Search button with context menu providing the option to Save Search