Appendix E: Enabling Federated Authentication
To enable Federated Authentication in Active Roles, perform the following procedures.
NOTE: To access the Active Roles Web Interface for Federated Authentication purposes, you can use any of the following supported web browsers: Google Chrome, Mozilla Firefox, or Microsoft Edge on Windows 10.
NOTE: While switching between the STS providers, restart IIS and clear the browser cache.
-
Configuring the domain service account for Federated Authentication
-
Updating Local Policies
-
Creating SPN entries for the domain service account
- Enabling delegation for Federated Authentication
Configuring the domain service account for Federated Authentication
To create a dedicated Federated Authentication domain service account and configure its domain and local group memberships, follow the steps.
To configure the domain service account for Federated Authentication
-
Create a dedicated Federated Authentication domain service account, for example: _arfed.
-
Ensure that the domain service account has a password that does not expire and set the following:
-
To configure domain group membership, add the domain service account to the Domain Users group.
-
To configure local group membership on the Active Roles server with the Active Roles Web Interface, add the domain service account to both Distributed COM Users and IIS_USRS groups.
Updating Local Policies
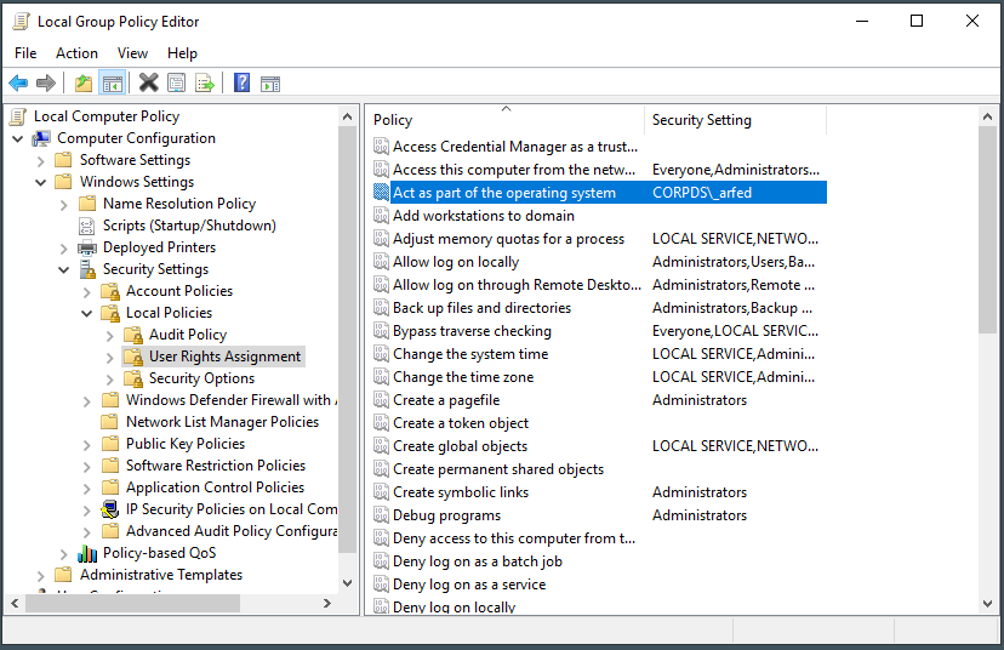
To grant the Federated Authentication domain service account the Act as part of the operating system User Rights Assignment on the local Active Roles server with the Local Group Policy Editor and the Active Roles Web Interface, follow the steps.
To add the Federated Authentication domain service account to the Act as part of the operating system policy
-
Right-click the Windows Start button and select Run.
-
Enter gpedit.msc and click OK.
-
Navigate to Computer Configuration > Windows Settings > Security Settings > Local Policies > and select User Rights Assignment.
-
In the right pane, double-click Act as part of the operating system.
-
Click Add User or Group.
-
Enter the name of the Federated Authentication domain service account and click OK.
-
Click OK.
-
Close the Local Group Policy Editor. The account is now present for the Act as part of the operating system policy.
Figure 150: Local Group Policy Editor

-
Open the Command Prompt with Administrator privileges and run gpupdate /force to refresh the local policy with the changes.
-
Close the Command Prompt.
Creating SPN entries for the domain service account
To create ServicePrincipalName (SPN) entries for the Federated Authentication domain service account, follow the steps.
To create SPN entries for the domain service account
-
On a Domain Controller in the domain where Active Roles is installed, log in with Domain Admin credentials to set the following SPNs for the Federated Authentication domain service account, and the delegation settings.
-
Open the Command Prompt with Administrator privileges and enter each of the following commands one by one:
setspn -U -S HTTP/ARWebServerName.YourDomain.com YourDomain\ARFederatedAccountName
setspn -U -S HTTP/ARWebServerName YourDomain\ARFederatedAccountName
setspn -U -S ArAdminSvc/ARServerName.YourDomain.com YourDomain\ARFederatedAccountName
setspn -U -S ArAdminSvc/ARServerName YourDomain\ARFederatedAccountName
-
To confirm that all SPNs are set, run:
setspn -L YourDomain\ARFederatedAccountName
-
Close the Command Prompt.

