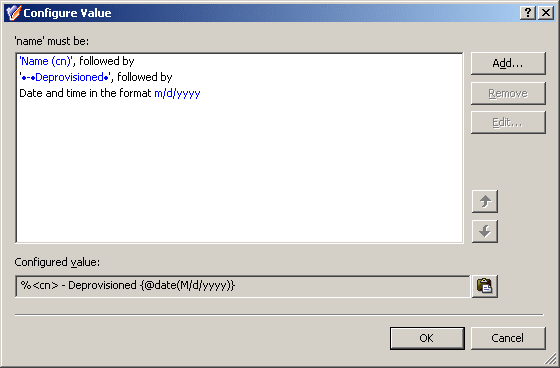
To configure a User Account Deprovisioning policy
-
On the Policy to Configure page, select User Account Deprovisioning, and then click Next.
-
On the Option to Prevent Logon page, select the options you want the policy to apply when deprovisioning a user account. You can select any combination of these options:
-
Disable the user account
-
Set the user’s password to a random value
-
Set the user logon name to a random value
-
Set the user logon name (pre-Windows 2000) to a random value
-
Rename the user account to
-
-
If you selected Rename the user account to, click Configure, and then complete the Configure Value dialog by using the procedure outlined later in this topic, in order to specify how you want the policy to update the user name when deprovisioning a user account.
-
Click Next.
-
On the Properties to Be Updated page, specify how you want the policy to update user properties when deprovisioning a user account:
-
Click Add, and then complete the Select Object Property dialog by using the procedure outlined later in this topic, in order to add property update rules.
-
Use View/Edit to modify existing rules.
-
Use Remove to delete existing rules.
-
-
Click Next.
-
On the Enforce Policy page, you can specify objects to which this Policy Object is to be applied:
-
Click Add, and use the Select Objects dialog to locate and select the objects you want.
-
-
Click Next, and then click Finish.
To complete the Configure Value dialog
-
Click Add.
-
Configure an entry to include in the value. For more information, see Steps for configuring entries.
-
In the Configure Value dialog, add more entries, delete or edit existing ones, and then click OK.
To complete Select Object Property dialog
-
From the Object property list, select an object property, and then click OK. The Add Value dialog appears.
If you select multiple properties, the Add Value dialog is not displayed. The properties you have selected are added to the list on the Properties to Be Updated page, with the update rule configured to clear those properties, that is, to assign them the “empty” value.
-
In the Add Value dialog, do one of the following:
-
Select Clear value if you want the update rule to assign the empty value to the property.
-
Select Configure value if you want the update rule to assign a certain, non-empty value to the property. Then, click Configure and complete the Configure Value dialog by using the instructions given earlier in this topic.
-

