Setting Authentication Services software path
During the installation process, the setup wizard copies the Authentication Services software packages to a default location on the local computer
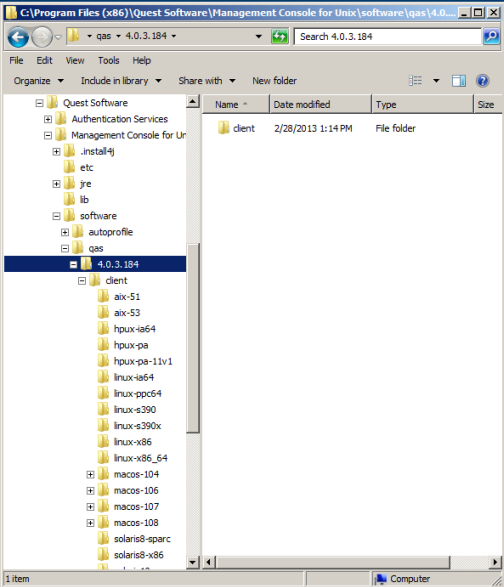
The default client directories are:
If you plan to install Authentication Services or Defender client software packages, or run the AD Readiness check, you must ensure the path to the software packages is correctly set in System Settings.
To ensure the path to the Authentication Services software packages is correctly set
-
Make note of where your Authentication Services client software packages are located.
-
Ensure that System Settings points to that location:
- Log in with the supervisor account or an Active Directory account with rights to change System Settings; that is, an account in the Console Administration role. See Console Roles and Permissions system settings for details.
-
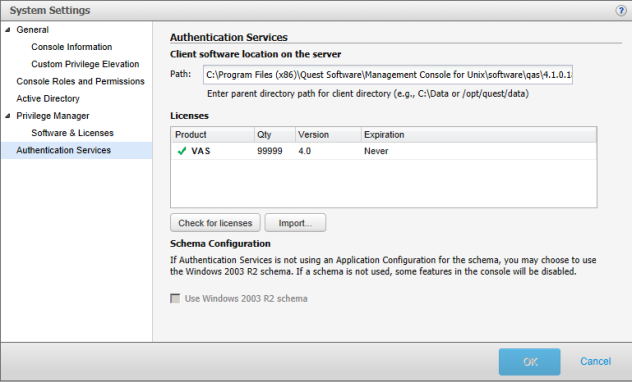
From the top-level Settings menu, navigate to System settings | Authentication Services.
-
In the Path box, enter the path where the Authentication Services client software packages are located on the server and click OK.
NoteS: The path to the software packages must point to the folder containing the client directory. If the path to the software packages is not pointing to where the client files are, you can either change the path or copy the files to the location.
When running Management Console for Unix on Windows, the location of the Authentication Services software packages must be accessible to the mangement console service which runs as 'NT AUTHORITY\NetworkService'.
Checking host for AD readiness
The Check for AD Readiness command performs a series of tests to verify that a host meets the minimum requirements to join an Active Directory domain.
To check hosts for Active Directory Readiness
-
Select one or more hosts on the All Hosts view of the Hosts tab, open the Check menu from the Prepare panel of the toolbar, and choose Check for AD Readiness.
-
In the Check AD Readiness dialog, enter the Active Directory domain to use for the readiness check.
-
Enter Active Directory user credentials, and click OK.
-
On the Log on to Host dialog, enter the user credentials to access the selected hosts and click OK.
If you selected multiple hosts, it asks whether you want to use the same credentials for all the hosts (default) or enter different credentials for each host.
-
If you selected multiple hosts and the Use the same credentials for all selected hosts option, enter your credentials to log on to access the selected hosts and click OK.
-
If you selected multiple hosts and the Enter different credentials for each selected host option, it displays a grid which allows you to enter different credentials for each host listed. Place your cursor in a cell in the grid to activate it and enter the data.
-
To check the results of the readiness check,
-
Right-click the host on the All Hosts view of the Hosts tab, and choose Properties.
-
Select the Readiness Check Results tab on the properties.
-
Choose AD Readiness from the drop-down menu, if necessary.
AD Readiness Check runs these tests:
- Checks for supported operating system and correct OS patches
- Checks for sufficient disk space to install software
- Checks that the host name of the system is not 'localhost'
- Checks if the name service is configured to use DNS
- Checks /etc/resolv.conf for proper formatting of name service entries and that the name servers can be resolved example.com
- Checks for a name server that has the appropriate DNS SRV records for Active Directory example.com
- Selects a writable DC with port 389 (UDP) open to use for the checks example.com
- Displays AD site of user running checks, if available
- Checks if port 464 (TCP) is open for Kerberos Kpasswd windows.example.com
- Checks if port 88 (UDP and TCP) is open for Kerberos Traffic windows.example.com
- Checks if port 389 (TCP) is open for LDAP windows.example.com
- Checks for Global Catalog and port 3268 (TCP) is open to the GC example.com
- Checks for a valid time skew against Active Directory DC windows.example.com
- Checks for Authentication Services Application Configuration windows.example.com
- Checks if port 445 (TCP) is open for Microsoft Directory Services windows.example.com
A progress bar displays in the Task Progress pane. The final status of the task displays, including any failures or advisories encountered.
-
If the Readiness Check completed with failures or advisories, correct the issues and rerun the Readiness Check until all tests pass.
Review the Authentication Services Readiness report
The Authentication Services Readiness report provides a snapshot of the readiness of each host to join Active Directory.
Note: This report is available when you are logged on as the supervisor or an Active Directory account in the Manage Hosts role.
To create the Authentication Services Readiness report
- From the mangement console, navigate to Reporting.
- From the Reports view, double-click the Authentication Services Readiness report name.
The report opens a new Authentication Services Readiness tab on the Reporting tab.
- Select or deselect the report parameters to define which details to include in the report:
- Joined to AD
- Ready to Join AD
- Ready to Join AD with Warnings
- Not Ready to Join AD
- Not Checked for Readiness
- Open the Export drop-down menu and select the format you want to use for the report: PDF, or CSV.
It launches a new browser or application page and displays the report in the selected format.
Note: When generating multiple reports simultaneously or generating a single report that contains a large amount of data, One Identity recommends that you increase the JVM memory. See JVM memory tuning suggestions for details.
Installing Authentication Services software packages
Once you have added and profiled one or more hosts, and checked them for AD Readiness, you can remotely deploy software products to them from the mangement console.
Note: This task is only available when you are logged on as supervisor or an Active Directory account in the Manage Hosts role.
To install Authentication Services software on hosts
- Select one or more profiled hosts on the All Hosts view and click the Install Software toolbar button.
Note: The Install Software toolbar menu is enabled when you select hosts that are profiled; the toolbar button will not be active if you have not selected any hosts.
-
On the Install Software dialog, select the software products you want to install and click OK.
- Authentication Services Agent
- Authentication Services for Group Policy
- (Optional) Authentication Services for NIS
- (Optional) Authentication Services for LDAP
- (Optional) Dynamic DNS Updater
- (Optional) Defender Pam Module
NOTES:
- Both the Authentication Services Agent and the Authentication Services Group Policy packages are required.
- If you do not see all of these software packages, verify that the path to the software packages is correctly set in System Settings. (Refer to: Setting Authentication Services software path)
- On the Log on to Host dialog, enter the user credentials to access the selected hosts and click OK.
Note: This task requires elevated credentials.
If you selected multiple hosts, it asks whether you want to use the same credentials for all the hosts (default) or enter different credentials for each host.
- If you selected multiple hosts and the Use the same credentials for all selected hosts option, enter your credentials to log on to access the selected hosts and click OK.
- If you selected multiple hosts and the Enter different credentials for each selected host option, it displays a grid which allows you to enter different credentials for each host listed. Place your cursor in a cell in the grid to activate it and enter the data.
