Gathering data about system problems
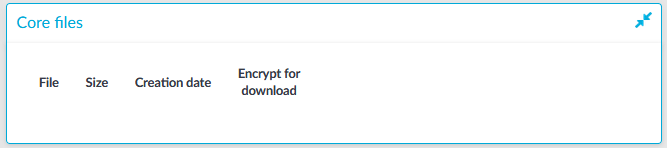
One Identity Safeguard for Privileged Sessions (SPS) automatically generates core dump files if an important software component (for example, Zorp) of the system crashes for some reason. These core dump files can be of great help to the One Identity Support Team to identify problems. When a core dump file is generated, the SPS administrator receives an alerting e-mail, and an SNMP trap is generated if alerting is properly configured (for details, see Configuring system monitoring on SPS and System logging, SNMP and e-mail alerts).
To list and download the generated core dump files, navigate to Basic Settings > Troubleshooting > Core files.
By default, core dump files are deleted after 14 days. To change the deletion timeframe, navigate to Basic Settings > Management > Core files.
Figure 345: Basic Settings > Troubleshooting — System troubleshooting with SPS
Viewing logs on One Identity Safeguard for Privileged Sessions (SPS)
The Troubleshooting menu provides an interface to view the logs generated by the various components of One Identity Safeguard for Privileged Sessions (SPS).
NOTE: Because of performance reasons, log files larger than 2 Megabytes are not displayed in the web interface. To access these logs, download the file instead.
To view logs on SPS
-
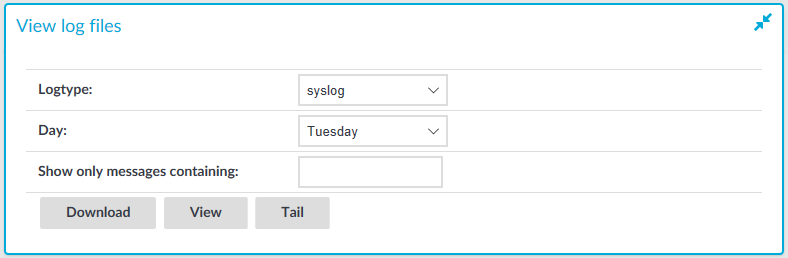
Navigate to Basic Settings > Troubleshooting > View log files.
Figure 346: Basic Settings > Troubleshooting — Viewing logs on SPS
-
Use the Logtype roll-down menu to select the message type.
-
syslog: All system logs of the SPS host.
-
scb: Logs of the SPS web interface.
- paa: Logs related to the workings of the One Identity Safeguard for Privileged Analytics module.
- logadapter: Logs of the log adapter plugin(s) and syslog instance(s) configured for ingesting logs from an external source.
-
http: Logs of the HTTP connections passing through SPS.
-
ica: Logs of the ICA connections passing through SPS.
-
rdp: Logs of the RDP connections passing through SPS.
-
ssh: Logs of the SSH connections passing through SPS.
-
telnet: Logs of the Telnet connections passing through SPS.
-
vnc: Logs of the VNC connections passing through SPS.
-
-
Use the buttons at the bottom of the dialog to perform the following tasks:
-
To download the log file, click Download.
-
To follow the current log messages real-time, click Tail.
-
To display the log messages, click View.
-
-
To display log messages of the last seven days, select the desired day from the Day field and click View.
TIP: To display only the messages of a selected host or process, enter the name of the host or process into the Show only messages containing field.
The Show only messages containing field acts as a generic filter: enter a keyword or a regular expression to display only messages that contain the keyword or match the expression.
Changing log verbosity level of One Identity Safeguard for Privileged Sessions (SPS)
The logging level of One Identity Safeguard for Privileged Sessions (SPS) can be set separately for every protocol.
NOTE: The Basic Settings > Management > Verbose system logs > Enable option is not related to the verbosity of traffic logs: it increases the log level of the non-network-related events, for example adds the commands executed by the SPS web interface to the logs, and so on.
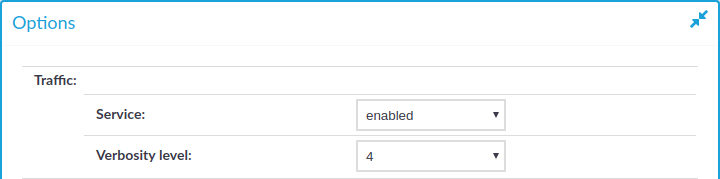
Figure 347: <Protocol name> Control > Global Options — Changing the verbosity level
To change the verbosity level of SPS
-
Navigate to the Global Options page of the traffic you want to change the log level of, for example, to SSH Control > Global Options to change the log level of SSH traffic, RDP Control > Global Options for remote desktop traffic, and so on.
-
Select the desired log level from the Verbosity level field. Note that the new verbosity level applies only to new sessions started after committing the change. The verbosity level of active sessions will not change.
NOTE: The verbosity level ranges from 1 (no logging) to 10 (extremely detailed), with level 4 being the default normal level. To debug complex problems, you might have to increase the verbosity level to 7. Higher level is needed only in extreme cases.
Caution: High verbosity levels generate very large amount of log messages and might result in a very high load on the machine.
For log levels 8-10, the logs contain highly sensitive data for all connections, as well as passwords and private keys in plain text format.
-
Click
.
-
Optional: To set a different verbosity level for sessions that belong to a specific Connection Policy, complete the following steps:
-
Navigate to the Connection Policy you want to modify.
-
Select Override global verbosity level.
-
Select the desired log level from the Connection specific verbosity level field. Note that the new verbosity level applies only to new sessions started after committing the change. The verbosity level of active sessions will not change.
-
Click
-


Collecting logs and system information for error reporting
To track down support requests, the One Identity Support Team might request you to collect system-state and debugging information. This information is collected automatically, and contains log files, the configuration file of One Identity Safeguard for Privileged Sessions (SPS), and various system-statistics.
NOTE: Sensitive data like key files and passwords are automatically removed from the files, that is, configuration files do not contain passwords or keys. However, if you increase the proxy verbosity level to 8-10 in the Global Options, then for troubleshooting purposes, the logs can contain highly sensitive data, for example, passwords and keys in plain text format. If you are concerned about the presence of sensitive data, check the collected log files before submitting to the Support Portal.
The Basic Settings > Management > Verbose system logs > Enable option is not related to the verbosity of log messages: it adds the commands executed by the SPS web interface to the log.
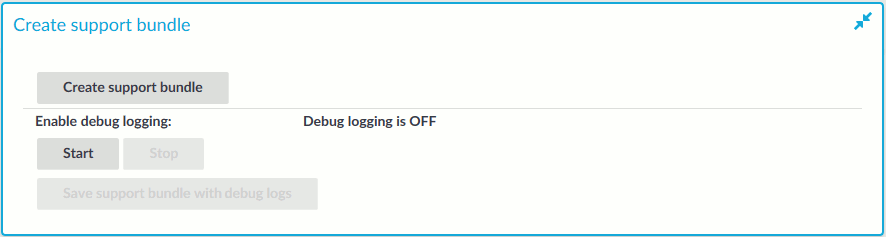
To collect system-state information (also known as a support bundle), navigate to Basic Settings > Troubleshooting > Create support bundle and click Create support bundle, then save the created zip file. The name of the file uses the debug_info-<hostname>YYYYMMDDHHMM format.
To collect information for a specific error
If the problem you want to reproduce requires a reboot, see Collecting logs and system information of the boot process for error reporting instead.
-
Navigate to Basic Settings > Troubleshooting > Create support bundle.
Figure 348: Basic Settings > Troubleshooting > Create support bundle — Collecting debug information
-
Click Start.
-
(Optional) If the error you want to reproduce is related to the audited network traffic, for example, it occurs when a used connects to a protected SSH server, consider increasing the log level of the related traffic (for example, SSH). For details, see Changing log verbosity level of One Identity Safeguard for Privileged Sessions (SPS).
Note that earlier versions of SPS increased the log level of the audited traffic automatically.
-
Reproduce the event that causes the error, for example connect to a server.
-
Click Stop.
-
Click Save support bundle with debug logs and save the created zip file. The name of the file uses the debug_info-<hostname>YYYYMMDDHHMM format.
SPS includes the configuration files of any plugins installed. Note that depending on the plugin, these configuration files can contain sensitive information, such as passwords or API keys. In this case, edit the plugin-related files in the plugins directory of the support bundle and delete the sensitive information.
-
(Optional) If you have increased the verbosity level of the audited network traffic, decrease it to the default level.
-
Attach the file to your support ticket.