Authenticating users to a RADIUS server
One Identity Safeguard for Privileged Sessions (SPS) can authenticate its users to an external RADIUS server. Group memberships of the users must be managed either locally on SPS or in an LDAP database.
|

|
Caution:
The challenge/response authentication method is currently not supported. Other authentication methods (for example password, SecureID) should work. |
To authenticate SPS users to a RADIUS server
-
Navigate to Users & Access Control > Settings.
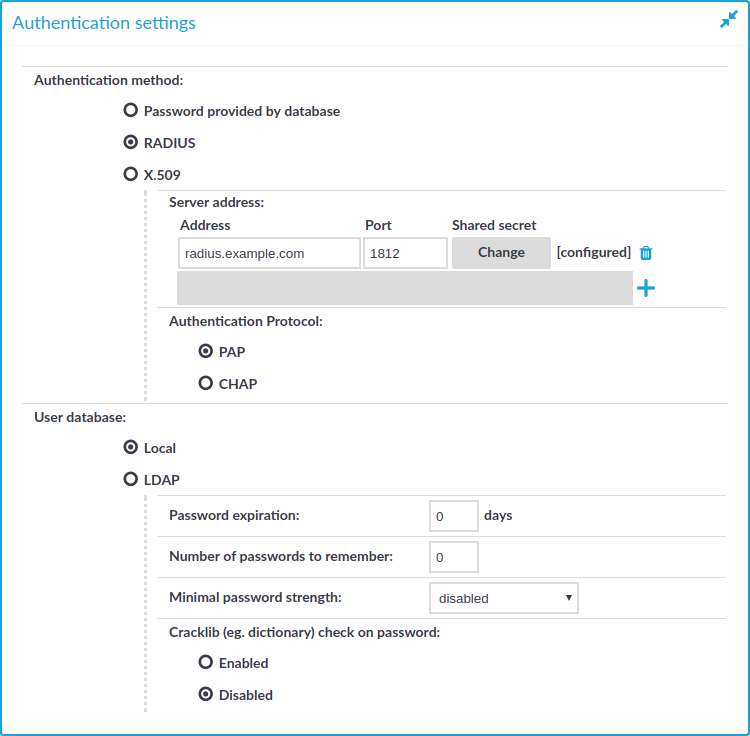
Figure 80: Configuring RADIUS authentication
-
Set the Authentication method field to RADIUS.
The status information displayed ([NOT CONFIGURED] and [CONFIGURED]) indicates whether or not you have provided the shared secret required to access the RADIUS server.
-
Enter the IP address or domain name of the RADIUS server into the Address field.
Use an IPv4 address.
-
Click Change, and enter the password that SPS can use to access the server into the Shared secret field.
NOTE: One Identity Safeguard for Privileged Sessions (SPS) accepts passwords that are not longer than 150 characters. Letters A-Z, a-z, numbers 0-9, the space character, as well as the following special characters can be used: !"#$%&'()*+,-./:;<>=?@[]\^-`{}_|
Click Update.
-
To use the Password Authentication Protocol, select PAP. To use the Challenge-Handshake Authentication Protocol, select CHAP.
-
To add more RADIUS servers, click  and repeat Steps 2-4.
Repeat this step to add multiple servers. If a server is unreachable, SPS will try to connect to the next server in the list in failover fashion.
-
When configuring RADIUS authentication with locally managed user accounts, complete the following steps.
-
Set Password expiration to 0.
-
Set Number of passwords to remember to 0.
-
Set Minimal password strength to disabled.
-
Set Cracklib check on password to disabled.
-
Click  .
.
|
|
Caution:
After you commit this configuration, the SPS web interface will be available only after successfully authenticating to the RADIUS server. Note that the default admin account of SPS will be able to login normally, even if the RADIUS server is unaccessible. |
Authenticating users with X.509 certificates
One Identity Safeguard for Privileged Sessions (SPS) provides a method to authenticate the users of the web interface with X.509 client certificates. The client certificate is validated against a trust store, and the username is exported from the client certificate for identification. One Identity recommends using 2048-bit RSA keys (or stronger).
To authenticate SPS users on the SPS web interface with X.509 client certificates, complete the following steps.
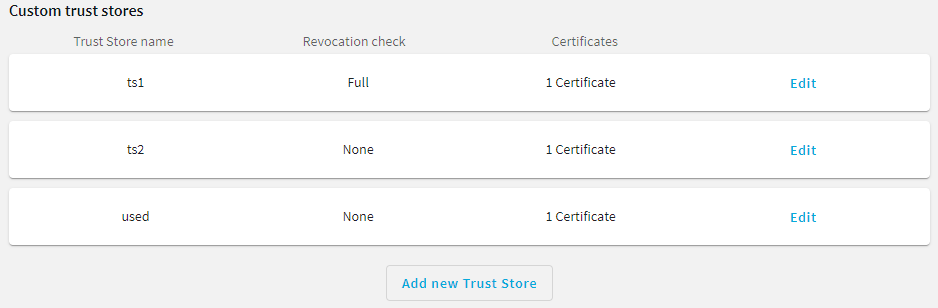
Figure 81: Basic Settings > Trust Stores — Creating a custom trust store
To authenticate users with X.509 certificates
-
Navigate to Users & Access Control > Settings > Authentication settings.
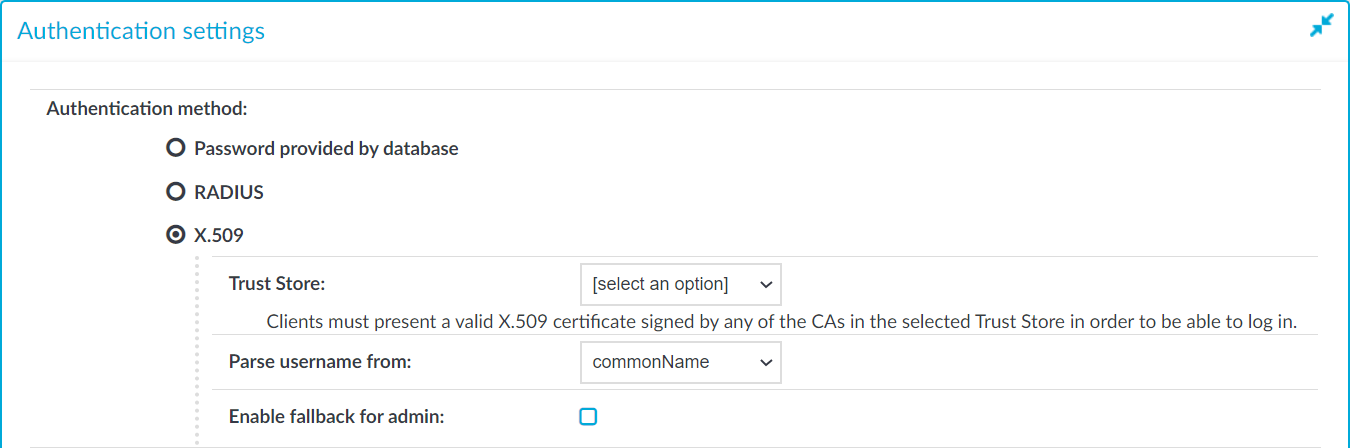
Figure 82: Users & Access Control > Settings > Authentication settings — Configuring X.509 authentication
-
Select X.509.
-
Select the trust store you created as a prerequisite in Trust Store.
|
|
CAUTION: Upgrading to SPS 6.8 changes authenticating the users of the web interface with X.509 client certificates: certificates are validated against a trust store instead of a trusted CA list. During the upgrade, the trusted CA list formerly used for authentication is copied to a trust store that has revocation check disabled by default.
If you enabled revocation check for your trusted CA list and added the URLs of certificate revocation lists (CRL) before or you would like to enable revocation check, you have to edit the settings of the trust store manually. Navigate to Basic Settings > Trust Stores, select revocation check type Leaf or Full for the trust store and make sure you add a CRL URL for each root and intermediate CA.
For more information about trust stores and how to configure them, see "Verifying certificates with Certificate Authorities using trust stores" in the Administration Guide. |
-
Select which field of the user certificate contains the username in the Parse username from field. In most cases, it is the commonName or userid field, but SPS supports the emailAddress and userPrincipalName fields as well.
-
To allow the admin user to be able to log in without using X.509 authorization, select Enable fallback for admin. This will fallback to password authentication.
|
|
CAUTION: One Identity recommends enabling fallback for admin when revocation check is enabled for the trust store that is used for X.509 authentication. Enabling fallback for admin allows the admin user to log in even if a Certificate Revocation List (CRL) is misconfigured, inaccessible or it has expired. |
-
Click .
Managing user rights and usergroups
In One Identity Safeguard for Privileged Sessions (SPS), user rights can be assigned to usergroups. SPS has numerous usergroups defined by default, but custom user groups can be defined as well. Every group has a set of privileges: which pages of the SPS web interface it can access, and whether it can only view (read) or also modify (read & write/perform) those pages or perform certain actions.
NOTE: Every group has either read or read & write/perform privileges to a set of pages.
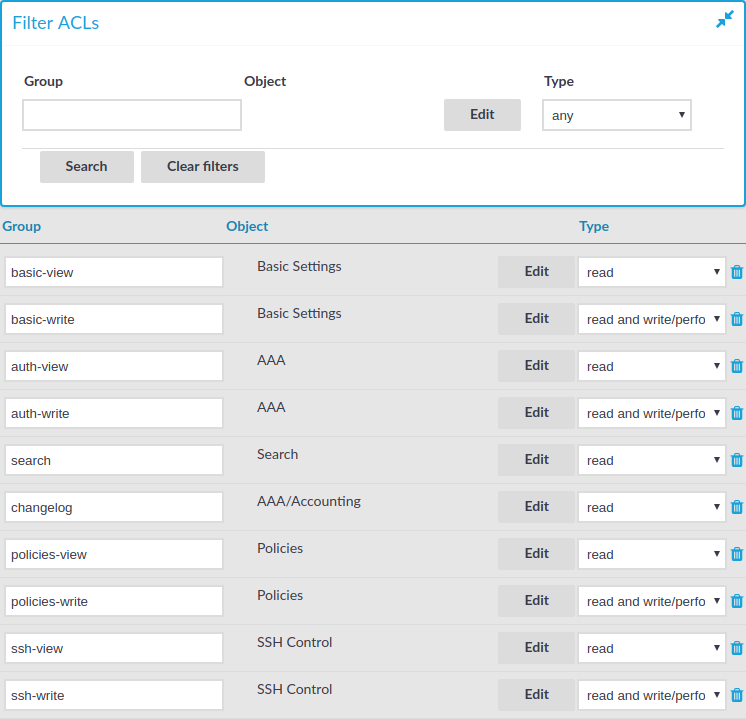
Figure 83: Users & Access Control > Appliance Access — Managing SPS users
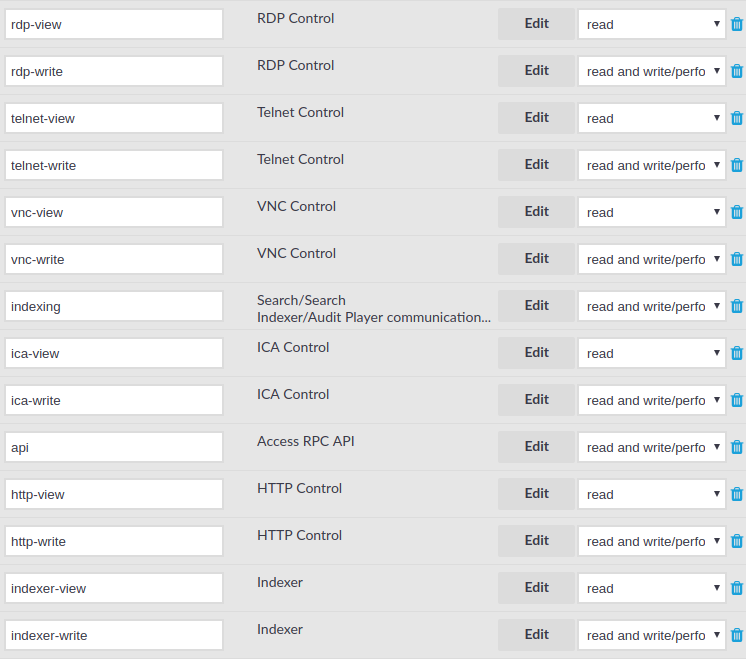
Assigning privileges to user groups for the One Identity Safeguard for Privileged Sessions (SPS) web interface
The following describes how to assign privileges to a new group.
To assign privileges to a new group
-
Navigate to Users & Access Control > Appliance Access and click .
-
Find your user group. If you start typing the name of the group you are looking for, the auto-complete function will make finding your group easier for you.
-
Click Edit located next to the name of the group. The list of available privileges is displayed.
-
Select the privileges (that is, the pages of the One Identity Safeguard for Privileged Sessions (SPS) interface) to which the group will have access and click Save.
NOTE: To export the configuration of SPS, the Export configuration privilege is required.
To import a configuration to SPS, the Import configuration privilege is required.
To update the firmware and set the active firmware, the Firmware privilege is required.
-
Select the type of access (read or read & write) from the Type field.
-
Click .
