This section discusses how to configure policies of the following types, grouped by Policy Object category.
|
Policy Object category |
|
|
|
|
| Office 365 and Azure Tenant Selection | |
|
Deprovisioning Policy Object |
|
This section discusses how to configure policies of the following types, grouped by Policy Object category.
|
Policy Object category |
|
|
|
|
| Office 365 and Azure Tenant Selection | |
|
Deprovisioning Policy Object |
|
Property Generation and Validation policies help you automate the configuration of directory object properties. Using this policy, you can:
Automatically generate default property values for new directory objects (for example, when creating new user accounts or groups).
Automatically check if the configured property values comply with the specified corporate policy rules.
To set up a policy, you can specify conditions that the property values must meet, and can also determine the default value for each property provisioned with the policy. For example, you can configure a policy to enforce a certain type of telephone number formatting in the contact information properties for your directory.
TIP: Consider the following when planning to configure a Property Generation and Validation policy:
To help you get started with configuring policy-based administration in your organization, Active Roles includes a set of built-in Policy Objects that offer provisioning and deprovisioning rules to the most typical administrative use cases. To find the built-in Policy Objects, navigate to the following node of the Active Roles MMC console:
Configuration > Policies > Administration > Builtin
If the directory of your organization contains cloud-only Azure objects (Azure users, guest users or contacts), then use the built-in Azure CloudOnly Policy - Default Rules to Generate Properties Policy Object to provision their default properties and accepted values.
NOTE: Policy Object settings specific to Azure cloud-only objects (such as cloud-only Azure users, guest users, or contacts) are available only if your Active Roles deployment is licensed for managing cloud-only Azure objects. Contact One Identity support for more information.
Also, Policy Objects specific to Azure cloud-only objects will work correctly only if an Azure tenant is already configured in the AD of the organization, and Active Roles is already set as a consented Azure application for that Azure tenant. For more information on these settings, see Configuring a new Azure tenant and consenting Active Roles as an Azure application.
When creating or modifying an object, Active Roles checks whether the property values satisfy criteria defined in the policy. If they do not, Active Roles prevents you from the object creation or modification.
In object creation wizards and properties dialog boxes, the properties that are controlled by the policy are displayed as hyperlinks. If you have a policy configured to populate a property with a certain value (generate the default value), the edit box for the property is unavailable for editing, as shown in the following figure.
Figure 42: Object creation
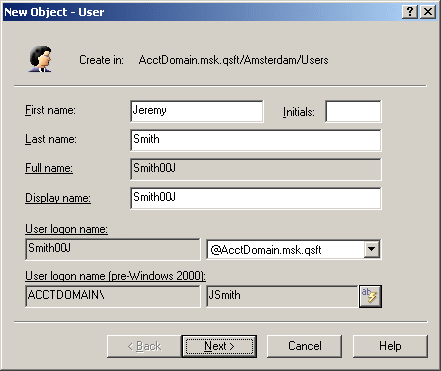
You can click a hyperlink to display the policy details.
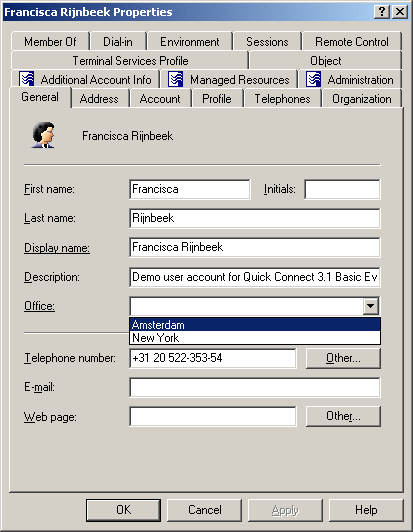
With a policy configured to define a set of acceptable values for a given property, the Active Roles console provides a drop-down list to select a value when modifying that property. The user of the Active Roles console can choose an acceptable value from the list instead of having to type a value in the edit box. This feature is illustrated in the following figure: The Office box provides a list of acceptable values that are prescribed by policy.
Figure 43: Acceptable values for a policy
To configure a Property Generation and Validation policy, select Property Generation and Validation on the Policy to Configure page in the New Provisioning Policy Object wizard or in the Add Provisioning Policy wizard. Then, click Next to display the Controlled Property page:
Figure 44: New provisioning policy object wizard
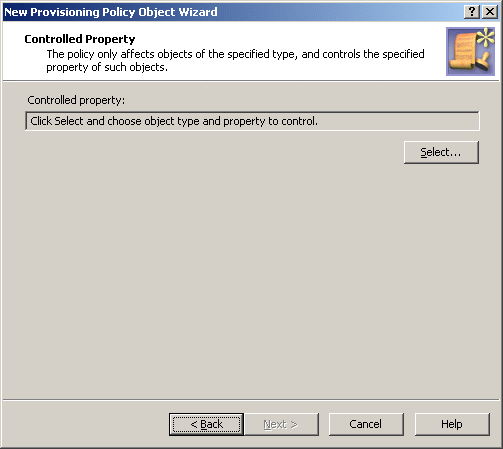
Click Select to choose the object type and object property you want the policy to control. This displays the Select Object Type and Property dialog box.
Figure 45: Select Object type and Property
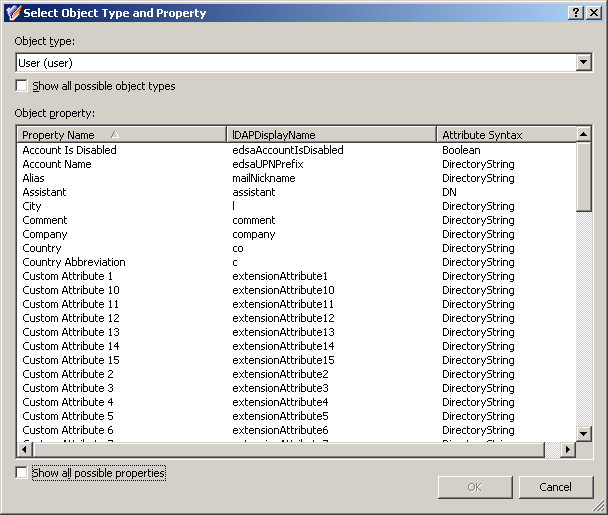
From the Object type list, select the object type. This lets you to specify the type of objects that are subject to the policy control. From the Object property list, select the object property. This lets you to specify the property you want the policy to control. Click OK.
On the Controlled Property page, click Next to display the Configure Policy Rule page:
Figure 46: Configure Policy Rule
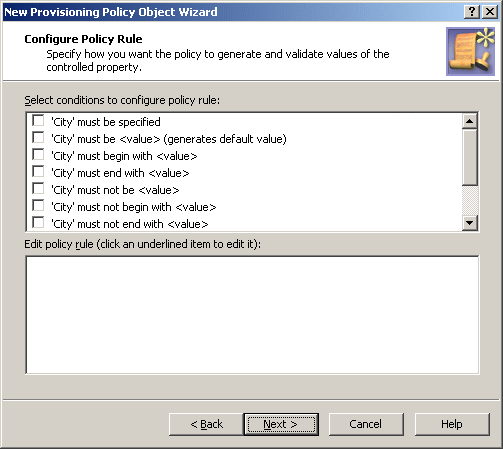
This page allows you to determine criteria used to generate and validate values of the controlled property.
To configure a policy rule, first select appropriate check boxes in the upper box on the Configure Policy Rule page. Each check box label is composed of the name of the controlled property followed by a condition. For example, if you select the check box next to must be specified, the policy will force a value to be assigned to the property.
If you want the policy to generate a default value for the controlled property, select the check box next to must be <value> (generates default value).
For the policy not to distinguish between uppercase and lowercase letters, select the check box next to is case insensitive.
After you selected check boxes in the upper box, the lower box prompts you to configure values, as shown in the following figure.
Figure 47: Edit policy rule

In the lower box, click links labeled <click to add value> to configure additional values. If you select several check boxes in the upper box, you must configure value for each condition.
In the Edit policy rule box, you can also:
To combine criteria into the policy rule, use the AND or OR operator. The policy will pass if the property value meets all of the specified criteria or any one of them depending on the operator you choose. To change the operator, click the link labeled and or or.
Clicking a link labeled <click to add value> displays a dialog box similar to the following figure.
Figure 48: Add Value
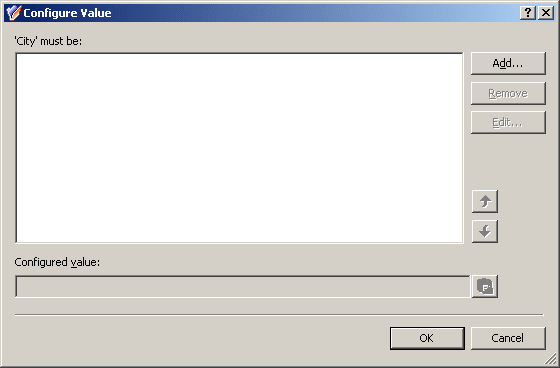
The Add Value dialog box allows you to specify a value for the selected condition. You can type a value in the edit box or use the point-and-click interface to configure a value. Clicking the Configure button displays the Configure Value dialog box, shown in the following figure.
Figure 49: Configure Value

Each value is a concatenation of one or more entries. In the Configure Value dialog box, you can:
In the Add Entry window, you can select the type of the entry to add, and then configure the entry. The following table summarizes the available types of entries.
The steps to configure an entry depend on the type of the entry. The following sections elaborate on the procedures for each of the entry types occurring in the Add Entry window.
© 2025 One Identity LLC. ALL RIGHTS RESERVED. 使用条款 隐私 Cookie首选项中心