サポートと今すぐチャット
サポートとのチャット

Active Roles 7.5.3 - Administration Guide

Introduction About Active Roles Getting Started Rule-based Administrative Views Role-based Administration
Access Templates as administrative roles Access Template management tasks Examples of use Deployment considerations Windows claims-based Access Rules
Rule-based AutoProvisioning and Deprovisioning
About Policy Objects Policy Object management tasks Policy configuration tasks
Property Generation and Validation User Logon Name Generation Group Membership AutoProvisioning E-mail Alias Generation Exchange Mailbox AutoProvisioning AutoProvisioning for SaaS products OneDrive Provisioning Home Folder AutoProvisioning Script Execution Office 365 and Azure Tenant Selection User Account Deprovisioning Office 365 Licenses Retention Group Membership Removal Exchange Mailbox Deprovisioning Home Folder Deprovisioning User Account Relocation User Account Permanent Deletion Group Object Deprovisioning Group Object Relocation Group Object Permanent Deletion Notification Distribution Report Distribution
Deployment considerations Checking for policy compliance Deprovisioning users or groups Restoring deprovisioned users or groups Container Deletion Prevention policy Picture management rules Policy extensions
Workflows
Understanding workflow Workflow activities overview Configuring a workflow
Creating a workflow definition Configuring workflow start conditions Configuring workflow parameters Adding activities to a workflow Configuring an Approval activity Configuring a Notification activity Configuring a Script activity Configuring an If-Else activity Configuring a Stop/Break activity Configuring an Add Report Section activity Configuring a Search activity Configuring CRUD activities Configuring a Save Object Properties activity Configuring a Modify Requested Changes activity Enabling or disabling an activity Enabling or disabling a workflow Using the initialization script
Example: Approval workflow E-mail based approval Automation workflow Activity extensions
Temporal Group Memberships Group Family Dynamic Groups Active Roles Reporting Management History
Understanding Management History Management History configuration Viewing change history
Workflow activity report sections Policy report items Active Roles internal policy report items
Examining user activity
Entitlement Profile Recycle Bin AD LDS Data Management One Identity Starling Management One Identity Starling Two-factor Authentication for Active Roles Managing One Identity Starling Connect Azure AD, Office 365, and Exchange Online management
Configuring Active Roles to manage hybrid AD objects Managing Hybrid AD Users Unified provisioning policy for Azure O365 Tenant Selection, Office 365 License Selection, and Office 365 Roles Selection, and OneDrive provisioning Office 365 roles management for hybrid environment users Managing Office 365 Contacts Managing Hybrid AD Groups Managing Office 365 Groups Managing Azure Security Groups Managing cloud-only Azure users Managing cloud-only Azure guest users Managing cloud-only Azure contacts Changes to Active Roles policies for cloud-only Azure objects Managing room mailboxes
Managing Configuration of Active Roles
Connecting to the Administration Service Adding and removing managed domains Using unmanaged domains Evaluating product usage Creating and using virtual attributes Examining client sessions Monitoring performance Customizing the console Using Configuration Center Changing the Active Roles Admin account Enabling or disabling diagnostic logs Active Roles Log Viewer
SQL Server Replication Appendix A: Using regular expressions Appendix B: Administrative Template Appendix C: Communication ports Appendix D: Active Roles and supported Azure environments Appendix E: Enabling Federated Authentication Appendix F: Active Roles integration with other One Identity and Quest products Appendix G: Active Roles integration with Duo Appendix H: Active Roles integration with Okta

How to configure a Property Generation and Validation policy

To configure a Property Generation and Validation policy, select Property Generation and Validation on the Policy to Configure page in the New Provisioning Policy Object wizard or in the Add Provisioning Policy wizard. Then, click Next to display the Controlled Property page:

Figure 31: New provisioning policy object wizard

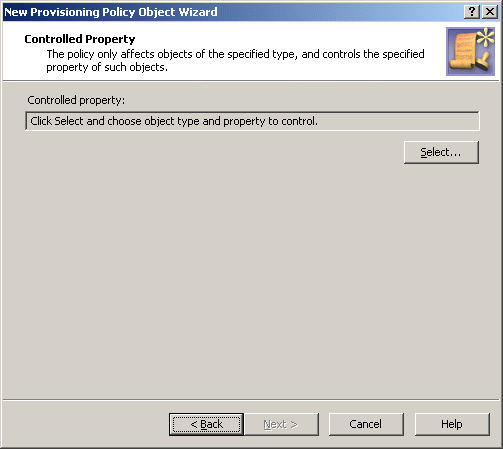
Click Select to choose the object type and object property you want the policy to control. This displays the Select Object Type and Property dialog box.

Figure 32: Select Object type and Property

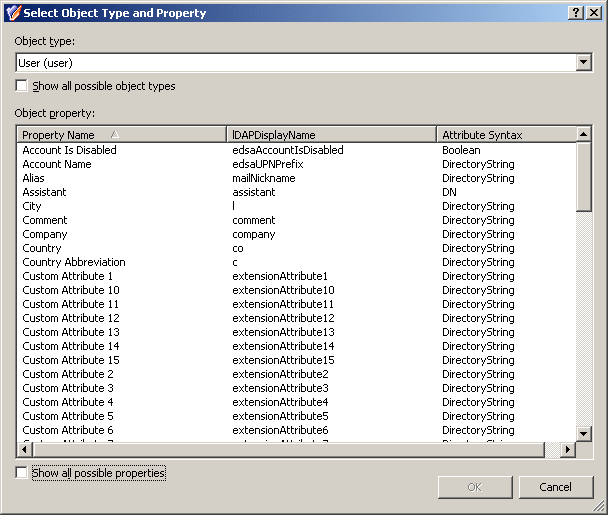
From the Object type list, select the object type. This lets you to specify the type of objects that are subject to the policy control. From the Object property list, select the object property. This lets you to specify the property you want the policy to control. Click OK.

On the Controlled Property page, click Next to display the Configure Policy Rule page:

Figure 33: Configure Policy Rule

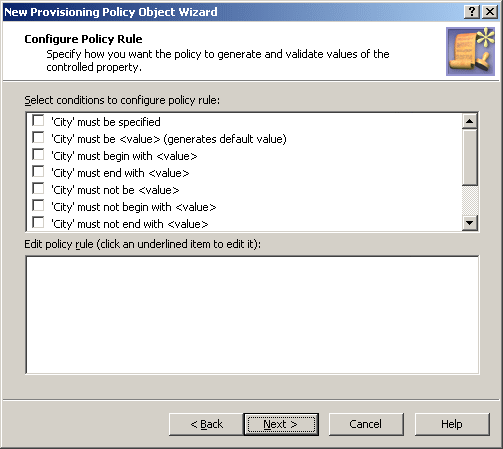
This page allows you to determine criteria used to generate and validate values of the controlled property.

To configure a policy rule, first select appropriate check boxes in the upper box on the Configure Policy Rule page. Each check box label is composed of the name of the controlled property followed by a condition. For example, if you select the check box next to must be specified, the policy will force a value to be assigned to the property.

If you want the policy to generate a default value for the controlled property, select the check box next to must be <value> (generates default value).

For the policy not to distinguish between uppercase and lowercase letters, select the check box next to is case insensitive.

After you selected check boxes in the upper box, the lower box prompts you to configure values, as shown in the following figure.

Figure 34: Edit policy rule

In the lower box, click links labeled <click to add value> to configure additional values. If you select several check boxes in the upper box, you must configure value for each condition.

In the Edit policy rule box, you can also:

  • Modify a value. Right-click the value and click Edit. This displays a dialog box similar to the Add Value dialog box, discussed later in this section.
  • Remove a value. Right-click the value and click Remove.
  • Rearrange the list of values (provided that multiple values are specified for a particular condition). Right-click a value and use the Move Up or Move Down command to change position of the value in the list, or click Sort Items Ascending or Sort Items Descending to sort the list accordingly.
  • Import values from a text file. Prepare a text file containing one value per line, right-click any value in the Edit policy rule box, click Import Items, and then open the file you prepared.
  • Export the values to a text file. Right-click any value, click Export Items, and specify a text file to write the values to.
  • Specify whether you want the rule to generate the default value. Click the Yes or No link to toggle this option.

To combine criteria into the policy rule, use the AND or OR operator. The policy will pass if the property value meets all of the specified criteria or any one of them depending on the operator you choose. To change the operator, click the link labeled and or or.

Clicking a link labeled <click to add value> displays a dialog box similar to the following figure.

Figure 35: Add Value

The Add Value dialog box allows you to specify a value for the selected condition. You can type a value in the edit box or use the point-and-click interface to configure a value. Clicking the Configure button displays the Configure Value dialog box, shown in the following figure.

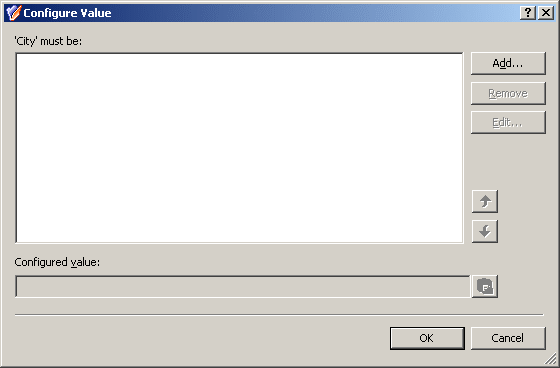
Figure 36: Configure Value

Each value is a concatenation of one or more entries. In the Configure Value dialog box, you can:

  • Add any number of entries to the value. Click Add to display the Add Entry window, discussed later in this section.
  • Remove entries from the value. Select entries from the list and click Remove.
  • Modify entries included in the value. Select an entry and click Edit. This displays a window similar to the Add Entry window, where you can view and modify the entry properties.
  • Move the selected entry up and down in the list, thereby rearranging the entries in the value. Click an entry in the upper box, and then click the arrow buttons next to the box to move the entry.
  • Paste the text from the Clipboard at the end of the value. If the text includes a valid syntax implementing an entry of a type other than Text (see the table below), the syntax is treated accordingly. Copy a text to the Clipboard, and then click the button next to the Configured value box to paste the text at the end of the string in that box.

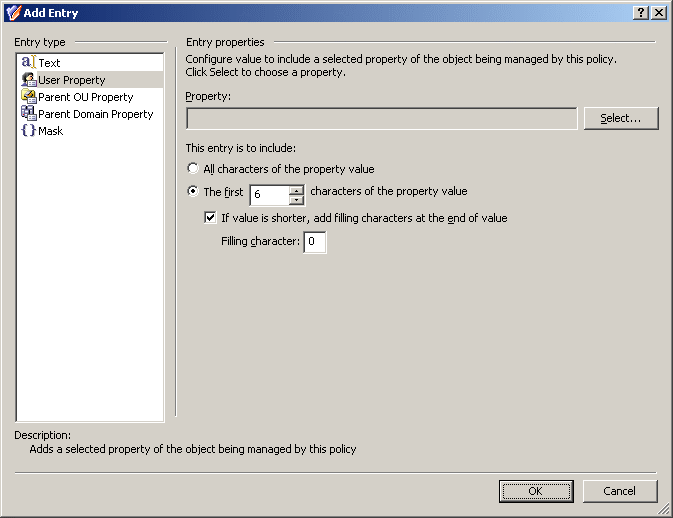
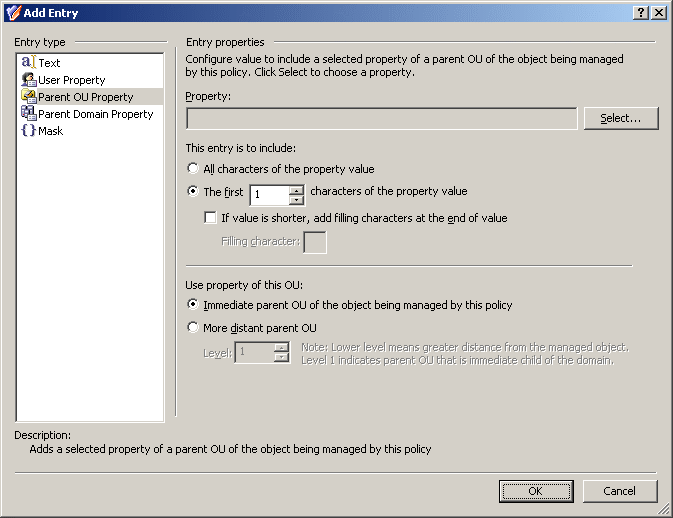
In the Add Entry window, you can select the type of the entry to add, and then configure the entry. The following table summarizes the available types of entries.

Table 16: Types of entries

Type of entry

Description

Text

Adds a text string to the value.

<Object> Property

Adds a selected property (or a part of a property) of the object being managed by the policy. When displaying this type of entry the console substitutes for the <Object> placeholder the actual category of objects that are subject to the policy control.

For example, with the policy configured to control a certain property of user objects, you can use this type of entry to populate that property of a user object with data stored in other properties of that same user object.

Parent OU Property

Adds a selected property (or a part of a property) of an organizational unit in the hierarchy of containers above the object being managed by this policy.

For example, with the policy configured to control a certain property of user objects, you can use this type of entry to populate that property of a user object with data stored in properties of the organizational unit containing that user object (immediate parent OU).

Parent Domain Property

Adds a selected property (or a part of a property) of the domain of the object being managed by this policy.

For example, with the policy configured to control a certain property of user objects, you can use this type of entry to populate that property of a user object with data stored in properties of the domain in which the user object resides.

Mask

Adds a syntax that determines what characters are allowed in the property controlled by this policy. You can use this type of entry to enforce a data format like numeric, postal/ZIP code, or telephone number.

The steps to configure an entry depend on the type of the entry. The following sections elaborate on the procedures for each of the entry types occurring in the Add Entry window.

Entry type: Text

Entry type: Text

When you select Text under Entry type in the Add Entry window, the Entry properties area displays the Text value box.

In the Text value box, type the text you want to include in the value, and then click OK.

Entry type: <Object> Property

Entry type: <Object> Property

When you select <Object> Property under Entry type in the Add Entry window, the Entry properties area looks like the following figure.

Using this entry type, you can configure a value based on a property of the object itself. To choose a property, click Select.

If you want the entry to include the entire value of the property, click All characters of the property value. Otherwise, click The first, and specify the number of characters to include in the entry.

In the latter case, you can select the If value is shorter, add filling characters at the end of value check box, and type a character in the Filling character box. This character will fill the missing characters in the value of the object property if the value is shorter than specified in the box next to the option The first.

When you are done configuring an entry, click OK to close the Add Entry window. The entry is added to the Configure Value dialog box.

Entry type: Parent OU Property

Entry type: Parent OU Property

When you select Parent OU Property under Entry type in the Add Entry window, the Entry properties area looks like the following figure.

Figure 37: Add Entry: Parent OU Property

Using this entry type, you can configure a value based on a property of a parent organizational unit (OU) of the object being managed by this policy. To choose an OU property, click Select.

If you want the entry to include the entire value of the property, click All characters of the property value. Otherwise, click The first, and specify the number of characters to include in the entry.

In the latter case, you can select the If value is shorter, add filling characters at the end of value check box, and type a character in the Filling character box. This character will fill the missing characters in the value of the OU property if the value is shorter than specified in the box next to the option The first.

You can also specify the level of the OU you want to the policy to use. To use the property of the OU in which the object resides, click Immediate parent OU of the object being managed by this policy. To use the property of a parent OU of a different level, click More distant parent OU and then, in the Level box, specify the level of the OU. Lower level means greater distance from the managed object in the hierarchy of containers above that object. OU level 1 is an immediate child OU of the domain.

When you are done configuring an entry, click OK to close the Add Entry window. The entry is added to the Configure Value dialog box.

関連ドキュメント

The document was helpful.

評価を選択

I easily found the information I needed.

評価を選択