You can assign a remote Exchange Online mailbox to an on-premises Active Directory (AD) user via the Active Roles Console.
Prerequisites
To assign a remote mailbox to an on-premises user, make sure that the following conditions are met.
-
Your organization must have an on-premises Exchange server deployed in the same forest or domain where you want to configure remote mailboxes for on-premises users. The Exchange server will indicate later for Active Roles that the affected users have remote mailboxes.
-
The on-premises user must already exist, and it cannot have a mailbox.
-
The Exchange Online mailbox that you will assign to the on-premises user must already exist. To create a new cloud mailbox, use any of the following:
|

|
CAUTION: After the cloud mailbox is created, it will enter into a 30-day grace period. To prevent deleting the remote mailbox after this period, you must assign an Exchange Online (Plan 2) license to it.
To assign an Exchange Online license to the cloud mailbox, in the Microsoft 365 Admin Center, select the user, then navigate to Manage product licenses. |
-
Note down the value of the Microsoft Online Services ID (that is, the MicrosoftOnlineServicesID attribute) of the remote mailbox. You will need to specify the value of this attribute to connect the on-premises user with the remote mailbox. You can check the value of the attribute either in the Microsoft 365 Admin Center, or via the Get-User PowerShell command.
TIP: If the remote mailbox has multiple aliases configured, the MicrosoftOnlineServicesID attribute always takes the value of the primary email address and user name.
To assign a remote mailbox to an on-premises user
-
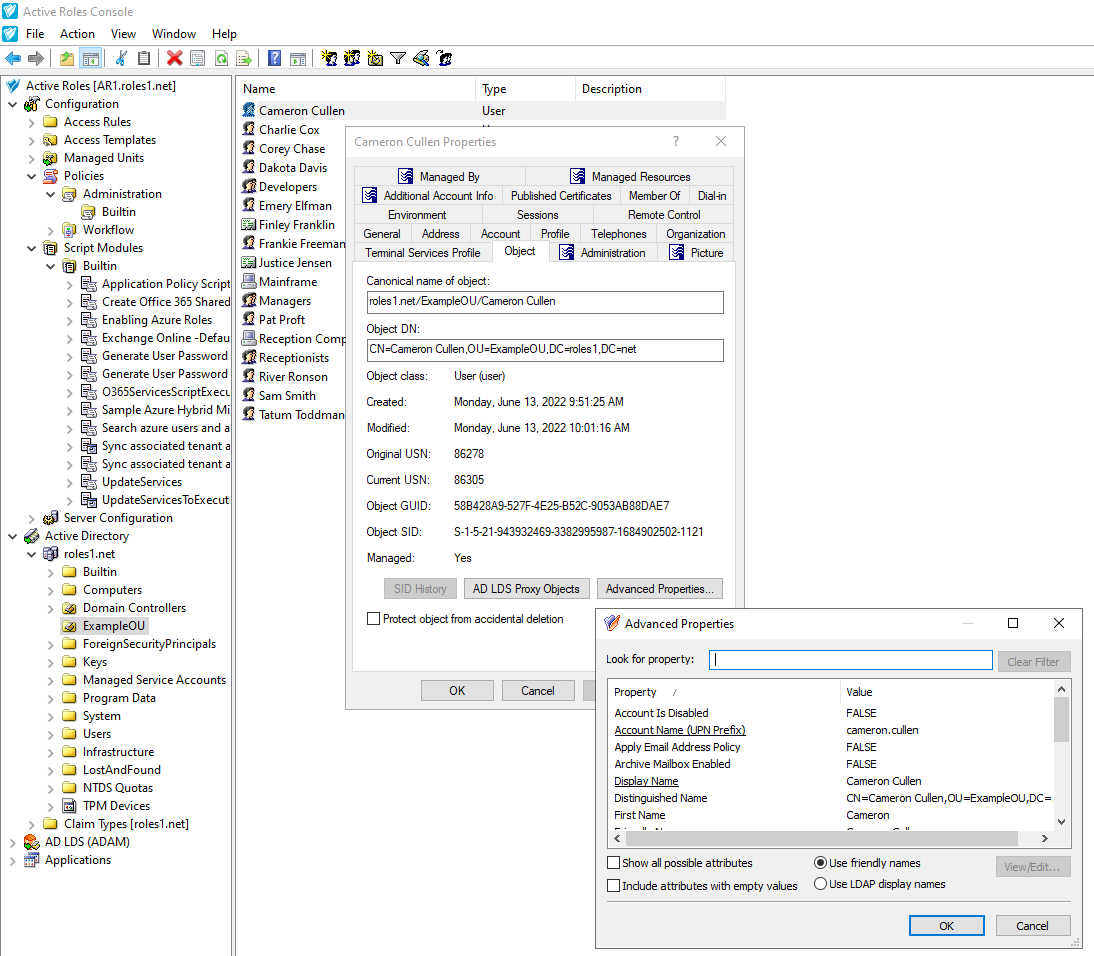
Open the Advanced Properties of the on-premises user for which you want to assign the remote mailbox. In the Active Roles Console, in the Active Directory (AD) tree, navigate to the Organizational Unit (OU) where the user is located, double-click the user, then in the Properties window, click Object > Advanced Properties.
Figure 149: Active Roles Console – Opening the Advanced Properties of a user
-
Search for the edsvaMsExchEnableRemoteMailRoutingAddress property.
TIP: To find the property faster, enter its name (or part of its name) in the Look for property field. If you cannot find the property, select Show all possible attributes and Include attributes with empty values, too.
After you found the property, open its settings by double-clicking it.
-
In the Edit Attribute dialog, in Value, enter the value of the MicrosoftOnlineServicesID attribute (that is, the primary email address of the remote mailbox).
-
To apply your changes, click OK in each open window.
NOTE: Assigning a remote mailbox to an on-premises user may take up to 15 minutes to complete, with Active Roles attempting to establish connection up to 9 times. If the procedure fails (for example, because Active Roles cannot find the specified email address), Active Roles will log an error in the Windows Event Viewer under the Applications and Services Logs > Active Roles Admin Service category.
For more information on how to check if Active Roles could assign the remote mailbox to the user, see Verifying that a remote mailbox is assigned to an on-premises user.
TIP: If Active Roles could not assign the remote mailbox to the on-premises user within the expected time frame, perform the following troubleshooting steps:
-
Check network connectivity.
-
Check the status of the on-premises Exchange server and the Exchange Online service.
-
Verify that the specified remote mailbox email address is correct.
Once you assigned an Exchange Online mailbox to an on-premises user, you can check if Active Roles completed the remote mailbox assignment by any of the following methods.
NOTE: Assigning a remote mailbox to an on-premises user may take up to 15 minutes to complete, with Active Roles attempting to establish connection up to 9 times. If the procedure fails (for example, because Active Roles cannot find the specified email address), Active Roles will log an error in the Windows Event Viewer under the Applications and Services Logs > Active Roles Admin Service category.
To verify with the msExchRemoteRecipientType property whether Active Roles assigned the remote mailbox
-
Open the Advanced Properties of the on-premises user to which you assigned the remote mailbox. In the Active Roles Console, in the Active Directory (AD) tree, navigate to the Organizational Unit (OU) where the user is located, double-click the user, then in the Properties window, click Object > Advanced Properties.
Figure 150: Active Roles Console – Opening the Advanced Properties of a user
-
Search for the msExchRemoteRecipientType property.
TIP: To find the property faster, enter its name (or part of its name) in the Look for property field. If you cannot find the property, select Show all possible attributes and Include attributes with empty values, too.
-
Check the value of the msExchRemoteRecipientType property. For users with no mailboxes, the value of this property is empty. Once Active Roles finished assigning the remote Exchange Online mailbox to the user, the value of the property changes to 1.
To verify with the Exchange mailbox GUID whether Active Roles assigned the remote mailbox
-
Open Windows PowerShell, and connect to Exchange Online with the following command:
Connect-ExchangeOnline
-
In the Microsoft login popup that appears, log in with the Azure AD administrator account associated with the Azure tenant that stores the remote mailbox.
-
After logging in, in Windows PowerShell, fetch the identity information of the remote mailbox with the following command:
Get-Mailbox -Identity '<email-address>' | Format-List ExchangeGUID
<email-address> is the Microsoft Exchange alias of the mailbox.
-
Note down the value of the ExchangeGUID parameter.
-
In the Active Roles Console, open the Advanced Properties of the on-premises user to which you assigned the remote mailbox. In the Active Roles Console, in the Active Directory (AD) tree, navigate to the Organizational Unit (OU) where the user is located, double-click the user, then in the Properties window, click Object > Advanced Properties.
-
Search for the msExchMailboxGuid property.
TIP: To find the property faster, enter its name (or part of its name) in the Look for property field. If you cannot find the property, select Show all possible attributes and Include attributes with empty values, too.
-
Compare the value of the msExchMailboxGuid property with the Exchange GUID returned by the Get-Mailbox PowerShell command. If the two values match, Active Roles successfully assigned the remote mailbox to the on-premises user.
To verify with the RecipientType attribute of the user whether Active Roles assigned the remote mailbox
-
On the on-premises Microsoft Exchange server that stores the mailbox data of the user, open Windows PowerShell and run the following command:
Get-User '<user-name>'
<user-name> is the fully qualified user name of the on-premises user.
-
Check the value of the RecipientType property:
-
If the value is MailUser, Active Roles assigned the remote mailbox to the user.
-
If the value is User, the on-premises user does not have any mailboxes assigned to them.
TIP: If Active Roles could not assign the remote mailbox to the on-premises user within the expected time frame, perform the following troubleshooting steps:
-
Check network connectivity.
-
Check the status of the on-premises Exchange server and the Exchange Online service.
-
Verify that the specified remote mailbox email address is correct.
When creating a remote mailbox for an on-premises user, Active Roles creates an Azure user entry for the mailbox in the Azure tenant where the remote mailbox is stored. The Azure user entry of the remote mailbox is listed in the Azure > <azure-tenant-name> > Azure Users node of the Active Roles Web Interface, and its name takes the value of the Name attribute of the remote mailbox.
You can view or modify the Exchange Online settings of the remote mailbox with the Exchange Online Properties action of the Azure user entry of the remote mailbox in the Active Roles Web Interface. Changing these properties is typically required if the user mailbox is affected by an IT infrastructural or organizational change, or the personal information of the user has changed.
NOTE: Although the on-premises user also has an Exchange Properties action when selecting it in the Active Roles Web Interface, you cannot use that action to modify the settings of the remote mailbox assigned to the on-premises user.
To modify the Exchange Online settings of a remote mailbox assigned to an on-premises user, always use the Exchange Online Properties of the Azure user entry of the remote mailbox instead.
To view or modify the Exchange Online properties of a remote mailbox
-
In the Active Roles Web Interface, under Directory Management > Tree > Active Directory, navigate to Azure > <azure-tenant-name> > Azure Users.
NOTE: <azure-tenant-name> is the Azure tenant storing the remote mailbox.
-
Select the Azure user entry of the remote mailbox you want to view or modify, then click Exchange Online Properties.
-
In the available Exchange Online Properties tabs, configure the Exchange Online mailbox settings as you need.
Table 96: Available Exchange Online properties
| Page |
Description |
| Mail Flow Settings |
View and configure rules for the emails that the mailbox sends or receives via the Exchange Online service. |
| Delegation |
Configure the email account as a shared mailbox. |
| General |
View and configure the email addresses associated with the mailbox. |
| Mailbox Features |
View and configure various Exchange Online mailbox features, for example mobile access, additional mailbox protocols, or archival settings. |
| Mailbox Settings |
View and configure Messaging Records Management (MRM) settings for the mailbox. |
-
To apply your changes, click Save.
You can set up rules for the emails that Exchange Online mailboxes send or receive in the organization with the Exchange Online Properties > Mail Flow Settings tab of the Active Roles Web Interface. Active Roles supports setting up two types of such rules:
-
Message size settings, specifying the size of the emails that the guest user can send or receive.
-
Email delivery and forwarding settings, allowing the guest user to send emails on behalf of a specified group, or have their received emails automatically forwarded to an additional specified address.
Such mail flow settings are typically configured if the organization enforces specific email messaging policies for users and guest users.
To configure the mail flow settings for an Exchange Online mailbox
-
On the Active Roles Web Interface, navigate to Directory Management > Tree View > Azure > <azure-tenant> > Azure Users (or Azure Guest Users).
-
From the list in the middle pane, select the Azure user or Azure guest user that you want to update.
-
To open the Exchange Online settings, click Exchange Online Properties.
-
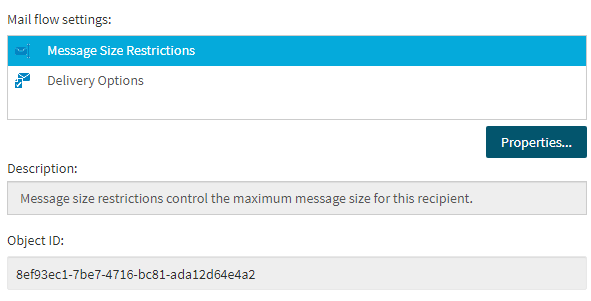
To open the mail flow settings, click the Mail Flow Settings tab.
Figure 151: Exchange Online Properties > Mail Flow Settings — Configuring the message size and forwarding settings of an Exchange Online mailbox
-
Select Message Size Restrictions, and click Properties....
-
Configure the size of the emails (in KB) that are sent or received by the mailbox. By default, both the Sending message size and the Receiving message size settings use the default limit of the Azure tenant.
-
To apply your changes and close the Message Size Restrictions dialog, click Save.
-
Select Delivery Options, and click Properties to configure the following email delivery and forwarding settings.
-
Send on Behalf: When configured, the mailbox can send emails on behalf of the specified mailbox or group.
-
Forwarding Address: When configured, the emails received by the mailbox are always forwarded to the specified email address.
-
To apply any changes you made in the Delivery Options dialog, click Save.
-
To close the Exchange Online Properties window, click Close.
