
Exporting an application configuration template
For SaaS applications such as Salesforce.com® there may also be account specific variables within URLs, such as a unique domain name or account identifier.
|
3 |
Click Create Template. |
If there are environment or account specific variables within the application’s configuration, you need to define the template settings page.
The template settings page is the first page of the application setup wizard that you will see when you click on a template. The image below shows an example of the Salesforce template settings page within Cloud Access Manager.
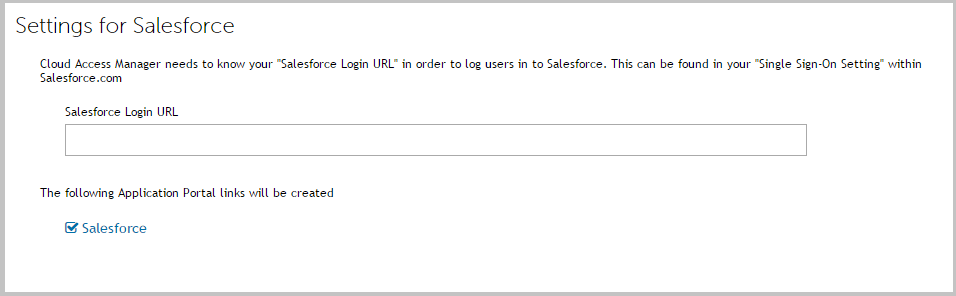
The text box in the image above is referred to in the Export Application as Template page as the Input Field. The value entered into this field by the administrator using the template is referred to as the Input Field Value. The Template settings page instructions should outline what the administrator must enter into the Input Field.
In the Salesforce example, this instruction is displayed below the Settings for Salesforce heading. The Input Field Label is used to identify the Input Field text box and is displayed just above the input field text box. The Format of Input Field Value list allows you to select the required format of the Input Field Value. For example, on the Salesforce template settings page, the Input Field Value must be a valid URL, so the format of the Input Field Value would be set to Full URL.

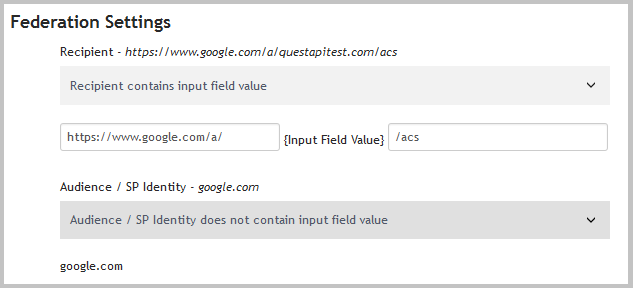
In the following example configuration for Google Apps, the Input Field Value would be questapitest.com as this is an account specific variable. The text in italics is the value of each field in your application’s configuration. So, to make the Recipient field generic you need to tell Cloud Access Manager where the Input Field Value would be. The Audience / SP Identity field does not contain questapitest.com, so we can select that option.
When you have configured all fields, click Create Template. You are prompted to save or open the file. Select Save. The application configuration template file is now ready to use.
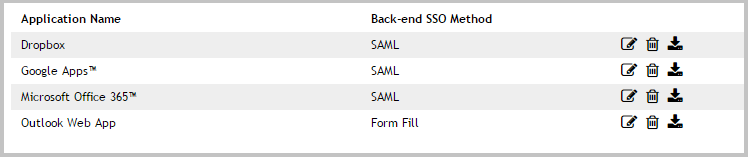
Forwarding claims to federated applications
Cloud Access Manager can be configured to:
|
1 |
|
3 |
In the navigation bar, click Claim Mapping. |
|
4 |
|
5 |
Complete the Name of the claim to send to the application. For OpenID Connect/OAuth 2.0 applications, you can select from a preset list of standard claims. |
|
6 |
Rule Processing Mode: Mapping rules can be applied to users who have a certain role. You can use the Rules Processing Mode setting to determine whether only the first rule matching the user(s) should apply, or whether all rules should apply. |
|
• |
Use first rule matched - return the result of the first rule where the user is a member of the role set on the rule. |
|
• |
Use all rules matched - return the results of all rules where the user is a member of the role set on the rule. |
|
7 |
In the Claim Rule box: |
|
b |
Choose the Claim mapping mode: |
|
• |
If you want the claim to be derived from a claim from an identity provider, choose Map claim to user attribute. |
|
• |
If you want Cloud Access Manager to set the claim to a constant value, choose Map claim to static value. |
|
8 |
If you have chosen Map claim to static value, enter that value in the box provided. If you have chosen Map claim to user attribute, choose the attribute holding the information you want to send as a claim from the dropdown. To add more attributes to the list displayed in the dropdown, click Manage User Attributes. 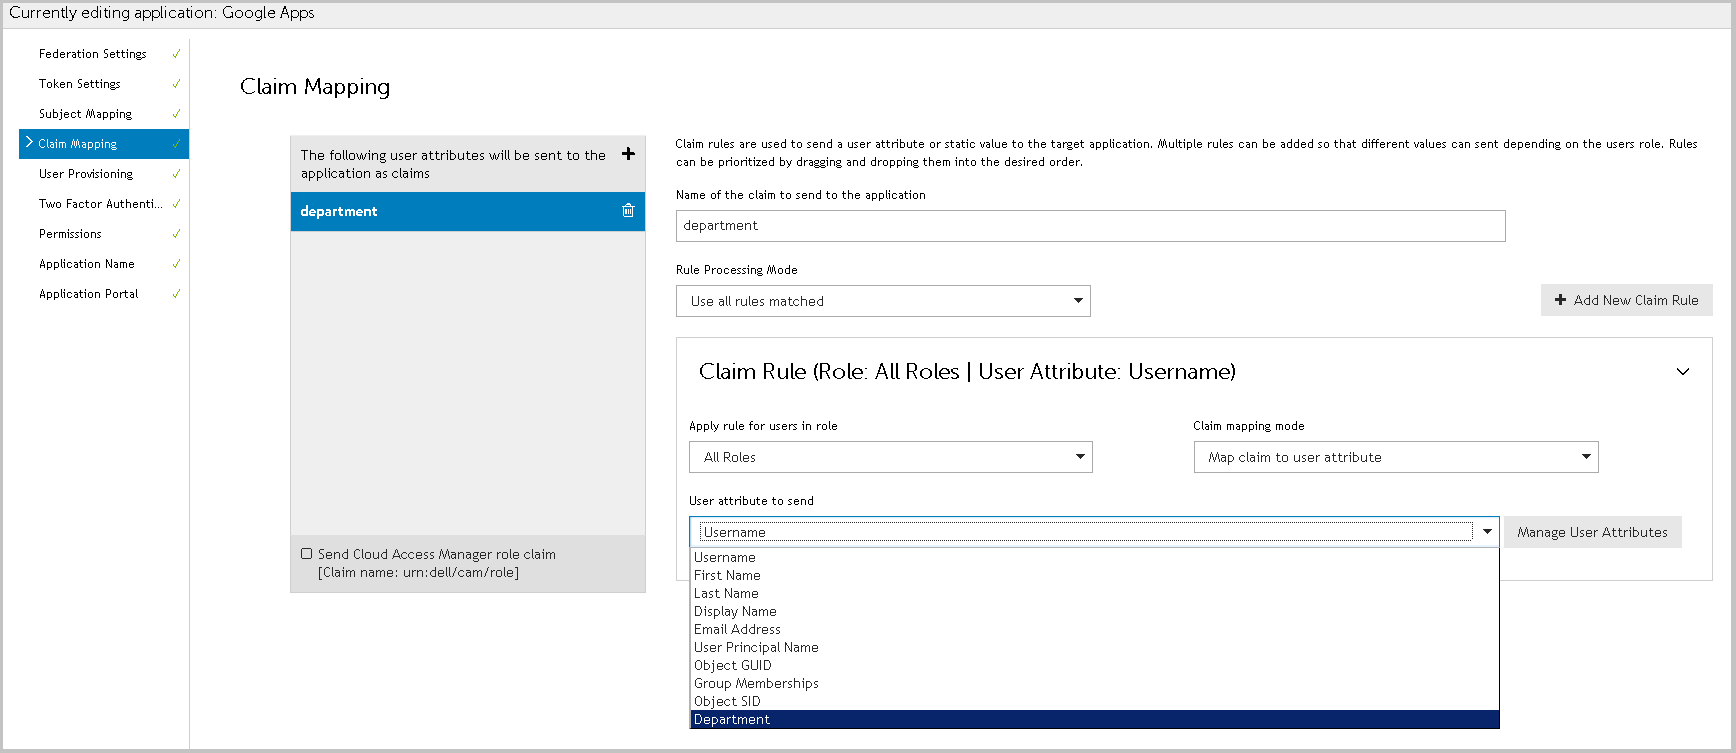 |
|
9 |
If the same claim can be derived from different attributes depending on the user's role, you can add another Claim Rule by clicking the Add New Claim Rule button. If you have defined multiple Claim Rules you can order them by dragging and dropping the rules into the correct position, so that the correct rule is processed for users in a given role. |
|
11 |
You can send the names of the user's Cloud Access Manager roles to the application as claims. To do this, select the Send Cloud Access Manager role claim box at the bottom of the claim list panel. |
|
NOTE: If you select Group Memberships for a claim rule and you are using Active Directory the user's Primary Group is not returned. In default installations, the user's Primary Group is Domain Users. The Primary Group is not returned because the claim rule returns the values in the memberOf attribute and the Primary Group is determined using the primaryGroupID attribute. |
Adding HTTP headers to proxy applications
Headers are pieces of information about a user, which the application can use to tailor its interface or to make authorization decisions. The mechanism for configuring additional HTTP headers uses the same process of building information from claim rules that is used in claim mapping. For detailed instructions on how the mapping interface works please refer to Forwarding claims to federated applications, where you see Claim Mapping replace this with Header Mapping.
|
1 |
|
3 |
In the navigation bar, click Header Mapping. |
|
4 |
Follow the instructions in Forwarding claims to federated applications, where you see Claim Mapping replace this with Header Mapping. |
Configuring step-up authentication
When you configure an Active Directory® or Lightweight Directory Access Protocol (LDAP) front-end authenticator you can also configure two-factor authentication. Configuring a front-end authentication method describes how to configure two-factor authentication for all users, for all applications.
This section describes how to modify the configuration in three ways: