Configuring Active Roles to manage hybrid AD objects
When a user signs up for a Microsoft cloud service such as Azure Active Directory, details about the user’s organization and the organization’s Internet domain name registration are provided to Microsoft. This information is then used to create a new Azure AD instance for the organization. The same directory is used to authenticate sign in attempts when you subscribe to multiple Microsoft cloud services.
The Azure AD instance of the organization, also called the Azure AD tenant, stores the users, groups, applications, and other information pertaining to an organization and its security. To access the Azure AD tenant, we need an application that is registered with the tenant. Active Roles uses this application, also called the Azure AD application, to communicate to Azure AD tenant after providing the required consent.
The Active Roles Web Interface and Management Shell can be used to perform the Azure AD configuration tasks. The new feature in Active Roles enables you to add or modify existing tenants to the management scope through the web interface and Management Shell.
The latest release of Active Roles supports Multiple tenants model.
NOTE: Administrative users or users with sufficient privileges only can view Azure configuration.
The following section guides you through the Active Roles web interface and Management Shell to configure Azure AD tenants and applications and synchronize existing AD objects to Azure AD.
Configuring Active Roles to manage Azure AD using the GUI
Use the Active Roles Web Interface and the Active Roles Configuration Center to perform the following actions and configure Azure AD deployments:
Configuring a new Azure tenant and consenting Active Roles as an Azure application
When installing Active Roles out-of-the-box, the Directory Management > Tree > Azure node of the Active Roles Web Interface only contains an empty Azure Configuration sub-node by default.
To manage Azure AD directory objects (Azure users, guest users, contacts, O365 groups and Azure Security groups, and so on), you must specify an Azure tenant and configure Active Roles as a consented Azure application for it in the Active Roles Configuration Center.
NOTE: If you have already used an Azure tenant (or tenants) in a previous version of Active Roles, you can import and reconfigure them in two ways:
-
If you perform an in-place upgrade of Active Roles (that is, you install the latest version without uninstalling the previous version of Active Roles first in one of the supported upgrade paths), you can reauthenticate the existing Azure tenants with the Upgrade configuration wizard upon launching the Active Roles Configuration Center after installation.
For more information on reauthenticating Azure tenants this way, see Reconfiguring Azure tenants during upgrade configuration in the Active Roles 7.5 Quick Start Guide. For more information on the supported upgrade paths, see Version upgrade compatibility chart in the Active Roles 7.5 Release Notes.
-
If you install a new version of Active Roles to a machine that does not have any earlier versions of the software installed (either because it has been already uninstalled, or it has been installed on another machine), you can import your existing Azure tenant(s) by importing your Azure AD configuration. Following the import, you can reconsent your Azure tenants manually.
For more information on importing existing Azure tenants this way, see Importing an Azure tenant and consenting Active Roles as an Azure application.
Prerequisites
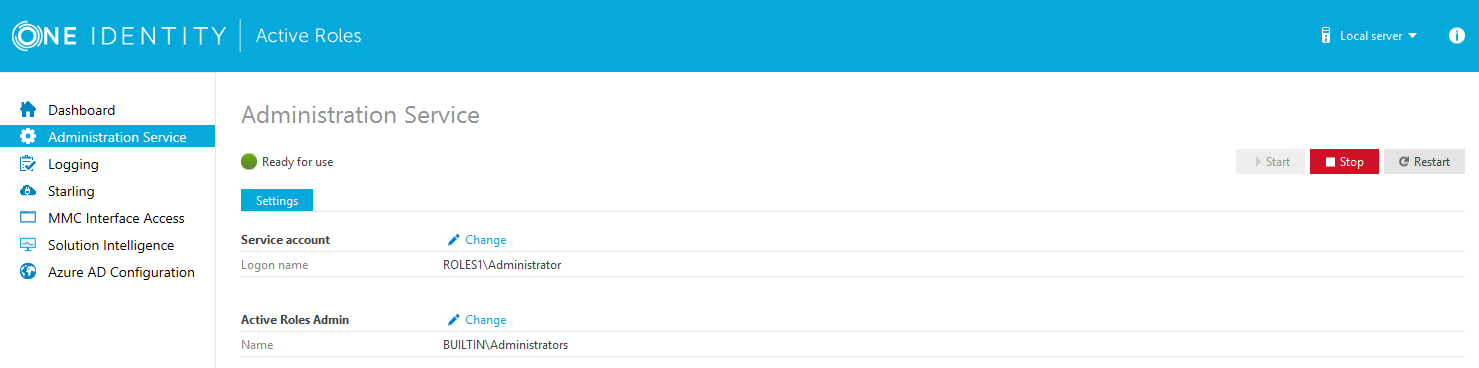
The Active Roles Administration Service must be already running. If the service is not running, then:
-
Open the Active Roles Configuration Center.
-
Navigate to the Administration Service page.
-
Click Start.
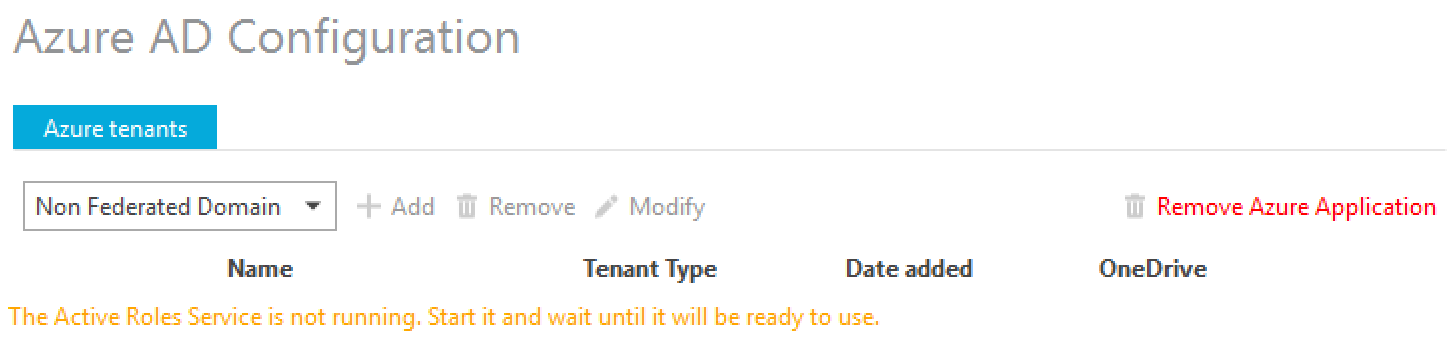
TIP: If the Active Roles Administration Service is not running, the Azure AD Configuration page indicates it with an on-screen warning.
To configure a new Azure tenant (or tenants) and set Active Roles as a consented Azure application
-
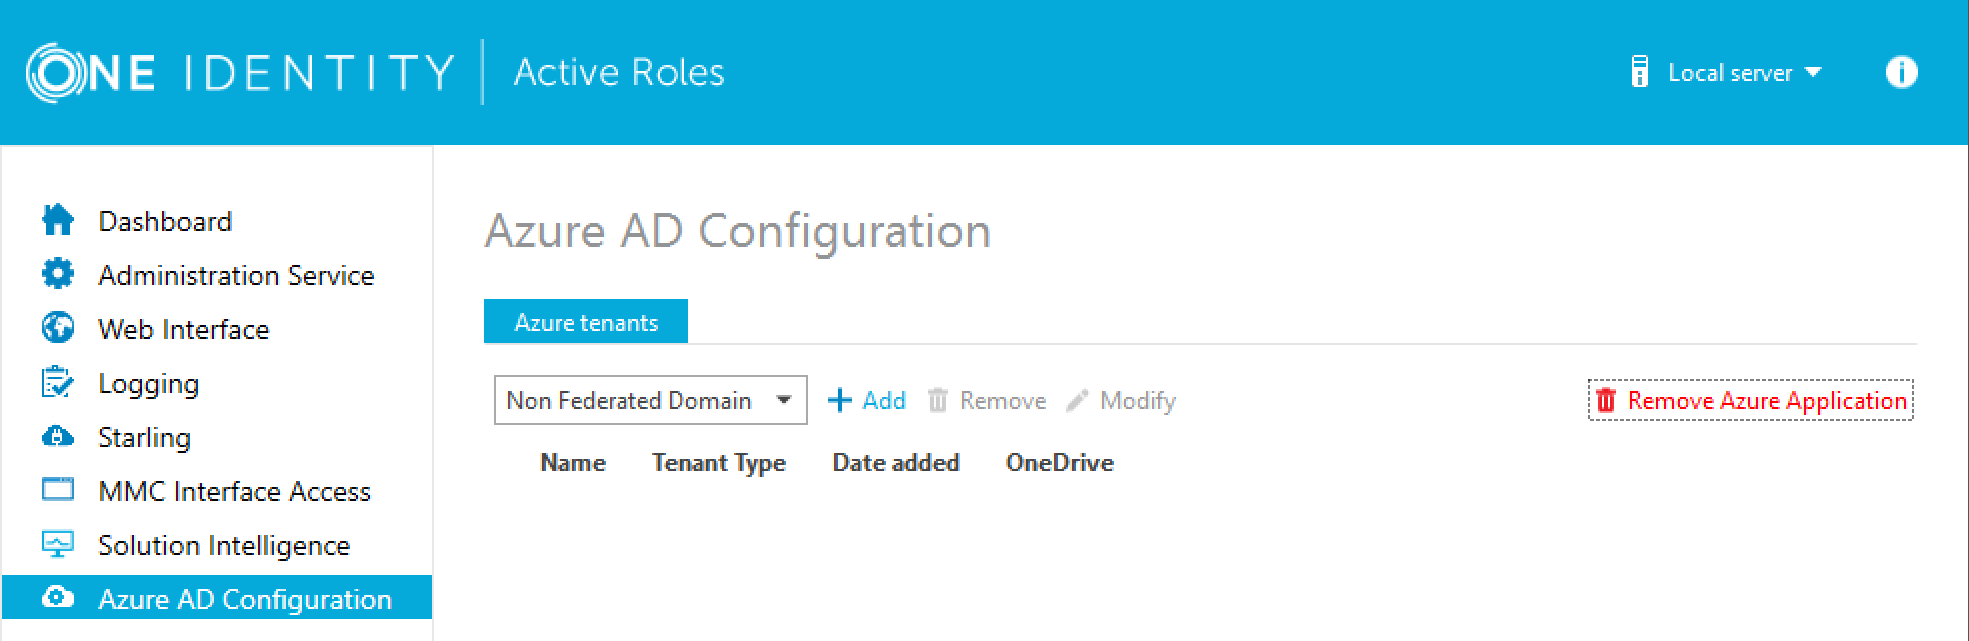
In the Active Roles Configuration Center, on the left pane, click Azure AD Configuration.
-
From the drop-down list, select the type of domain assigned to the new Azure AD tenant:
-
Non-Federated Domain: When selected, on-premises domains are not registered in Azure AD, and Azure AD Connect is not configured. Azure users and Azure guest users are typically created with the onmicrosoft.com UPN suffix.
-
Federated Domain: On-premises domains are registered in Azure AD and Azure AD Connect. Also, Active Directory Federation Services (ADFS) is configured. Azure users and Azure guest users are typically created with the UPN suffix of the selected on-premises domain.
-
Synchronized Identity Domain: On-premises domains may or may not be registered in Azure AD. Azure AD Connect is configured. Azure users and Azure guest users can be created either with the selected on-premises domain, or with the onmicrosoft.com UPN suffix.
-
To configure a new Azure tenant, click Add.
-
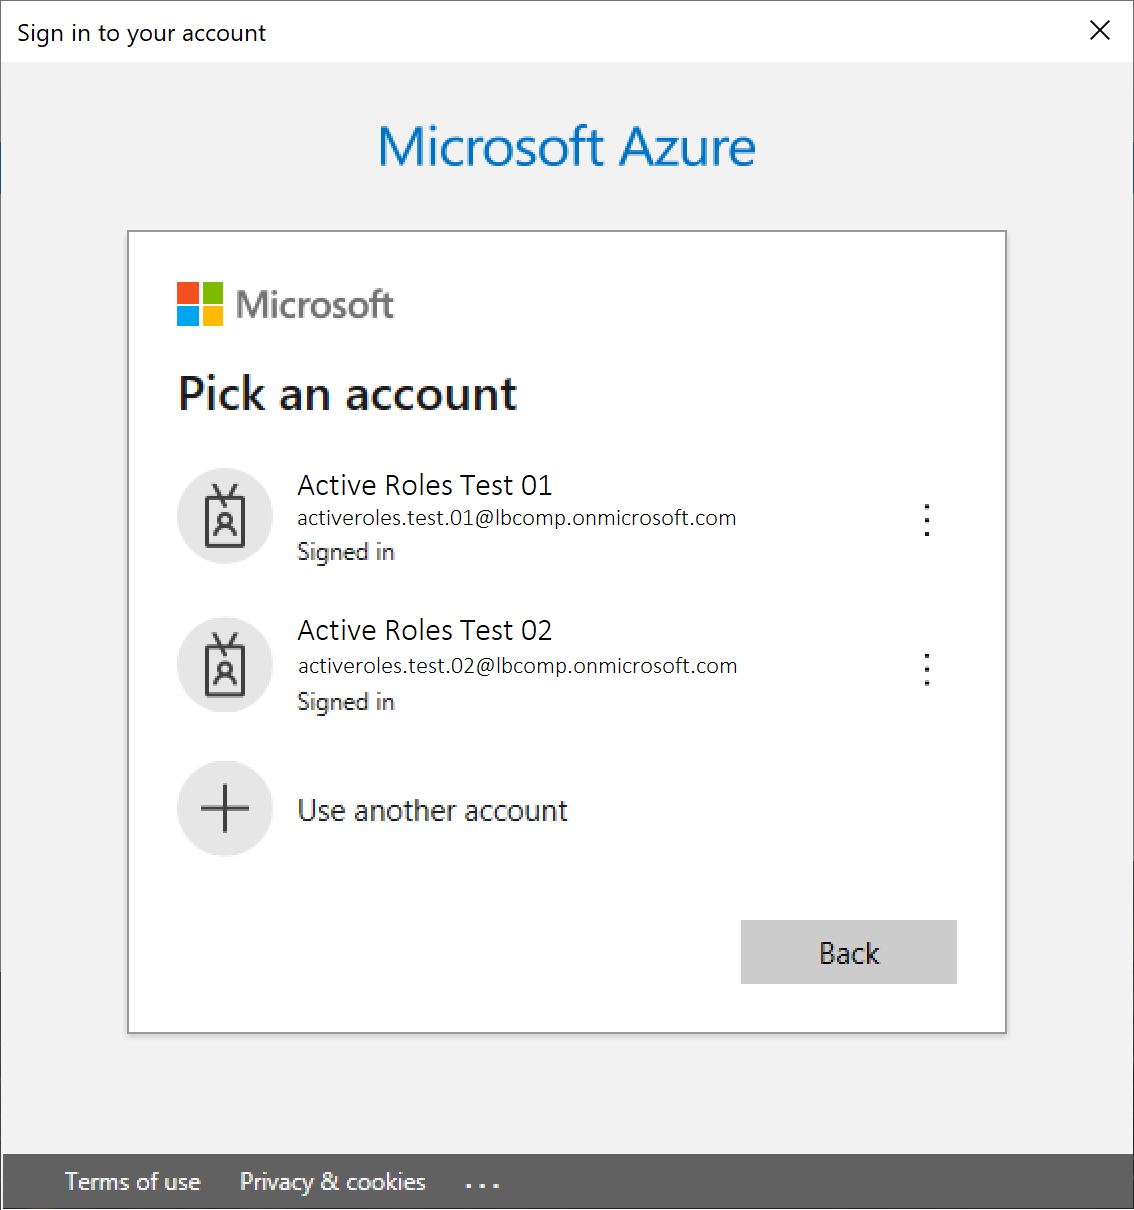
Authenticate your Azure AD administrator account.
-
If you already used one or more Azure AD administrator accounts on your PC, select your account from the Pick an account list, then provide the account password. If you do not find your account in the list, specify your account by clicking Use another account.
-
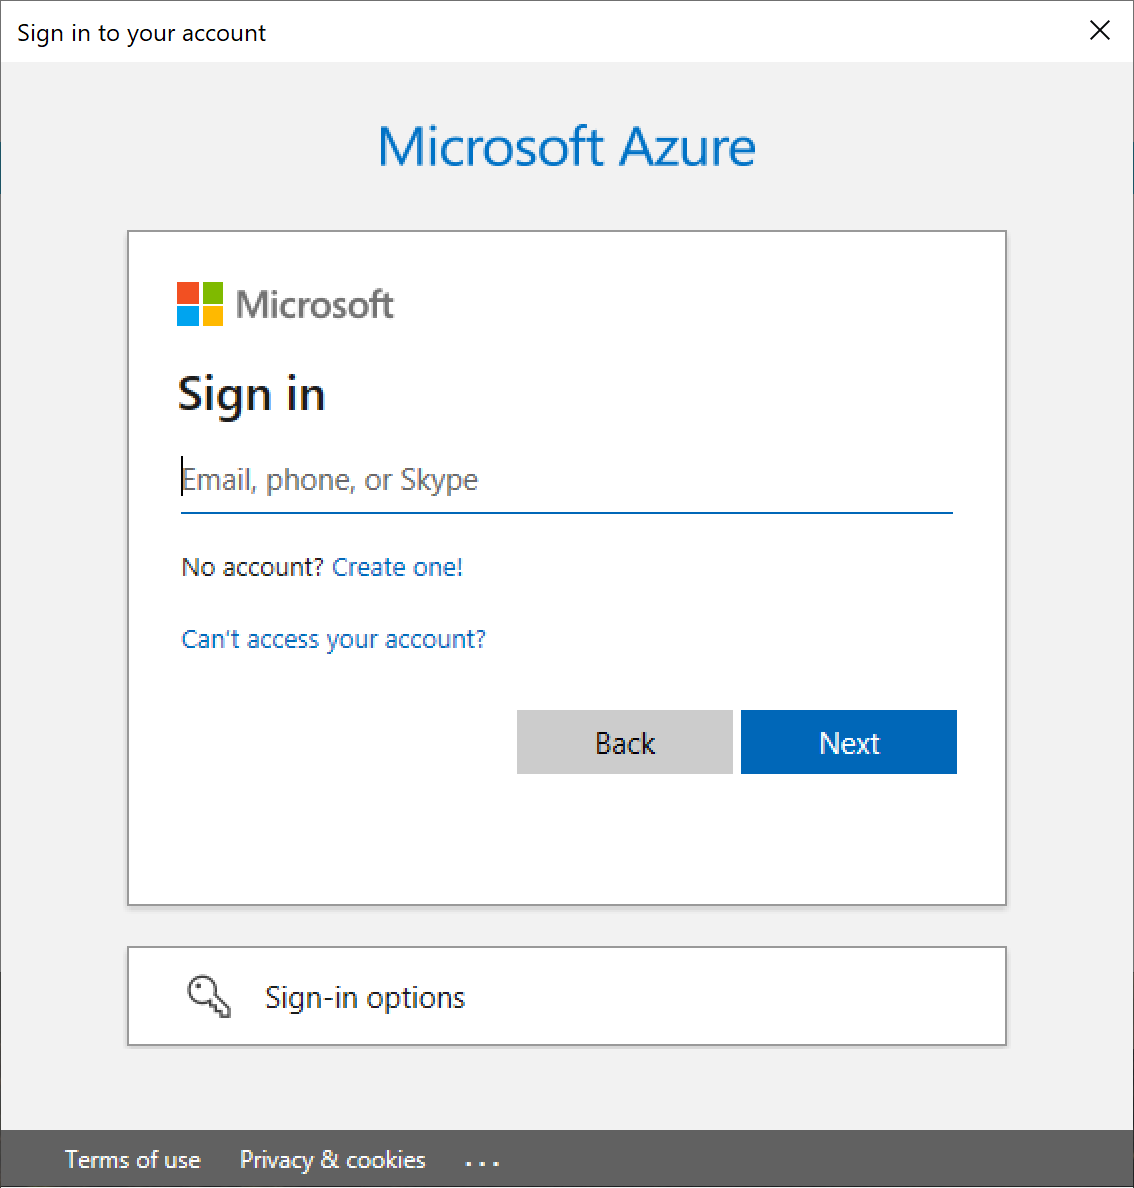
If you have not used any Azure AD administrator accounts yet on the PC (for example, because you are configuring a fresh Active Roles installation), specify your account user name in the Sign in field, then provide your password.
NOTE: Do not specify an account that has already been used to add an Azure tenant. You can only add a single Azure tenant with the same Azure AD account. Specifying an administrator account that is already linked to an Azure tenant will result in an error.
Upon successful authentication, the new Azure tenant appears in the list.
-
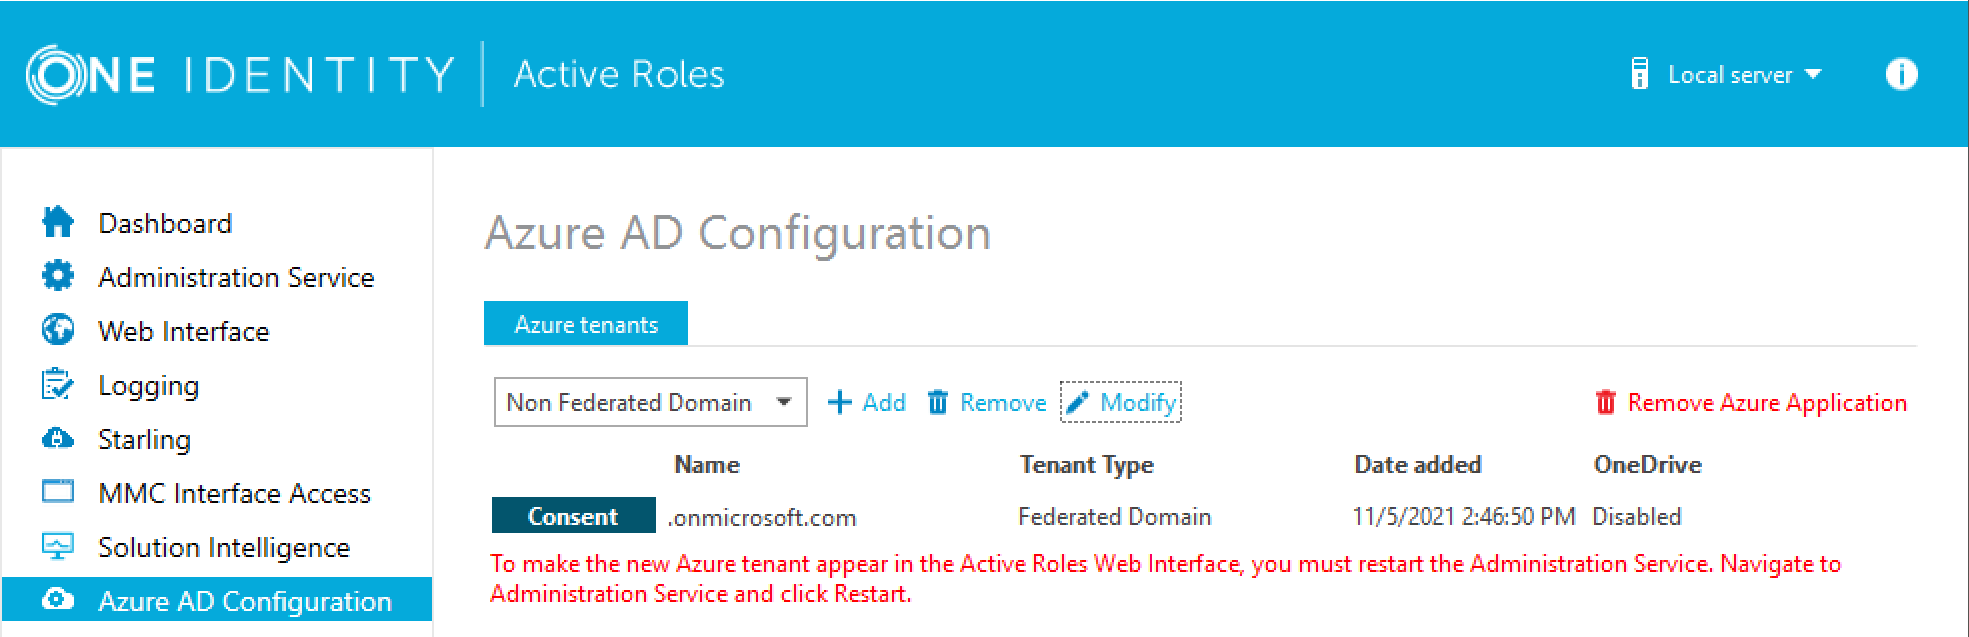
To manage the Azure tenant and its contents in the Active Roles Web Interface, you must consent Active Roles as an Azure application. To do so, click Consent next to the Azure tenant.
-
Authenticate your Azure AD administration account again. Depending on the type of Microsoft pop-up that appears (Pick an account or Sign in), either select the Azure AD account you used for adding the Azure tenant, or specify its user name and password again.
NOTE: Make sure to specify the account used for adding the Azure tenant (that is, the account name listed under the Name column of the Azure tenant). Authenticating with another account will result in an error.
-
The standard Microsoft Permissions requested pop-up appears, listing all the permissions required for configuring Active Roles as an Azure application. To finish creating the Azure application, click Accept.
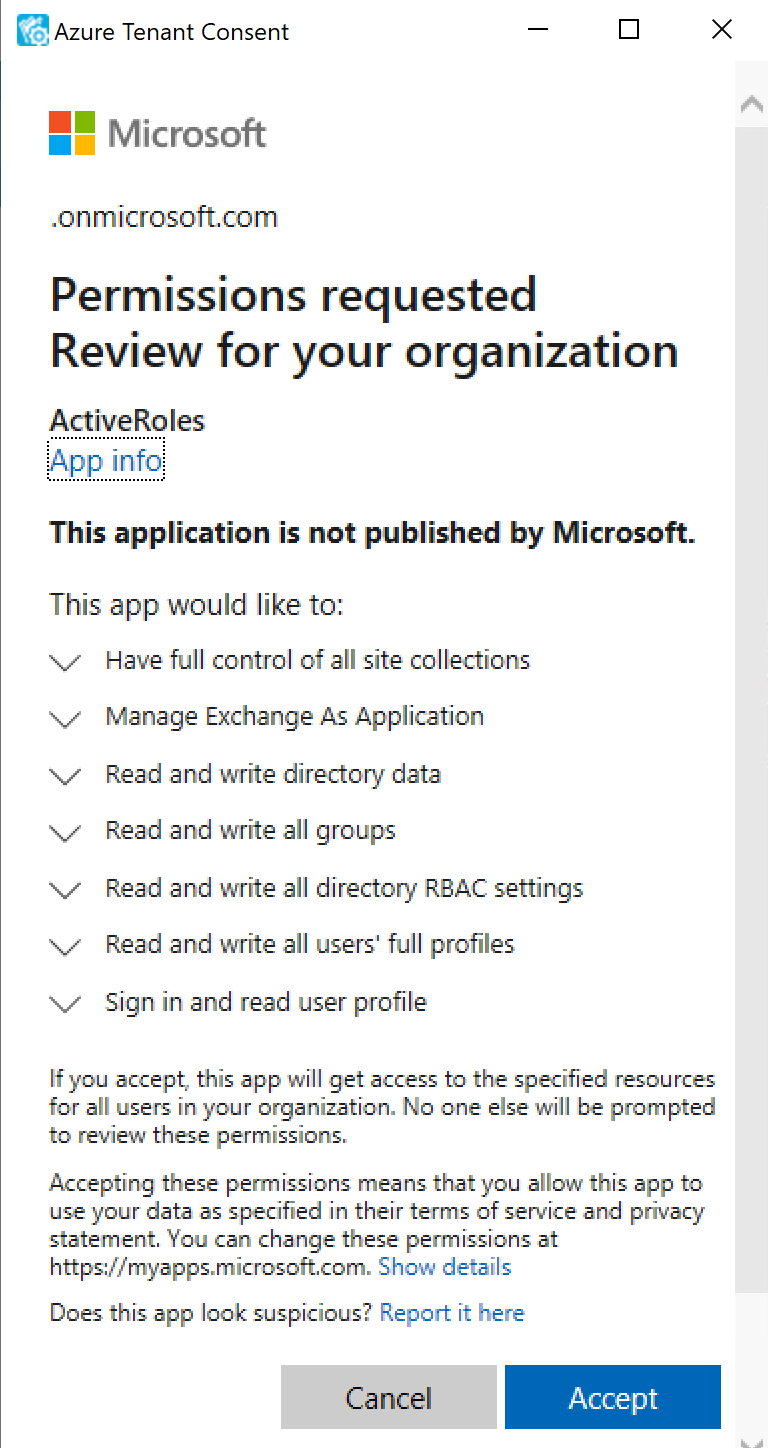
Active Roles then authenticates every Azure AD administrative operation performed in the Azure tenant with a set of generated client ID and client secret.
NOTE: Once you click Accept, Windows may show a Security Warning pop-up with the following message:
The current webpage is trying to open a site on your intranet. Do you want to allow this?
In such cases, clicking either Yes or No could freeze the pop-up dialog, but consenting the Azure tenant will finish without problem.
This issue can occur in case the computer running Active Roles has incorrect browser settings. As a workaround, to get an up-to-date status of the state of the Azure tenant, close and restart the Active Roles Configuration Center after clicking Yes in the Security Warning pop-up.
-
If you have additional Azure tenants to add and consent, configure them as described in the previous steps of this procedure.
-
To make the configured Azure tenant(s) appear in the Active Roles Web Interface, you must restart the Administration Service, as indicated on the user interface. Click Administration Service on the left pane, then either click Restart, or first click Stop and then Start.
TIP: Once the Azure tenant or tenants are configured, and Active Roles is also set as a consented Azure AD application for it, you can view and modify the configured tenant(s) and their settings at the following locations:
-
To change the domain type or OneDrive provisioning settings of an Azure tenant, in the Active Roles Configuration Center, navigate to Azure AD Configuration, select the Azure tenant, and click Modify. For more information, see Viewing or modifying the Azure AD tenant type.
-
To check the connectivity status of the Azure configuration, in the Active Roles Web Interface, navigate to Directory Management > Tree > Azure > Azure Configuration > Azure Health Check. For more information, see View Azure Health for Azure AD tenants and applications .
-
To check the Azure Licenses Report, in the Active Roles Web Interface, navigate to Directory Management > Tree > Azure > Azure Configuration > Azure Licenses Report. For more information, see View Azure Licenses Report .
-
To check the Office 365 Roles Report, in the Active Roles Web Interface, navigate to Directory Management > Tree > Azure > Azure Configuration > Office 365 Roles Report. For more information, see View Office 365 Roles Report .
NOTE: Consider the following when configuring an Azure tenant:
-
When Active Roles is registered as a consented Azure AD application, minimal permissions are assigned to it by default. To add additional permissions to the Azure application, sign in to the Azure Portal and add your required permissions there.
-
Azure Multi-Factor Authentication (MFA) is automatically enforced for Azure users and Azure guest users added to the configured Azure tenant. To disable Azure MFA for the Azure tenant, sign in to the Azure Portal and navigate to Tenant > Properties > Manage Security defaults and set Enable Security defaults to No.
Importing an Azure tenant and consenting Active Roles as an Azure application
If you have previously managed an Azure AD deployment, but you are not upgrading from a previous version of Active Roles via in-place upgrade (for example, because the previous version of Active Roles has been uninstalled before installing the new version), you can import, reauthenticate and consent existing Azure tenants via the Active Roles Configuration Center.
NOTE: Consider the following if you have not used any Azure tenants earlier, or if you installed the latest version of Active Roles via in-place upgrade:
-
If you have installed Active Roles out-of-the-box, and no Azure AD environment has been used previously in your organization, you must specify a new Azure tenant to manage Azure directory objects (such as Azure users, guest users, contacts, O365 groups or Azure Security groups). For more information, see Configuring a new Azure tenant and consenting Active Roles as an Azure application.
-
If you perform an in-place upgrade of Active Roles (that is, you install the latest version without uninstalling the previous version of Active Roles first in one of the supported upgrade paths), you can reauthenticate the existing Azure tenants with the Upgrade configuration wizard upon launching the Active Roles Configuration Center after installation.
For more information on reauthenticating Azure tenants this way, see Reconfiguring Azure tenants during upgrade configuration in the Active Roles 7.5 Quick Start Guide. For more information on the supported upgrade paths, see Version upgrade compatibility chart in the Active Roles 7.5 Release Notes.
To import and reauthenticate an Azure tenant and set Active Roles as a consented Azure application
-
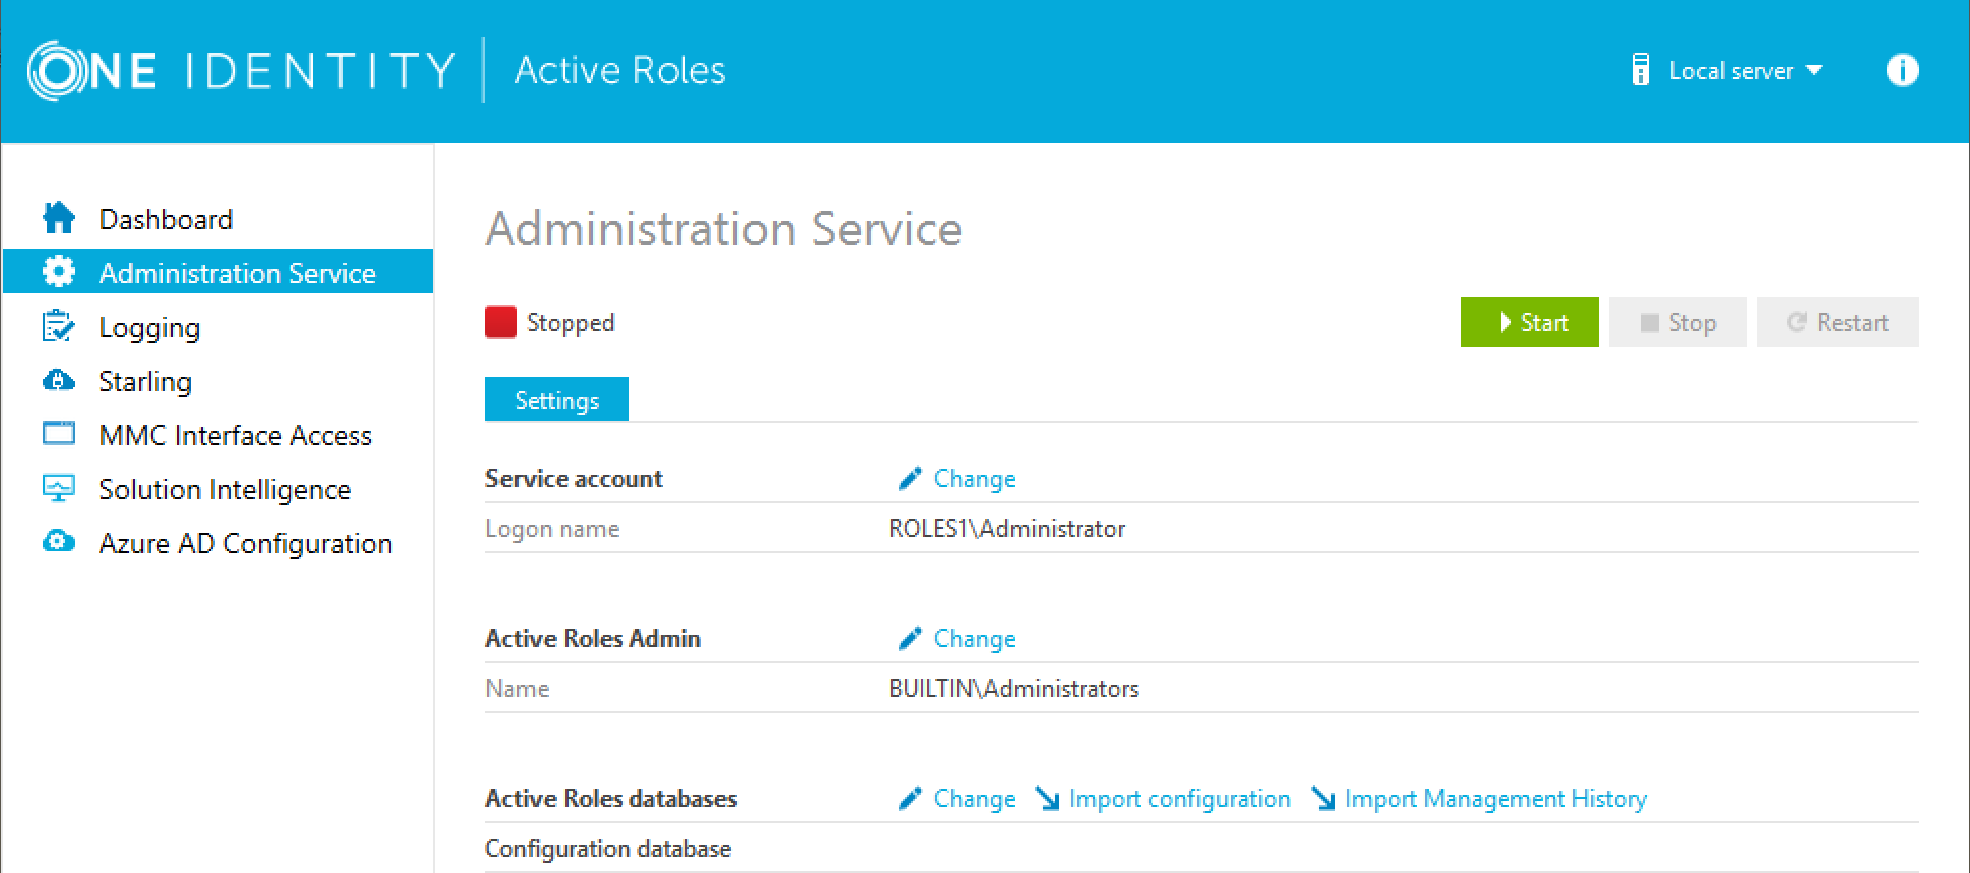
Stop the Active Roles Administration Service. To do so, in the Active Roles Configuration Center, on the left pane, navigate to Administration Service and click Stop.
-
Once the Active Roles Administration Service stopped, open the Import configuration wizard by clicking Active Roles databases > Import configuration.
-
Perform the steps of the wizard. For more information, see Import configuration data or Steps to deploy the Administration Service in the Active Roles Quick Start Guide.
|

|
CAUTION: Importing a configuration will overwrite every Azure tenant currently listed in the Azure AD Configuration page with those included in the imported configuration. |
-
Once the import procedure finished, start the Active Roles Administration Service by clicking Start in the Administration Service page.
-
In the Active Roles Configuration Center, on the left pane, click Azure AD Configuration.
The list of imported Azure tenants appears.
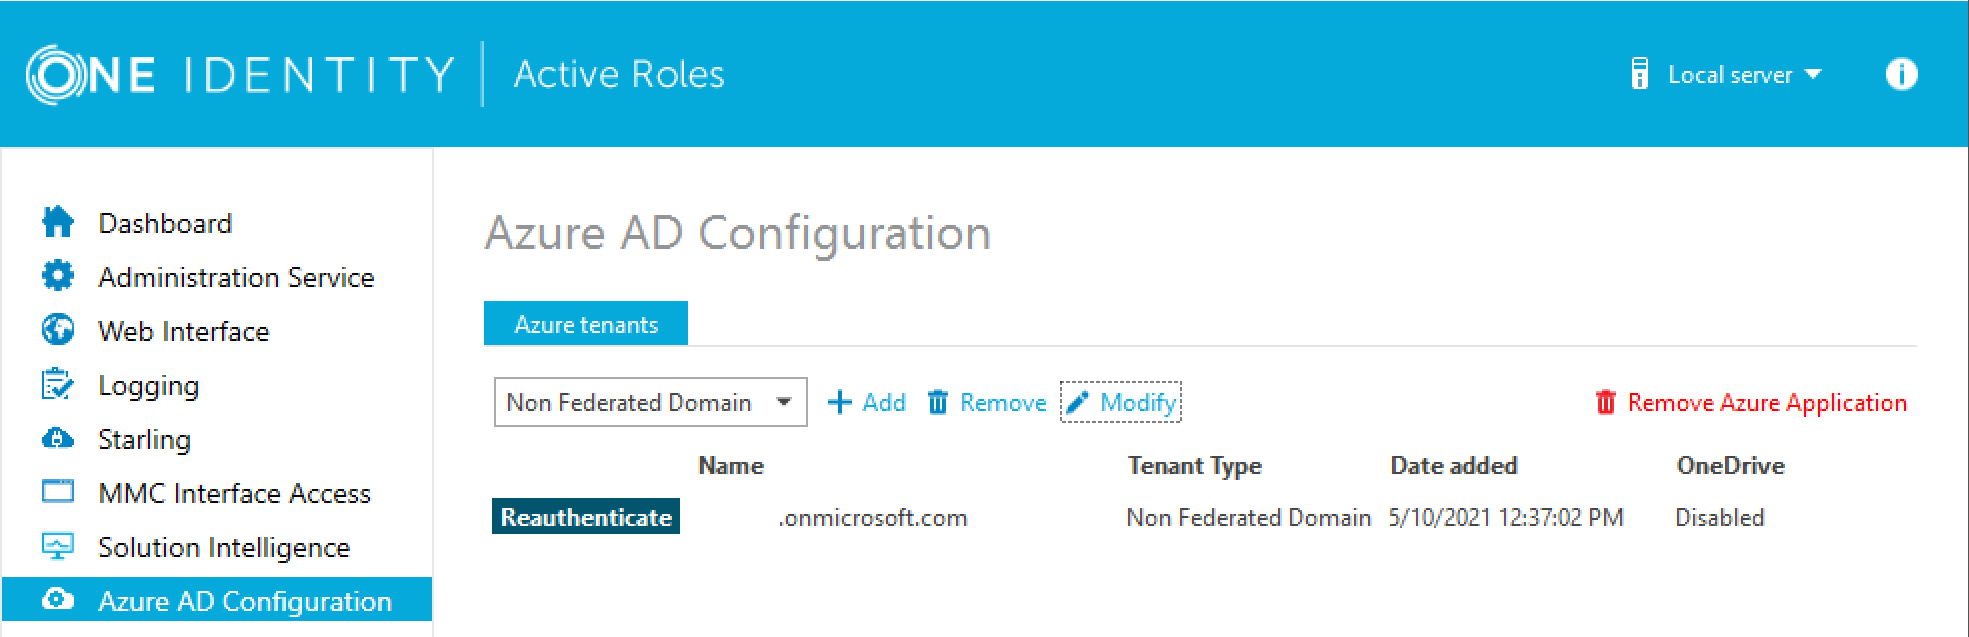
-
To configure an imported Azure tenant, click Reauthenticate.
-
Authenticate your Azure AD administrator account.
-
If you already used one or more Azure AD administrator accounts on your PC, select your account from the Pick an account list, then provide the account password. If you do not find your account in the list, specify your account by clicking Use another account.
-
If you have not used any Azure AD administrator accounts yet on the PC (for example, because you are configuring a fresh Active Roles installation), specify your account user name in the Sign in field, then provide your password.
NOTE: Make sure to specify the account used for adding the Azure tenant (that is, the account name listed under the Name column of the Azure tenant). Authenticating with another account will result in an error.
-
To manage the Azure tenant and its contents in the Active Roles Web Interface, you must consent Active Roles as an Azure application. To do so, click Consent next to the Azure tenant.
-
Authenticate your Azure AD administration account again. Depending on the type of Microsoft pop-up that appears (Pick an account or Sign in), either select the Azure AD account you used for adding the Azure tenant, or specify its user name and password again.
NOTE: Make sure to specify the account used for adding the Azure tenant (that is, the account name listed under the Name column of the Azure tenant). Authenticating with another account will result in an error.
-
The standard Microsoft Permissions requested pop-up appears, listing all the permissions required for configuring Active Roles as an Azure application. To finish creating the Azure application, click Accept.
Active Roles then authenticates every Azure AD administrative operation performed in the Azure tenant with a set of generated client ID and client secret.
NOTE: Once you click Accept, Windows may show a Security Warning pop-up with the following message:
The current webpage is trying to open a site on your intranet. Do you want to allow this?
In such cases, clicking either Yes or No could freeze the pop-up dialog, but consenting the Azure tenant will finish without problem.
This issue can occur in case the computer running Active Roles has incorrect browser settings. As a workaround, to get an up-to-date status of the state of the Azure tenant, close and restart the Active Roles Configuration Center after clicking Yes in the Security Warning pop-up.
-
To make the configured Azure tenant(s) appear in the Active Roles Web Interface, you must restart the Administration Service, as indicated on the user interface. Click Administration Service on the left pane, then either click Restart, or first click Stop and then Start.
TIP: Once the Azure tenant or tenants are configured, and Active Roles is also set as a consented Azure AD application for it, you can view and modify the configured tenant(s) and their settings at the following locations:
-
To change the domain type or OneDrive provisioning settings of an Azure tenant, in the Active Roles Configuration Center, navigate to Azure AD Configuration, select the Azure tenant, and click Modify. For more information, see Viewing or modifying the Azure AD tenant type.
-
To check the connectivity status of the Azure configuration, in the Active Roles Web Interface, navigate to Directory Management > Tree > Azure > Azure Configuration > Azure Health Check. For more information, see View Azure Health for Azure AD tenants and applications .
-
To check the Azure Licenses Report, in the Active Roles Web Interface, navigate to Directory Management > Tree > Azure > Azure Configuration > Azure Licenses Report. For more information, see View Azure Licenses Report .
-
To check the Office 365 Roles Report, in the Active Roles Web Interface, navigate to Directory Management > Tree > Azure > Azure Configuration > Office 365 Roles Report. For more information, see View Office 365 Roles Report .
NOTE: Consider the following when configuring an Azure tenant:
-
When Active Roles is registered as a consented Azure AD application, minimal permissions are assigned to it by default. To add additional permissions to the Azure application, sign in to the Azure Portal and add your required permissions there.
-
Azure Multi-Factor Authentication (MFA) is automatically enforced for Azure users and Azure guest users added to the configured Azure tenant. To disable Azure MFA for the Azure tenant, sign in to the Azure Portal and navigate to Tenant > Properties > Manage Security defaults and set Enable Security defaults to No.
