Resolving an IP conflict between cluster nodes
The IP addresses of the HA interfaces connecting the two nodes are detected automatically, during boot. When a node comes online, it attempts to connect to the IP address 1.2.4.1. If no other node responds until timeout, then it sets the IP address of its HA interface to 1.2.4.1, otherwise (if there is a responding node on 1.2.4.1) it sets its own HA interface to 1.2.4.2.
Replaced nodes do not yet know the HA configuration (or any other HA settings), and will attempt to negotiate it automatically in the same way. If the network is, for any reason, too slow to connect the nodes on time, the replacement node boots with the IP address of 1.2.4.1, which can cause an IP conflict if the other node has also set its IP to that same address previously. In this case, the replacement node cannot join the HA cluster.
To manually assign the correct IP address to the HA interface of a node, perform the following steps:
-
Log in to the node using the IPMI interface or the physical console.
Configuration changes have not been synced to the new (replacement) node, as it could not join the HA cluster. Use the default password of the root user of syslog-ng Store Box (SSB), see Installing this hotfix in the Installation Guide.
-
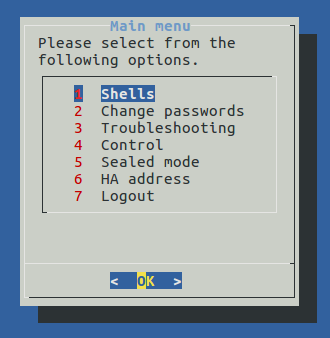
From the console menu, choose 6 HA address.
Figure 247: The console menu
-
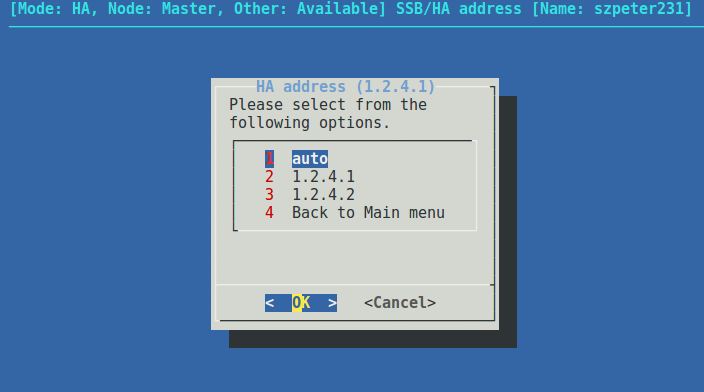
Choose the IP address of the node.
Figure 248: The console menu
-
Reboot the node.
Restoring SSB configuration and data
The following procedure describes how to restore the configuration and data of syslog-ng Store Box (SSB) from a complete backup, for example, after a hardware replacement.
NOTE: It is possible to receive indexer errors following data restore. Data that was still in the memory of SSB during backup might have been indexed, but as it was not on the hard drive, it was not copied to the remote server.
To make sure that all data is backed up (for example, before an upgrade), shut down syslog-ng before initiating the backup process.
|

|
Caution:
Statistics about syslog-ng and logspace sizes are not backed up. As a result, following a data restore, the Basic Settings > Dashboard page will not show any syslog-ng and logspace statistics about the period before the backup. |
To restore the configuration and data of SSB from a complete backup
-
Connect to your backup server and locate the directory where SSB saves the backups. The configuration backups are stored in the config subdirectory in time stamped files. Find the latest configuration file (the configuration files are called SSB-timestamp.config).
-
Connect to SSB.
If you have not yet completed the Welcome Wizard, click Browse, select the configuration file, and click Import.
If you have already completed the Welcome Wizard, navigate to Basic Settings > System > Import configuration > Browse, select the configuration file, and click Import.
-
Navigate to Policies > Backup & Archive/Cleanup. Verify that the settings of the target servers and the backup protocols are correct.
-
Navigate to Basic Settings > Management > System backup, click Restore now and wait for the process to finish. Depending on the amount of data stored in the backup, and the speed of the connection to the backup server, this may take a long time.
-
Navigate to Log > Logspaces, and click Restore ALL. Depending on the amount of data stored in the backup, and the speed of the connection to the backup server, this may take a long time.
Configuring the IPMI interface from the BIOS after losing IPMI password
It may happen that you inadvertently lose the IPMI pasword of your syslog-ng Store Box (SSB). In that case, you will be required to:
-
Shut down SSB.
-
Unplug the SSB physical appliance's power cord.
-
Wait 30 seconds.
-
Replug the power cord.
-
Restart the appliance.
-
Re-configure the IPMI interface from the BIOS.
To confgure IPMI from the BIOS, complete the following steps.
Prerequisites:
To apply the procedure outlined here, you will need physical access to a monitor and keyboard.
-
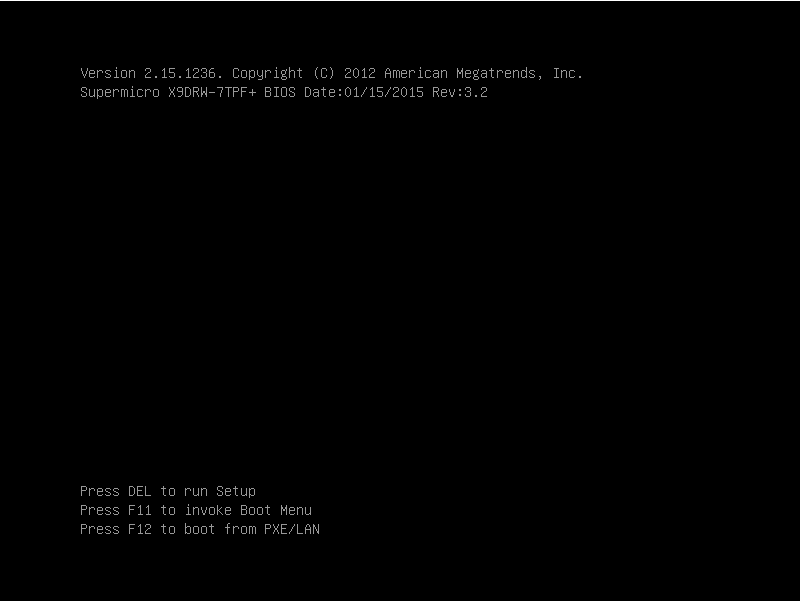
Press the DEL button when the POST screen comes up while the appliance is booting.
Figure 249: POST screen during booting
-
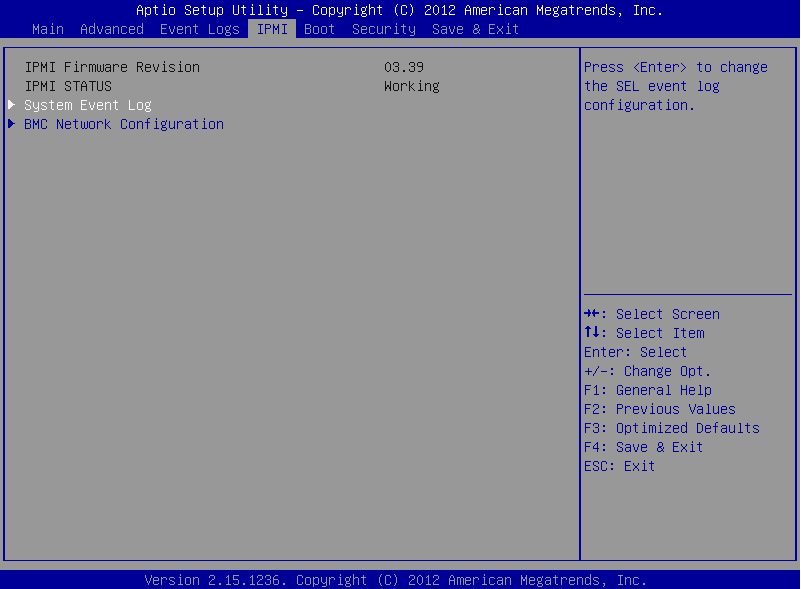
In the BIOS, navigate to the IPMI page.
-
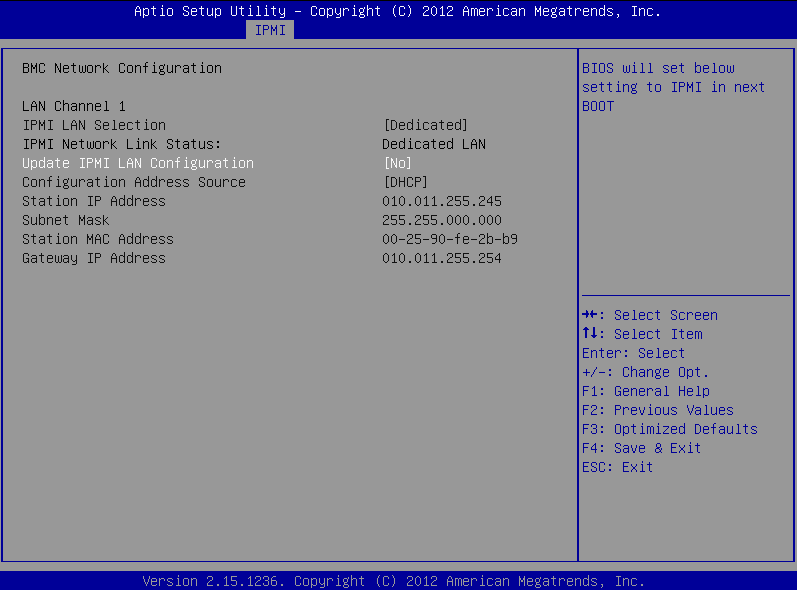
On the IPMI page, select BMC Network Configuration, and press Enter.
Figure 250: IMPI page > BMC Network Configuration option
-
On the BMC Network Configuration page, select Update IPMI LAN Configuration, press Enter, and select Yes.
Figure 251: BMC Network Configuration page > Update IPMI LAN Configuration
-
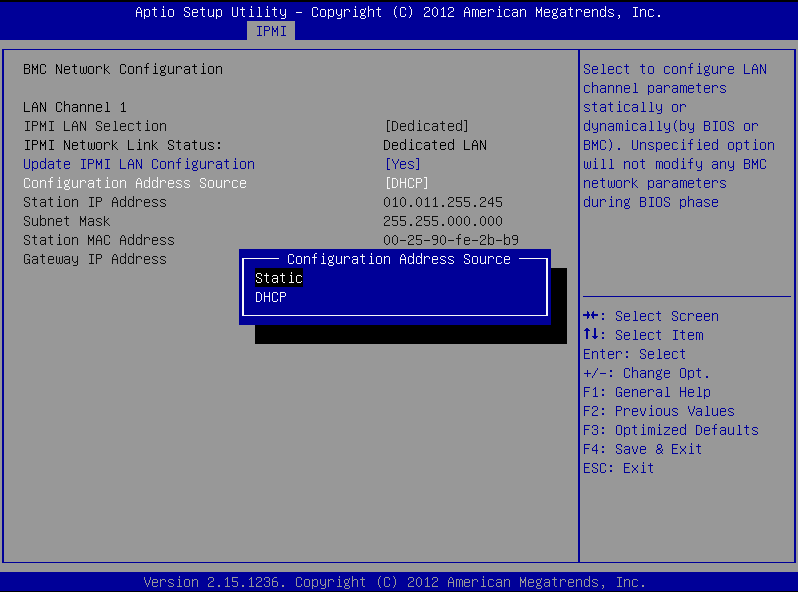
Stay on the BMC Network Configuration page, select Configuration Address Source, press Enter, and select Static.
Figure 252: BMC Network Configuration page > Configuration Address Source
-
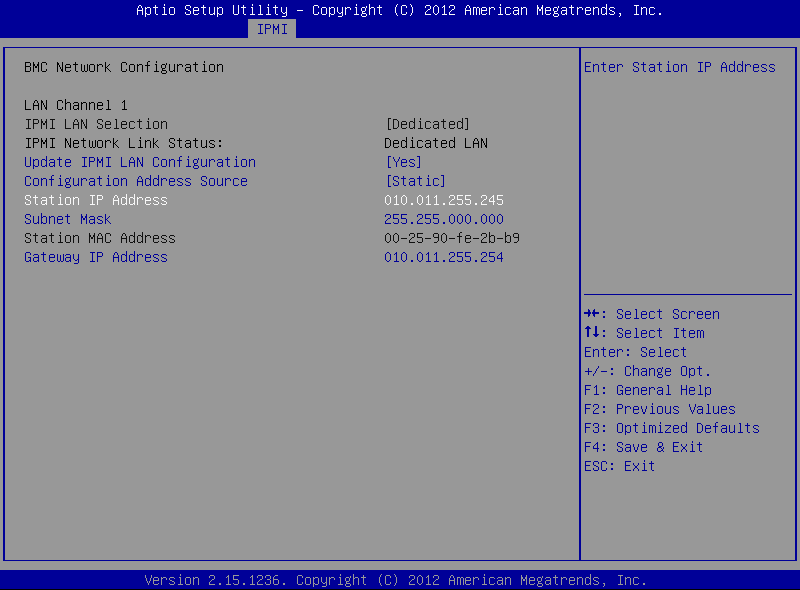
Still on the BMC Network Configuration page, configure the Station IP Address, Subnet Mask, and Gateway IP Address individually.
Figure 253: BMC Network Configuration page > Station IP Address, Subnet Mask, Gateway IP Address
-
Press F4 to save the settings, and exit from the BIOS.
About a minute later, you will be able to log in on the IPMI web interface.
Accessing and using the SSB boot loader menu and console
GNU GRUB (GRand Unified Bootloader) is a boot loader which is the first software program that runs when syslog-ng Store Box (SSB) boots. It is responsible for loading and transferring control to the SSB operating system kernel.
GRUB can manage the filesystems and kernel executable formats which SSB uses, so in case of SSB fails to boot, you can perform recovery using the GRUB console (e.g. you can load the kernel just by specifying its file name and the drive and partition where the kernel resides.)
When entering the GRUB menu, you can use either a menu interface, or a command-line interface to boot or to do a recovery. Using the command-line interface, you can enter the drive specification and file name of the kernel manually. In the menu interface, you can select SSB to boot. You can even edit the SSB menu entry before using it. While in the menu, you can switch between the command-line mode and the menu interface.
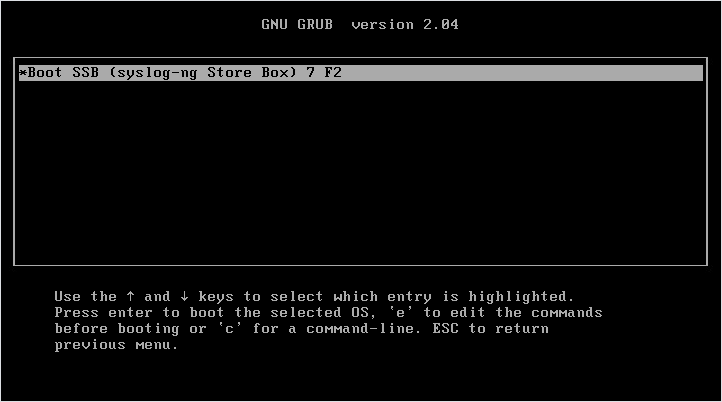
To enter the GRUB menu of SSB
-
To enter the GRUB menu, press Esc when you see the Press 'ESC' to enter the menu ... text on the screen.
Figure 254: Entering the GRUB menu

-
Choose one of the following:
-
To boot SSB, press Enter.
-
To edit the kernel options of SSB, press E.
-
To enter the GRUB command prompt, press C. For the available console commands, see the official GRUB documentation.
Figure 255: GRUB menu
To leave the GRUB menu and continue booting, press Enter.
-
Enter the root username and the GRUB password.
Figure 256: Entering the username and password to access the kernel options or the boot loader console

NOTE: From version 7.2.0 it is required to enter a username and a password to change SSB boot settings or to enter the boot loader console for troubleshooting.
Enter the following username when prompted by GRUB:
The default password for the root user is:
One Identity recommends changing the default GRUB password if you have updated SSB from a version prior to 7.2.0.
For more information about changing the GRUB password, see Changing the GRUB password of SSB or Using the console menu of SSB.
