By default, ERFM synchronizes a pre-defined set of user and mailbox properties between the master accounts and shadow accounts. If you need to modify and/or expand the default set of synchronized properties (for example, because of organizational reasons), open and update the applicable ERFM - Mailbox Management policy settings.
ERFM synchronizes three types of properties:
-
Synchronized properties: Active Roles updates these properties of the master account in both the master account and its shadow account whenever they are modified. Such properties include, for example, the personal (First Name, Last Name, and so on), geographical (Office Location, City), organizational (Company, Department, and so on) or contact (Home Phone, Mobile Number) information of the user.
-
Substituted properties: Active Roles updates these properties in the shadow account in the resource forest, even if you modify them in the master account in the account forest. Substituted properties include all Exchange recipient properties of the mail-enabled user.
-
Back synchronized properties: Active Roles copies these properties from the shadow account to the master account. By default, this category includes a single property, E-Mail Address (mail).
To view or modify the synchronized, back synchronized or substituted properties of linked mailboxes
-
In the Active Roles Console, in the Active Directory (AD) tree, navigate to Configuration > Policies > Administration > Builtin.
-
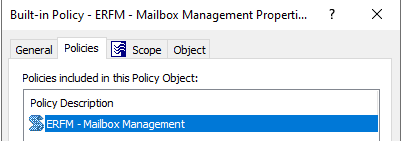
To open the Properties of the ERFM - Mailbox Management policy, in the list of policies, double-click Built-in Policy - ERFM - Mailbox Management. Alternatively, right-click the policy, then click Properties in the context menu.
Figure 143: Active Roles Console– Opening the Properties of the ERFM - Mailbox Management built-in policy

-
To open the policy settings, in the Policies tab, click Policy Description > ERFM - Mailbox Management.
Figure 144: Active Roles Console– Opening the policy settings of the ERFM - Mailbox Management built-in policy
-
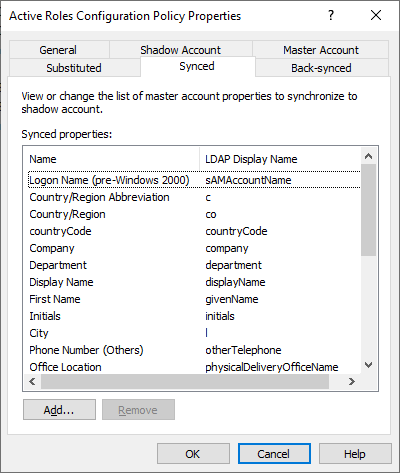
(Optional) To view or modify the list of properties synchronized by the ERFM - Mailbox Management policy, click Synced.
Figure 145: Active Roles Console– Viewing or modifying the synchronized properties of linked mailboxes
-
To add a new property to the list, click Add. Then, in the Select Object Property window, select the property (or properties) you wish to add, and click OK.
Figure 146: Active Roles Console– Adding or removing synchronized properties for linked mailboxes
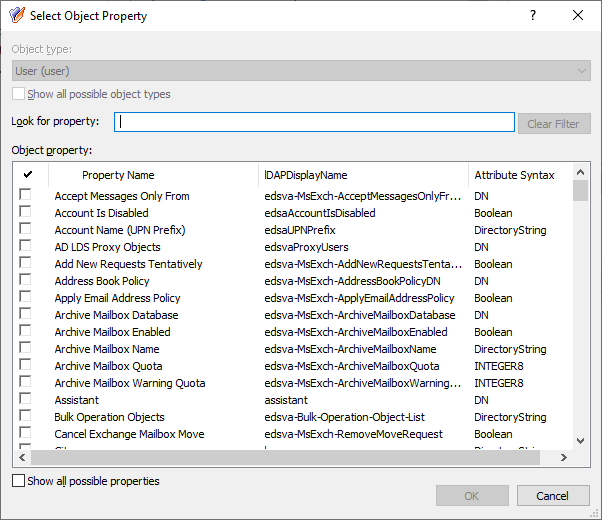
TIP: If you cannot find the property you are looking for, select Show all possible properties to list all available properties.
-
To remove a property (or properties) from the list, select the property (or properties), click Remove, and confirm the removal.
-
To apply your changes, click OK.
-
(Optional) To view or modify the list of back synchronized properties, click Back-synced.
-
To add a new property to the list, click Add. Then, in the Select Object Property window, select the property (or properties) you wish to add, and click OK.
TIP: If you cannot find the property you are looking for, select Show all possible properties to list all available properties.
-
To remove a property (or properties) from the list, select the property (or properties), click Remove, and confirm the removal.
-
To apply your changes, click OK.
-
(Optional) To view or modify the list of substituted properties, click Substituted.
-
To add a new property to the list, click Add. Then, in the Select Object Property window, select the property (or properties) you wish to add, and click OK.
TIP: If you cannot find the property you are looking for, select Show all possible properties to list all available properties.
-
To remove a property (or properties) from the list, select the property (or properties), click Remove, and confirm the removal.
-
To apply your changes, click OK.
After Exchange Resource Forest Management (ERFM) is set up for your organization, you can configure linked mailboxes for new users in the Active Roles Web Interface.
To create a new user with a linked mailbox
-
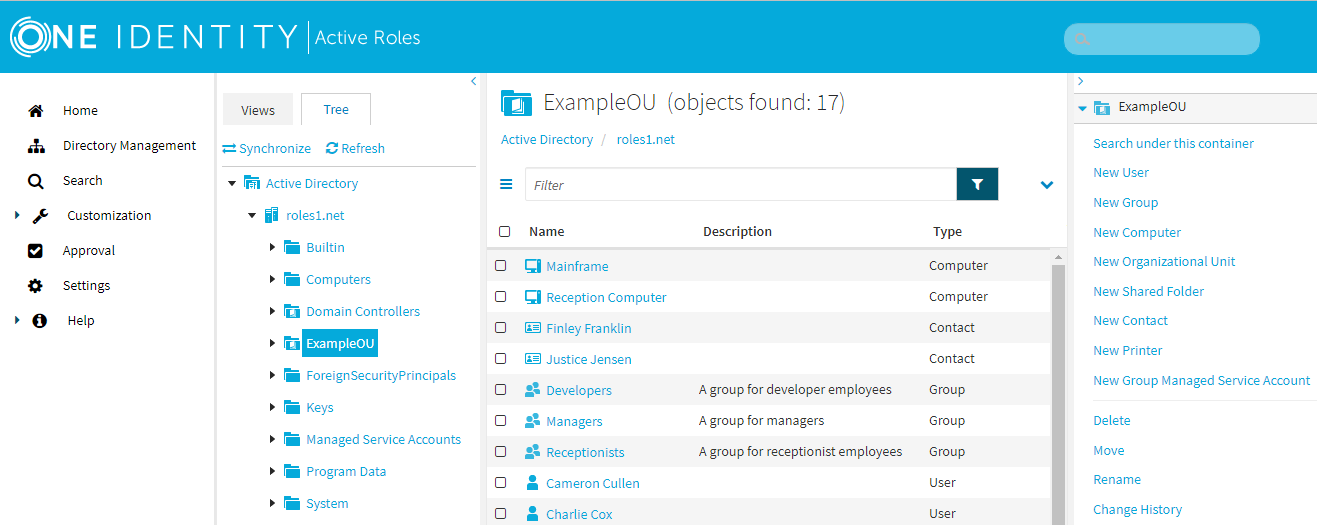
In the Active Roles Web Interface, under Directory Management > Tree > Active Directory, navigate to the OU for which ERFM is configured.
Figure 147: Active Roles Web Interface – Navigating to the OU supporting linked mailboxes
-
In the list of actions available for the selected OU, click New User.
-
In the General step, specify the following information as required by your organization:
-
First name: The first name of the user.
-
Last name: The last name of the user.
-
(Optional) Initials: The initials of the user.
-
Name: The fully-qualified user name of the user. By default, Active Roles automatically fills this property based on the specified First name, Last name, and Initials.
-
Display name: The name of the user as it will appear in Active Directory. By default, Active Roles automatically fills this property based on the specified Name.
-
User logon name: The user name used to log in to the domain. The User logon name also contains a user principal name (UPN) suffix. To configure the appropriate UPN suffix, use the drop-down button and select the appropriate domain for the user.
NOTE: The list contains:
-
The full DNS name of the current domain.
-
The full DNS name of the root domain of the current forest.
-
Any alternative UPN suffixes created via the Active Directory Domains and Trusts console.
-
(Optional) User logon name (pre-Windows 2000): The user name used to log in to the domain, following the pre-Windows 2000 logon name format: <domain-name>\<user-name>. By default, Active Roles automatically fills this property based on the specified User logon name.
-
In the Account step, specify the security settings of the user:
-
Password and Confirm password: The initial password of the user and the corresponding password confirmation field. You can specify the password either manually, or Generate one with Active Roles that follows the password policy requirements of your organization.
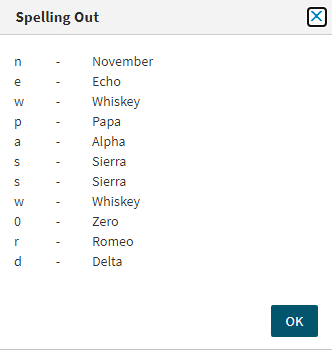
To clear the specified password, click Clear. To spell out each character of the password for clarification, click Spell out.
Figure 148: Active Roles Web Interface – Spelling out the characters of the generated or specified password
-
Account options: Use these options to specify additional security settings for the user (for example, to have them change the configured password during their next login attempt, or have the configured password expire after some time). If you want to enable the created user account later for increased security (for example, because the new user joins later to your organization), select Account is disabled.
-
In the Create Mailbox step, configure the following settings:
-
Create an Exchange mailbox: Make sure that this setting is selected.
-
Alias: Specify the Microsoft Exchange alias of the new mailbox. By default, Active Roles generates the mailbox alias from the value specified for the General > User logon name property of the user.
-
Mailbox database: If all the mandatory prerequisites of this procedure are met, Active Roles must indicate in this field the default mailbox database of the Microsoft Exchange server deployed in the resource forest.
If this field does not point to the Exchange server of the resource forest for any reason, click Browse and select the Exchange server of the resource forest.
-
(Optional) Retention policy: If your organization has any retention policies configured for user mailboxes as part of its messaging records management (MRM) strategy, apply them to the new mailbox by selecting this setting and clicking Browse to select the appropriate policy or policies.
-
(Optional) Exchange ActiveSync mailbox policy: If your organization has any Exchange ActiveSync mailbox policies configured for mobile devices, then apply them to the new mailbox by selecting this setting and clicking Browse to select the appropriate policy or policies.
-
(Optional) Address book policy: If your organization has any address book policies configured for global address list (GAL) segmentation, apply them to the new mailbox by selecting this setting and clicking Browse to select the appropriate policy or policies.
-
(Optional) To open the settings of the new user immediately after finishing the procedure, select Open properties for this object when I click Finish.
-
To apply your changes, click Finish.
Active Roles then creates the new user with the following resources:
-
A new master user account in the OU of the account forest you navigated to at the beginning of this procedure.
-
A new shadow account and a linked mailbox in the resource forest, either in the default Users container or in the container you manually specified in Changing the location of the shadow accounts.
After Exchange Resource Forest Management (ERFM) is set up for your organization, you can configure linked mailboxes for existing users without mailboxes in the Active Roles Web Interface.
NOTE: If your organization has any existing users whose user mailboxes were created before configuring linked mailboxes, you cannot configure new linked mailboxes for those users. Instead, you must convert their existing user mailboxes to linked mailboxes. For more information, see Converting a user mailbox to a linked mailbox.
To create a linked mailbox for an existing user
-
In the Active Roles Web Interface, under Directory Management > Tree > Active Directory, navigate to the OU for which ERFM is configured.
Figure 149: Active Roles Web Interface – Navigating to the OU supporting linked mailboxes
-
Select the user account for which you want to configure the linked mailbox.
-
To start configuring the mailbox for the user, click New User Mailbox.
-
In the Mailbox Settings step, configure the following settings:
-
Alias: Specify the Microsoft Exchange alias of the new mailbox. By default, Active Roles generates the mailbox alias from the value specified for the General > User logon name property of the user.
-
Mailbox database: If all the mandatory prerequisites of this procedure are met, Active Roles must indicate in this field the default mailbox database of the Microsoft Exchange server deployed in the resource forest.
If this field does not point to the Exchange server of the resource forest for any reason, click Browse and select the Exchange server of the resource forest.
-
(Optional) Retention policy: If your organization has any retention policies configured for user mailboxes as part of its messaging records management (MRM) strategy, apply them to the new mailbox by selecting this setting and clicking Browse to select the appropriate policy or policies.
-
(Optional) Exchange ActiveSync mailbox policy: If your organization has any Exchange ActiveSync mailbox policies configured for mobile devices, then apply them to the new mailbox by selecting this setting and clicking Browse to select the appropriate policy or policies.
-
(Optional) Address book policy: If your organization has any address book policies configured for global address list (GAL) segmentation, apply them to the new mailbox by selecting this setting and clicking Browse to select the appropriate policy or policies.
-
To apply your changes, click Finish.
Active Roles then creates a new shadow account and a linked mailbox in the resource forest, either in the default Users container or in the container you manually specified in Changing the location of the shadow accounts.
After Exchange Resource Forest Management (ERFM) is set up for your organization, you can modify the Exchange properties of an existing linked mailbox in the Active Roles Web Interface by selecting the master user account in the account forest, and opening the Exchange Properties window. This is typically required in case of organizational or employment status changes.
When you modify the available Exchange properties this way, Active Roles redirects the change requests of the Exchange mailbox properties from the master account that you have opened to the shadow user account in the Exchange forest.
NOTE: If your environment has a large number of Microsoft Exchange mailboxes (or a complex Microsoft Exchange deployment), Active Roles may retrieve the properties of users with Exchange mailboxes slower than for users without Exchange mailboxes.
To solve this problem, enable a performance fix by creating a new registry key as described in Knowledge Base Article 4336544:
-
On the machine(s) running the Administration Service and the Web Interface, launch the Windows Registry Editor.
-
In the Registry Editor, navigate to the following registry path:
HKEY_LOCAL_ MACHINE\SOFTWARE\One Identity\Active Roles\Configuration
-
Create a new DWORD (32-bit) Value named PerformanceFlag.
-
Double-click the new PerformanceFlag DWORD, and set its Value data to 1.
-
To apply the fix, restart the Active Roles Administration Service and IIS. If the fix is enabled successfully, the following Active Roles event log with Event ID 2508 will appear in the Event Viewer:
Performance flag value set to 1.
-
(Optional) To deactivate the fix later, set the Value data of the PerformanceFlag DWORD to 0.
The PerformanceFlag registry key accepts only a value of 1 (to activate the fix) or 0 (to deactivate it).
To view or modify the Exchange properties of a linked mailbox
-
In the Active Roles Web Interface, under Directory Management > Tree > Active Directory, navigate to the OU for which ERFM is configured.
Figure 150: Active Roles Web Interface – Navigating to the OU supporting linked mailboxes
-
Select the master user account whose Exchange properties you want to modify and click Exchange Properties.
-
View or change the following mailbox settings as you need:
-
(Optional) General: View and configure the general email settings, for example the First name, Last name, or User logon name.
-
(Optional) E-mail Addresses: View and configure email addresses for the selected user.
-
(Optional) Mailbox Features: View and configure various Exchange mailbox features for the user, for example, mobile device synchronization features, web application access, or email messaging protocols.
-
(Optional) Mail Flow Settings: View and configure rules for the emails that the user sends or receives via the Exchange server of your organization, for example, message size restrictions or delivery and forwarding settings.
-
(Optional) Mailbox Settings: View and configure Messaging Records Management (MRM) settings for the user.
-
To apply your changes, click Save.
After you save your changes, Active Roles applies the modifications on the shadow user account associated with the master user account.
TIP: To verify if your changes have already been synchronized, in the Active Roles Web Interface, under Directory Management > Tree > Active Directory, navigate to the resource forest, select the shadow account associated with the master account you modified, and click Change History.
