Applying Access Templates
You can apply ATs to an AD object with the Delegation of Control Wizard. To start the wizard, navigate to either:
-
The AT you want to apply on an AD object. When you start the Delegation of Control Wizard this way, you can select the securable AD objects for which the access is granted, and the trustees who receive the access to those securable objects.
For the steps of this procedure, see Applying an Access Template directly.
-
The securable AD object (container, Managed Unit or leaf object) whose access and administration permissions you want to configure. When you start the Delegation of Control Wizard this way, you can select the trustees who receive the access to the securable object and the ATs defining the permissions of the trustees to the securable object.
For the steps of this procedure, see Applying Access Templates on a securable object.
-
The trustee for which you want to assign permissions. When you start the Delegation of Control Wizard this way, you can select the securable AD object to which the trustee will receive access and the ATs defining the permissions of the trustee to the securable object.
For the steps of this procedure, see Applying Access Templates on a user or group.
NOTE: ATs support propagating their permission settings for the child objects of the securable objects too.
TIP: For more technical details about how Active Roles applies permissions with Access Templates, see Applying permissions with Access Template in the Active Roles Feature Guide.
Applying an Access Template directly
You can configure permissions for a trustee to a securable Active Directory (AD) object via an Access Template (AT) by selecting the AT directly in the Active Roles Console.
To apply an Access Template on a trustee or trustees
-
In the Active Roles Console, in the Active Directory (AD) tree, navigate to Configuration > Access Templates.
-
Right-click the AT you want to assign to a trustee (or trustees), then click Links.
TIP: For more information on the ATs, see the Description of the AT or the Active Roles Built-in Access Templates Reference Guide document.
-
In the Links dialog, to start the Delegation of Control Wizard, click Add. Click Next on the Welcome page, when it appears.
-
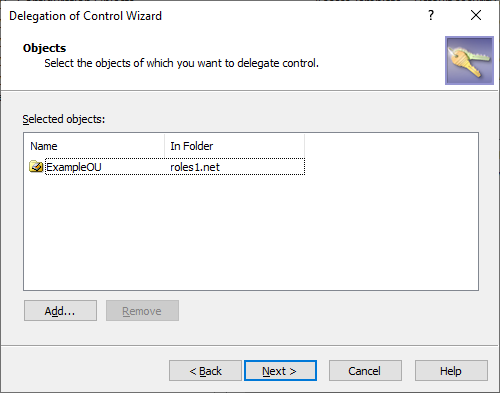
In the Objects step, specify the securable objects that you want to add to the scope of the AT.
-
To specify a new securable object or objects, click Add. Then, in the Select Objects window, locate and select the securable objects you want to add to the scope of the AT, and click Add.
Once you finalized the list, to close the Select Objects window and apply your selection, click OK.
TIP: If no securable objects appear in the window, use the Click here to display objects link.
Figure 8: Delegation of Control Wizard – Select objects window when specifying securable objects
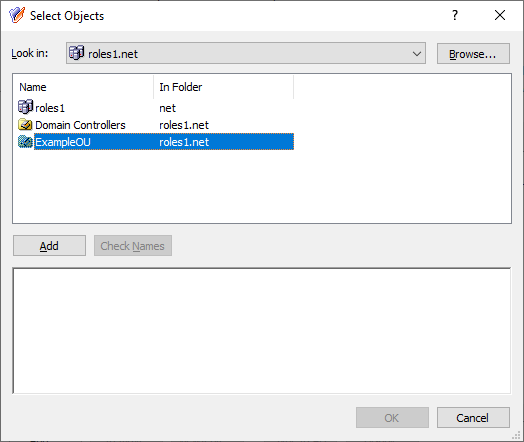
Figure 9: Delegation of Control Wizard – Selecting securable objects
-
To remove securable objects added earlier to the scope of the AT, select them in the Objects step, and click Remove.
To continue, click Next.
-
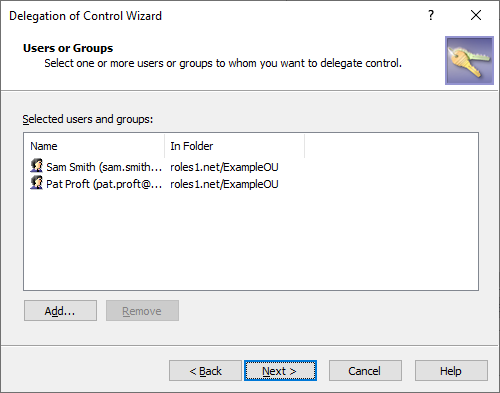
In the Users or Groups step, specify the trustee(s) for which you want to grant the permissions of the AT.
-
To specify a new trustee or new trustees, click Add. Then, in the Select Objects window, locate and select the users or groups you want to add to the scope of the AT, and click Add. Once you finalized the list, to close the Select Objects window and apply your selection, click OK.
TIP: If no users or groups appear in the window, use the Click here to display objects link.
Figure 10: Delegation of Control Wizard – Select Objects window when specifying trustees

Figure 11: Delegation of Control Wizard – Selecting trustees
-
To remove existing trustees added earlier to the scope of the AT, select them in the Users or Groups step, and click Remove.
To continue, click Next.
-
In the Inheritance Options step, specify with the Apply permissions onto setting the scope of securable objects to which Active Roles applies the permissions of the AT:
-
This directory object: Trustees receive the AT permissions only to the selected securable object.
-
Child objects of this directory object: Trustees receive the AT permissions to the children of the securable object. To limit the granted permissions only to the direct children of the object, select Immediate child objects only as well.
Figure 12: Delegation of Control Wizard- Inheritance Options

To continue, click Next.
-
In the Permissions Propagation step, to synchronize the configured permission settings to the native Active Directory (AD) access controls, select Propagate permissions to Active Directory.
Figure 13: Delegation of Control Wizard – Permissions propagation
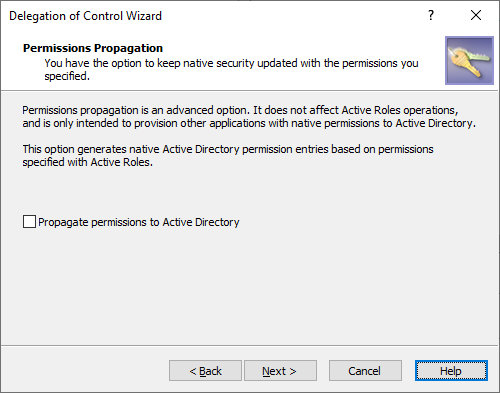
Selecting this setting will modify the authorization information of the AD objects with the permission settings defined in Active Roles, providing more flexibility for users and groups that use native AD management tools besides Active Roles.
IMPORTANT: Selecting this setting will result in trustees keeping their configured permissions outside of the Active Roles environment, with the potential risk of bypassing policies configured and enforced with Active Roles.
Therefore, select this option only if the selected trustees have the required security clearance and/or meet all security guidelines in effect within your organization.
TIP: Once Propagate permissions to Active Directory is selected and configured, you can change this setting at any time with the Active Roles Security > Sync to AD setting, or with the Advanced Details > Sync to AD setting. For more information, see Synchronizing permissions to Active Directory.
To continue, click Next.
-
To complete the wizard, click Finish.
Applying Access Templates on a securable object
You can configure permissions for a trustee (or trustees) to a securable Active Directory (AD) object via Access Templates (ATs) by selecting the securable object in the Active Roles Console.
To configure permissions with an Access Template from a securable object
-
In the Active Roles Console, in the Active Directory (AD) tree, navigate to the securable object for which you want to configure an AT.
-
To open the Delegation of Control Wizard from the securable object:
-
If the securable object is a container or Managed Unit, right-click the object, then click Delegate Control > Add.
-
If the securable object is a leaf object, right-click the object and click Properties. Then, in the Properties window, click Administration > Security > Add.
When the Welcome screen of the Delegation of Control Wizard appears, click Next.
-
In the Users or Groups step, specify the trustee(s) for which you want to grant the permissions of the AT.
-
To specify a new trustee or new trustees, click Add. Then, in the Select Objects window, locate and select the users or groups you want to add to the scope of the AT, and click Add. Once you finalized the list, to close the Select Objects window and apply your selection, click OK.
TIP: If no users or groups appear in the window, use the Click here to display objects link.
Figure 14: Delegation of Control Wizard – Select Objects window when specifying trustees
Figure 15: Delegation of Control Wizard – Selecting trustees
-
To remove existing trustees added earlier to the scope of the AT, select them in the Users or Groups step, and click Remove.
To continue, click Next.
-
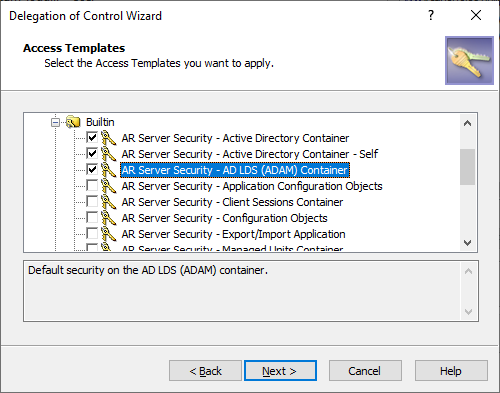
In the Access Templates step, specify the ATs you want to assign to the selected trustees for the configured securable object. Expand the containers of the ATs, then select the AT or ATs you want to apply.
Figure 16: Delegation of Control Wizard – Selecting Access Templates
To continue, click Next.
-
In the Inheritance Options step, specify with the Apply permissions onto setting the scope of securable objects to which Active Roles applies the permissions of the AT:
-
This directory object: Trustees receive the AT permissions only to the selected securable object.
-
Child objects of this directory object: Trustees receive the AT permissions to the children of the securable object. To limit the granted permissions only to the direct children of the object, select Immediate child objects only as well.
Figure 17: Delegation of Control Wizard- Inheritance Options
To continue, click Next.
-
In the Permissions Propagation step, to synchronize the configured permission settings to the native Active Directory (AD) access controls, select Propagate permissions to Active Directory.
Figure 18: Delegation of Control Wizard – Permissions propagation
Selecting this setting will modify the authorization information of the AD objects with the permission settings defined in Active Roles, providing more flexibility for users and groups that use native AD management tools besides Active Roles.
IMPORTANT: Selecting this setting will result in trustees keeping their configured permissions outside of the Active Roles environment, with the potential risk of bypassing policies configured and enforced with Active Roles.
Therefore, select this option only if the selected trustees have the required security clearance and/or meet all security guidelines in effect within your organization.
TIP: Once Propagate permissions to Active Directory is selected and configured, you can change this setting at any time with the Active Roles Security > Sync to AD setting, or with the Advanced Details > Sync to AD setting. For more information, see Synchronizing permissions to Active Directory.
To continue, click Next.
-
To complete the wizard, click Finish.
Applying Access Templates on a user or group
You can configure permissions for a trustee (typically a user or group) to a securable Active Directory (AD) object via Access Templates (ATs) by selecting the trustee in the Active Roles Console.
To configure permissions with an Access Template from a trustee
-
In the Active Roles Console, in the Active Directory (AD) tree, navigate to the trustee AD object (such as a user or group) for which you want to configure access with an AT or ATs to a securable object.
-
To open the Delegation of Control Wizard, right-click the trustee, then click Delegated Rights > Add.
When the Welcome screen appears, click Next.
-
In the Objects step, specify the securable objects that you want to add to the scope of the AT.
-
To specify a new securable object or objects, click Add. Then, in the Select Objects window, locate and select the securable objects you want to add to the scope of the AT, and click Add.
Once you finalized the list, to close the Select Objects window and apply your selection, click OK.
TIP: If no securable objects appear in the window, use the Click here to display objects link.
Figure 19: Delegation of Control Wizard – Select objects window when specifying securable objects
Figure 20: Delegation of Control Wizard – Selecting securable objects
-
To remove securable objects added earlier to the scope of the AT, select them in the Objects step, and click Remove.
To continue, click Next.
-
In the Access Templates step, specify the ATs you want to assign to the selected trustees for the configured securable object. Expand the containers of the ATs, then select the AT or ATs you want to apply.
Figure 21: Delegation of Control Wizard – Selecting Access Templates
To continue, click Next.
-
In the Inheritance Options step, specify with the Apply permissions onto setting the scope of securable objects to which Active Roles applies the permissions of the AT:
-
This directory object: Trustees receive the AT permissions only to the selected securable object.
-
Child objects of this directory object: Trustees receive the AT permissions to the children of the securable object. To limit the granted permissions only to the direct children of the object, select Immediate child objects only as well.
Figure 22: Delegation of Control Wizard- Inheritance Options
To continue, click Next.
-
In the Permissions Propagation step, to synchronize the configured permission settings to the native Active Directory (AD) access controls, select Propagate permissions to Active Directory.
Figure 23: Delegation of Control Wizard – Permissions propagation
Selecting this setting will modify the authorization information of the AD objects with the permission settings defined in Active Roles, providing more flexibility for users and groups that use native AD management tools besides Active Roles.
IMPORTANT: Selecting this setting will result in trustees keeping their configured permissions outside of the Active Roles environment, with the potential risk of bypassing policies configured and enforced with Active Roles.
Therefore, select this option only if the selected trustees have the required security clearance and/or meet all security guidelines in effect within your organization.
TIP: Once Propagate permissions to Active Directory is selected and configured, you can change this setting at any time with the Active Roles Security > Sync to AD setting, or with the Advanced Details > Sync to AD setting. For more information, see Synchronizing permissions to Active Directory.
To continue, click Next.
-
To complete the wizard, click Finish.
