
Changing the root password of One Identity Safeguard for Privileged Sessions (SPS)
The root password is required to access One Identity Safeguard for Privileged Sessions (SPS) locally, or remotely via an SSH connection. Note that the password of the root user can be changed from the console menu as well. For details, see Accessing the One Identity Safeguard for Privileged Sessions (SPS) console.
To change the root password of SPS
-
Navigate to Basic Settings > Management > Change root password.
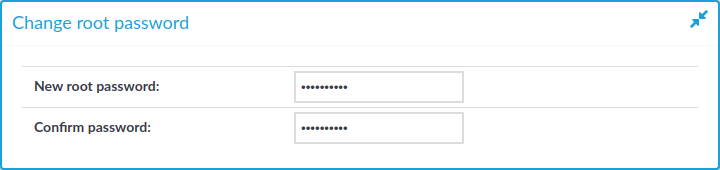
Figure 108: Basic Settings > Management > Change root password — Changing the root password of SPS
-
Enter the new password into the New root password and Confirm password fields.
NOTE: One Identity Safeguard for Privileged Sessions (SPS) accepts passwords that are not longer than 150 characters. The following special characters can be used: !"#$%&'()*+,-./:;<=>?@[\]^-`{|}
-
Click
.

Firmware update using SSH
In some cases, uploading large files over HTTP is not possible. In such cases, you can update the firmware using SSH.
|
|
Caution:
The recommended way to update the firmware is using the One Identity Safeguard for Privileged Sessions (SPS) web interface (see Upgrading One Identity Safeguard for Privileged Sessions (SPS)). Update the SPS firmware using SSH is only if you cannot update the firmware using the web interface. Note that updating using SSH may be removed from later versions of SPS. |

Prerequisites
-
Remote SSH access to SPS must be enabled. For details, see Enabling SSH access to the One Identity Safeguard for Privileged Sessions (SPS) host.
To update the firmware using SSH
-
Download the firmware file to your computer.
-
Log in to SPS remotely using SSH, and select Shells > Core shell from the console menu.
-
Copy the firmware to the SPS host, for example, into the /root/ directory.
If you are copying the firmware to SPS using SCP and you issue the copy command on the client side and not within the core firmware, the root directory of the core firmware is: /mnt/firmware/root
-
Install the firmware: /opt/scb/bin/firmwarectl install <path-to-firmware>
This command installs the firmware into the first empty slot, and returns the value of the slot where the firmware has been installed.
-
Check if you can upgrade to the new firmware, and resolve any errors before continuing: /opt/scb/bin/firmwarectl precheck <slot-number-of-the-firmware>
In the returned values, "exitcode": 0 means that the precheck has finished without any errors. "exitcode": 1 means that errors have occurred, and the contents of "output": [] gives you a clue as to what is causing the problem.
-
Activate the new firmware: /opt/scb/bin/firmwarectl activate <slot-number-of-the-firmware>
Using the /opt/scb/bin/firmwarectl list command, you can check whether activation has been successful. In the returned values, look for your slot number and the value of "active":, it should say true. For example:
...
"slot": 3,
"precheck": true,
"active": true,
"boot_link": "mnt/boot-firmware/slot3",
"core_link": "mnt/firmware/slot3",
"branch": "5.6",
"version": "5.6.0a",
"current": false,
...
-
Reboot SPS: xcbclient self xcb_do_reboot
-
If the upgrade is successful, delete any unused firmware: /opt/scb/bin/firmwarectl delete <slot-number-of-unused-firmware>
-
Delete the firmware file you uploaded to SPS, it is not needed anymore: rm -fv /root/<firmware-file-you-uploaded>
Exporting and importing the configuration of One Identity Safeguard for Privileged Sessions (SPS) using the console
For manual archiving, or to migrate it to another One Identity Safeguard for Privileged Sessions (SPS) unit, you can export/import the configuration of SPSfrom the console using the /opt/scb/bin/configbundle.py script.
|
|
NOTE:
You must run the /opt/scb/bin/configbundle.py script using the root user. |
|
|
NOTE:
The configuration of your SPS may contain sensitive information. Make sure you delete any configuration export files that are not needed anymore. |
To export/import the configuration of SPS from the console
-
Execute the following command to export the configuration of your SPS:
/opt/scb/bin/configbundle.py create --bundle /<my destination folder>/bundle.tar.gz
Where:
-
/opt/scb/bin/configbundle.py: The script you execute to export the configuration.
-
create: The option that lets you export a configuration.
-
--bundle: The option used to specify the bundle file.
-
/<my destination folder>/bundle.tar.gz: The path to the file where you wish to export the configuration.
Replace <my destination folder> with the name of the folder where you wish to store the exported configuration.
-
-
Execute the following command to import the configuration of your SPS:
/opt/scb/bin/configbundle.py import --bundle /<my destination folder>/bundle.tar.gz
Where:
-
/opt/scb/bin/configbundle.py: The script you execute to import the configuration.
-
import: The option that lets you import a configuration.
-
--bundle: The option used to specify the bundle file.
-
/<my destination folder>/bundle.tar.gz: The path to the file from which you wish to import the configuration.
Replace <my destination folder> with the name of the folder where your configuration export file is stored.
-
Sealed mode
When sealed mode is enabled, the following settings are automatically applied:
-
One Identity Safeguard for Privileged Sessions (SPS) cannot be accessed remotely via SSH for maintenance.
-
The root password of SPS cannot be changed in sealed mode.
-
It is not possible to upload or delete plugins in sealed mode.
-
Sealed mode can be disabled only from the local console. For details, see Disabling sealed mode.
To enable sealed mode use one of the following methods:
-
Select the Sealed mode option during the Welcome Wizard.
-
Select Basic Settings > System > Sealed mode > Activate sealed mode on the SPS web interface.
-
Log in to SPS as root using SSH or the local console, and select Sealed mode > Enable from the console menu.