Displaying statistics on search results
One Identity Safeguard for Privileged Sessions (SPS) can create statistics (bar, pie and list) from various information about the search results, for example, the distribution of the target hosts, and so on.
To display statistics about the connections
-
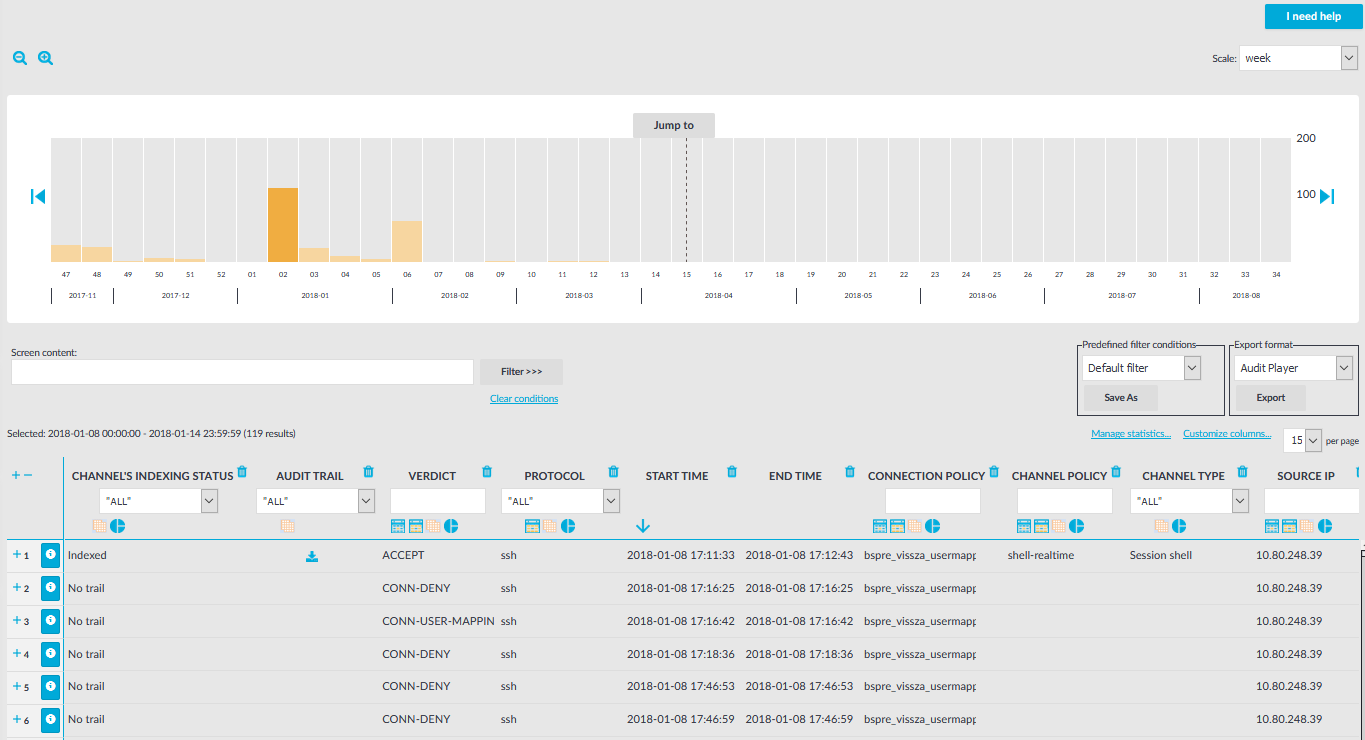
Navigate to the Search (classic) > Search page.
-
Set the filters you need.
-
Click the
icon in the header of the table. A pop-up window is displayed.
Figure 322: Search (classic) > Search — Displaying statistics
-
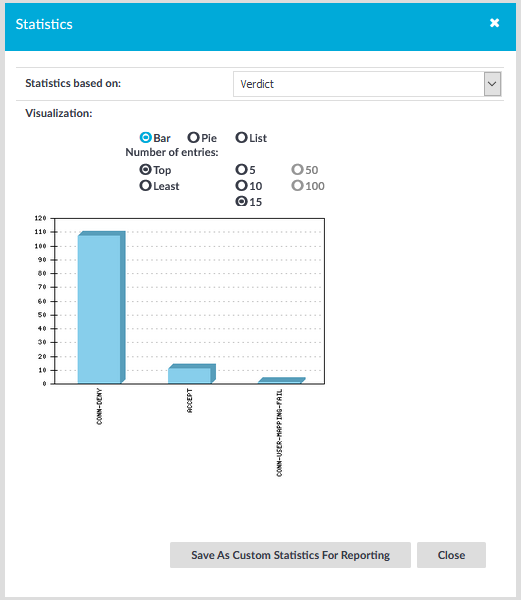
Select the type of metadata you want to create statistics on from the Statistics based on field
-
Select the type of chart to display, that is, Bar, Pie or List. The chart will be displayed in the same pop-up window.
-
By default, the statistics start with the largest number of entries. To start statistics with the least number of entries, select Least.
-
Select the number of data groups to display from the Number of entries field. For example, if you want to display the statistics of the ten hosts that start the most connections (the "top talkers"), select 10. That way the top ten talkers will be displayed individually, while the amount of connections started by the other hosts will be aggregated and labeled as Others.
NOTE: For pie and bar charts you can select 5, 10 and 15, for lists 5, 10, 15, 50 and 100.
Figure 323: Search (classic) > Search — Selecting display type
-
(Optional) To export statistics data to a CSV file, select List, set the number of entries and click Export all to CSV. SPS compiles the selected data into a results.csv file.
NOTE: This action exports all rows, not only the currently displayed ones.
-
(Optional) You can also save these statistics and include them in reports as a report subchapter. You can include these subchapters into your reports in the Reports > Configuration menu.
-
To save these statistics as custom statistics for reporting, click Save As Custom Statistics For Reporting.
-
Add a name for the statistics in the Name field.
-
Select a group from the already existing groups in the Groups field. The autocomplete function helps you with the selection.
-
(Optional) The Add to report as a subchapter function enables you to instantly add this statistics as a subchapter to the selected report.
-
Click Save. This action includes the saved statistics as a selectable subchapter into Reporting > Configuration. For details on how to add this subchapter to a selected report, see Configuring custom reports.
-