Chat now with support
Chat with Support

One Identity Safeguard for Privileged Sessions 7.1 - Administration Guide

Preface Introduction The concepts of One Identity Safeguard for Privileged Sessions (SPS)
The philosophy of One Identity Safeguard for Privileged Sessions (SPS) Policies Credential Stores Plugin framework Indexing Supported protocols and client applications Modes of operation Connecting to a server through One Identity Safeguard for Privileged Sessions (SPS) Archive and backup concepts Maximizing the scope of auditing IPv6 in One Identity Safeguard for Privileged Sessions (SPS) SSH host keys Authenticating clients using public-key authentication in SSH The gateway authentication process Four-eyes authorization Network interfaces High Availability support in One Identity Safeguard for Privileged Sessions (SPS) Versions and releases of One Identity Safeguard for Privileged Sessions (SPS) Accessing and configuring One Identity Safeguard for Privileged Sessions (SPS)
Cloud deployment considerations The Welcome Wizard and the first login Basic settings
Supported web browsers The structure of the web interface Network settings Configuring date and time System logging, SNMP and e-mail alerts Configuring system monitoring on SPS Data and configuration backups Archiving Cleaning up audit data Using plugins Forwarding data to third-party systems Starling integration
User management and access control
Login settings Managing One Identity Safeguard for Privileged Sessions (SPS) users locally Setting password policies for local users Managing local user groups Managing One Identity Safeguard for Privileged Sessions (SPS) users from an LDAP database Authenticating users to a RADIUS server Authenticating users with X.509 certificates Authenticating users with SAML2 Managing user rights and usergroups Creating rules for restricting access to search audit data Displaying the privileges of users and user groups Listing and searching configuration changes
Managing One Identity Safeguard for Privileged Sessions (SPS)
Controlling One Identity Safeguard for Privileged Sessions (SPS): reboot, shutdown Managing One Identity Safeguard for Privileged Sessions (SPS) clusters Managing a High Availability One Identity Safeguard for Privileged Sessions (SPS) cluster Upgrading One Identity Safeguard for Privileged Sessions (SPS) Managing the One Identity Safeguard for Privileged Sessions (SPS) license Accessing the One Identity Safeguard for Privileged Sessions (SPS) console Sealed mode Out-of-band management of One Identity Safeguard for Privileged Sessions (SPS) Managing the certificates used on One Identity Safeguard for Privileged Sessions (SPS)
General connection settings HTTP-specific settings ICA-specific settings MSSQL-specific settings RDP-specific settings SSH-specific settings Using Sudo with SPS Telnet-specific settings VMware Horizon View connections VNC-specific settings Indexing audit trails Using the Search interface Advanced authentication and authorization techniques Reports The One Identity Safeguard for Privileged Sessions (SPS) REST API One Identity Safeguard for Privileged Sessions (SPS) scenarios Troubleshooting One Identity Safeguard for Privileged Sessions (SPS)
Network troubleshooting Gathering data about system problems Viewing logs on One Identity Safeguard for Privileged Sessions (SPS) Changing log verbosity level of One Identity Safeguard for Privileged Sessions (SPS) Collecting logs and system information for error reporting Collecting logs and system information of the boot process for error reporting Support hotfixes Status history and statistics Troubleshooting a One Identity Safeguard for Privileged Sessions (SPS) cluster Understanding One Identity Safeguard for Privileged Sessions (SPS) RAID status Restoring One Identity Safeguard for Privileged Sessions (SPS) configuration and data VNC is not working with TLS Configuring the IPMI from the BIOS after losing IPMI password Incomplete TSA response received Using UPN usernames in audited SSH connections
Using SPS with SPP Configuring external devices Using SCP with agent-forwarding Security checklist for configuring One Identity Safeguard for Privileged Sessions (SPS) Jumplists for in-product help Configuring SPS to use an LDAP backend Glossary

Assigning roles to nodes in your cluster

By default, nodes do not have any roles assigned to them. The only exception is the Central management node, which you specifically promoted to fulfill that role. To assign a role to a node in the cluster, complete the following steps.

To assign roles to nodes in your cluster

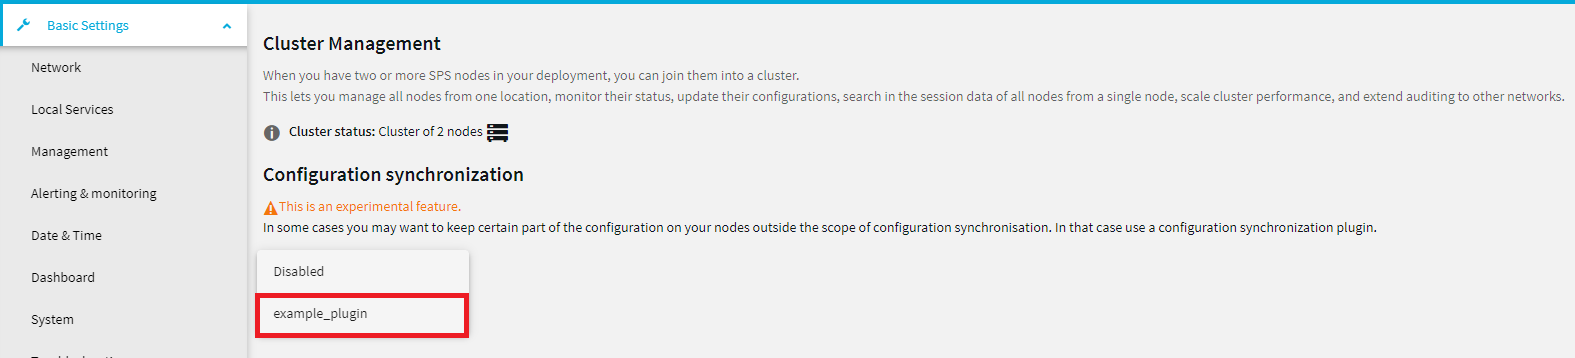
  1. On the web interface of your Central management node, navigate to Basic Settings > Cluster management. This page displays all nodes in the cluster.

  2. Click 
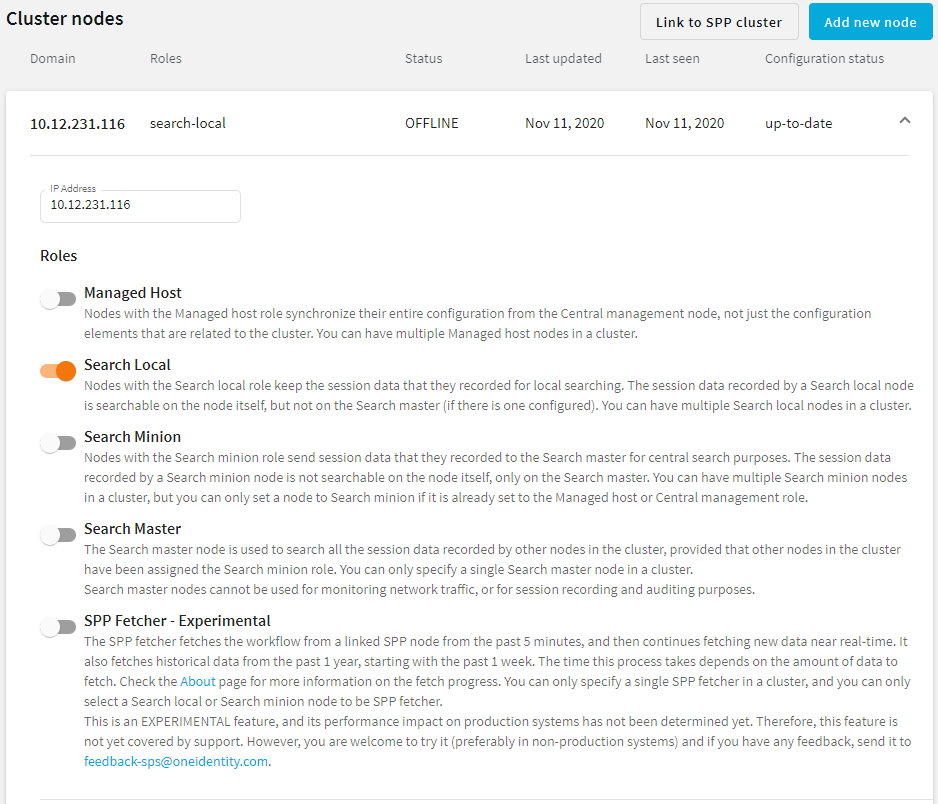
at the right side of the row of the node that node that you want to update. The node row is expanded, showing the node address and the available roles.

  3. Select the role that you want to assign to the node. For details on what each role means, see Cluster roles.

    Caution:

    Configuration options that you set on a node before joining it to the cluster will be overwritten by the configuration of the Central management node. For example, policies and protocol-specific settings will be overwritten once you assign the Managed host role to the node. Managed host roles periodically fetch the configuration of the Central management node and merge it into their own. This is called configuration synchronization.

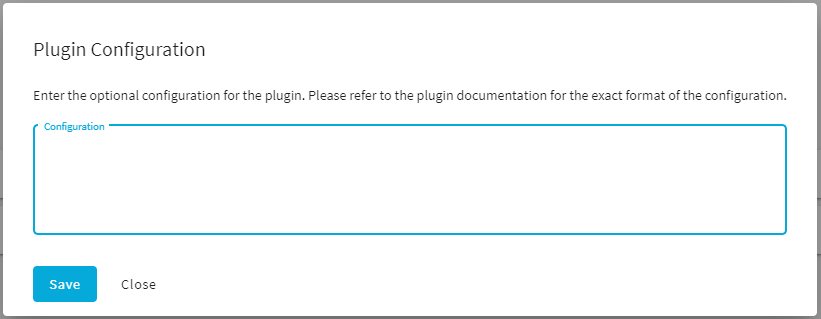
    To avoid the loss of policies and settings that are specific to your Managed host node, use a configuration synchronization plugin. Such plugins enable you to limit the scope of configuration synchronization.

    For more information, see Configuration synchronization across nodes in a cluster.

    NOTE: When assigning search roles, consider the following:

    • Ensure that each node has a search role.
    • Ensure that each node has only one search role.
    • You must assign the Search master role before you can assign Search minion roles.

    Figure 125: Basic Settings > Cluster management — Assigning the Search local role to the selected node

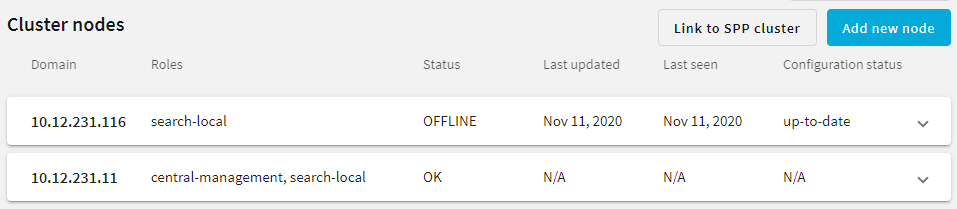
  4. Click Update to apply the selected roles. The role you assigned (in this case, the Search local role) is then displayed next to the node, under the Roles column.

    Figure 126: Basic Settings > Cluster management — Search local role is assigned to node

    You can assign roles to your nodes through the REST API, too. For details, see "Assign a role to a node" in the REST API Reference Guide.

Configuration synchronization across nodes in a cluster

Nodes fetch their configuration from the Central management node, and merge it into their own configuration. Depending on their role, nodes may merge the whole configuration into their own (Managed host nodes), or only the cluster-specific parts (nodes with no roles assigned). Whenever a configuration change is made on the Central management node and the change is committed, it is synchronized to all nodes in the cluster as soon as the nodes fetch the latest configuration from the Central management node.

Configuration synchronization in One Identity Safeguard for Privileged Sessions (SPS) has some implications for the SSH keys (if any) that have been recorded on your nodes before they were joined to the cluster. For details, see Configuration synchronization and SSH keys.

In some cases, you may want to keep certain parts of the configuration on your nodes outside the scope of configuration synchronization. In that case, use a configuration synchronization plugin. For more information, see Using a configuration synchronization plugin.

The following configuration settings are never overwritten by configuration synchronization, even when not using a configuration synchronization plugin:

  • Settings related to networking (Basic Settings > Network).
  • Settings related to local services (Basic Settings > Local Services).
  • Settings related to the management of SPS (Basic Settings > Management).

For more information, see the following resources:

Configuration synchronization and SSH keys

The only SSH keys present on Managed host nodes will always be the ones that have been recorded by the Central management node. This is because the SSH keys stored on the Central management node get synced to the Managed host nodes during configuration synchronization. This means that the SSH keys recorded on the Managed host nodes before they were joined to the cluster are overwritten by the keys stored on the Central management node.

The Central management node records new SSH keys in the following cases:

  • The Central management node is configured to Accept key for the first time, and a new key is automatically recorded when the Central management node interacts with a server for the first time.
  • A new key is recorded on the Central management node on the SSH Control > Server Host Keys page and this change is committed.

These are the keys that get synced to your Managed host nodes.

Using a configuration synchronization plugin

When synchronizing the central configuration across nodes, you may want to:

  • Keep certain parts in the configuration of individual nodes unchanged.

  • Customize certain parts of the central configuration to specific needs of individual nodes in the cluster (for example, your nodes may access external services through different network addresses).

You can achieve all of these by using a configuration synchronization plugin that contains transformations for the problematic parts. The plugin only runs on nodes that have the Managed host role.

Customizing certain parts or features of a node using a configuration synchronization plugin has the same limitations as configuring One Identity Safeguard for Privileged Sessions (SPS) through the REST API. In other words, whatever you can configure through the REST API, you can configure the exact same settings using the plugin. One notable difference between the REST API and the plugin is that using the REST API, you can only read certain types of data (such as keys and passwords), while using the configuration synchronization plugin, you can write these types of data as well.

For details on how to configure SPS using the REST API, see REST API Reference Guide.

Data structures in the plugin are represented as nested JSON objects. For object references, the plugin uses keys.

The plugin works with the following key parameters:

  • local_config: The current configuration of a Managed Host node (those parts that can be configured through the REST API).
  • merged_config: The configuration of the Central management node that is about to be synced to the Managed host node (those parts that can be configured through the REST API), with settings related to networking, local services, and management whitelisted. These settings are never overwritten by configuration synchronization.
  • node_id: The unique ID of the Managed host node in the cluster (you can retrieve this identifier by querying the /api/cluster/nodes endpoint through the REST API).
  • plugin_config: The configuration of the plugin provided as free-form text. Specifying the configuration of the plugin is optional. It enables you to run configuration synchronization on each cluster with different parameters if you have multiple clusters.
Example: Customizing an IP address in a connection policy

For example, an RDP connection policy on a Managed host node specifies the following client and target addresses:

$ curl ... https://<url-of-Central-Management-node>/api/configuration/rdp/connections/<id-of-the-connection-policy>

{
    "body": {
        "network": {
            "clients": [
                "0.0.0.0/0"
                ],
            "ports": [
                3389
                ],
           "targets": [
               "10.30.255.28/24"
               ]
        },
    },
    ...
}

In the following example, an RDP connection policy is configured with the following details on the Central management node:

$ curl ... https://<url-of-Managed-Node>/api/configuration/rdp/connections/<id-of-the-connection-policy>

{
    "body": {
        "network": {
            "clients": [
                "0.0.0.0/0"
                ],
            "ports": [
                3389
                ],
           "targets": [
               "10.30.255.8/24"
               ]
        },
    },
    ...
}

To ensure that the details of the connection policy on the Managed host node are kept as-is after configuration synchronization, add the following lines to the plugin main.py file:

$ cat main.py
def merge(local_config: dict, merged_config: dict, node_id: str, plugin_config: str, **kwargs):
    merged_config['rdp']['connections'][<id-of-the-connection-policy>]['network']['targets'][0] = "10.30.255.8/24"
    return merged_config

Due to possible new (as yet undefined) parameters, it is good practice to close the parameter list of the merge function with **kwargs.

If you need assistance with writing customized transformations, contact our Professional Services Team, and a One Identity Service Delivery Engineer will help you.

NOTE: Configuration settings related to networking (Basic Settings > Network) and local services (Basic Settings > Local Services), with the exception of Safeguard for Privileged Analytics, are not overwritten on the nodes by configuration synchronization even if you are not using a plugin.

For the management of SPS (Basic Settings > Management), the following configuration settings are not overwritten:

  • Email settings

  • SSL certificates

To use a configuration synchronization plugin

  1. Upload a configuration synchronization plugin:

    1. Navigate to Basic Settings > Plugins.

    2. Browse for the file, and click Upload plugin.

      NOTE: It is not possible to upload or delete plugins if SPS is in Sealed mode.

  2. Enable the plugin:

    1. Navigate to Basic Settings > Cluster management > Configuration synchronization.

    2. Select the plugin you have uploaded.

      Figure 127: Basic Settings > Cluster management — Select configuration synchronization plugin

  3. (Optional) Once you selected the plugin, to open the Plugin Configuration dialog, click Configure next to the plugin drop-down box.

    In the Configuration field, enter the configuration of the plugin. If you have multiple clusters, specifying the configuration of the plugin enables you to run configuration synchronization on each cluster with different parameters. To save your changes and return to the Cluster management window, click Save.

  4. To save your changes, click Commit changes.

You can also upload and enable the configuration synchronization plugin through the REST API. For more information, see "Upload and enable a configuration synchronization plugin" in the REST API Reference Guide.

Related Documents

The document was helpful.

Select Rating

I easily found the information I needed.

Select Rating