From SPS version 6.11, you can enable auditing the sound that is transferred between an RDP client and the server.
Using the Safeguard Desktop Player application, you can export the input and output sound recorded on the side of the audited user to a .wav file.
NOTE: To export audio files from the audit trails, make sure that you have the appropriate version of Safeguard Desktop Player installed.
For more information on the sound export process in Safeguard Desktop Player, see Exporting files from an audit trail.
To configure SPS to enable extracting sound from audit trails
-
Navigate to RDP Control > Channel Policies and open the policy that you want to use for sound auditing or create and configure a new connection for this purpose.
For example, you can use the all policy for sound auditing as well.
-
From the Type drop-down, open Sound and Dynamic virtual channel and make sure that the Record audit trail checkbox is selected for both of these channel types.
NOTE: If the Record audit trail checkbox is selected only for the Sound channel, only the output sound (the one that is received by the audited user) is recorded in the audit trail.
If the Record audit trail checkbox is selected for the Dynamic virtual channel, both the input sound (the one that comes from the audited user) and output sound (the one that is received by the audited user) are recorded.
TIP: To play back the video file of the recorded audit trails with sound, enable the Record audit trail checkbox for the Drawing channel as well.
-
Click  to save your configuration.
The Share connection policy with SPP option enables you to use RDP connection policies in SPP to initiate sessions.
To share an RDP connection policy
-
Navigate to RDP Control > Connections.
Figure 227: RDP Control > Connections — Functions shared with SPP

-
Select Share connection policy with SPP.
NOTE: The Share connection policy with SPP checkbox is enabled only if you have linked an SPP appliance to SPS.
-
Set the following configuration for the RDP connection policy:
-
In Target, select Inband destination selection.
-
Unselect Require Gateway Authentication on the SPS Web Interface.
-
In AA plugin, consider the following, then select the AA plugin of your choice:
-
Select an AA plugin different from the safeguard_default plugin.
-
Alternatively, leave AA plugin unset.
|

|
WARNING: Do not delete or rename the safeguard_default AA plugin; otherwise, you are not able to use the Share connection policy with SPS option.
If you have modified the safeguard_default plugin, to proceed, revert your changes.
|
-
In Credential Store, select SGCredStore.
NOTE: The SGCredStore option is available only if you have linked an SPP appliance to SPS.
-
To save your changes, click Commit.
If you have joined an SPP to SPS, the Share connection policy with SPS option enables you to use RDP connection policies in SPS to initiate sessions.
To share an RDP connection policy
-
Navigate to RDP Control > Connections.
Figure 228: RDP Control > Connections — Functions shared with SPP

-
Select Share connection policy with SPS.
NOTE: The Share connection policy with SPS checkbox is enabled only if you have linked an SPP appliance to SPS.
-
Set the following configuration for the RDP connection policy:
-
Unselect Require Gateway Authentication on the SPS Web Interface.
-
In AA plugin, consider the following:
-
Select an AA plugin different from the safeguard_default plugin.
-
Alternatively, leave AA plugin unset.
|
|
WARNING: Do not delete or rename the safeguard_default AA plugin; otherwise, you are not able to use the Share connection policy with SPS option.
If you have modified the safeguard_default plugin, to proceed, revert your changes.
|
-
To save your changes, click Commit.
The Credential injection option enables you to use credential injection in SPP-initiated RDP sessions.
The RDP Application session initiated on the SPP side provides the password automatically for the RemoteApp Launcher. To use credential injection, use a connection policy for the RDP Application session that has Credential injection selected.
Prerequisites
Link an SPP appliance to SPS. For more information, see Linking SPS to SPP.
To enable credential injection for SPP, select the Share connection policy with SPP option as well.
To use credential injection in SPP-initiated sessions
-
Navigate to RDP Control > Connections.
Figure 229: RDP Control > Connections — Functions shared with SPP
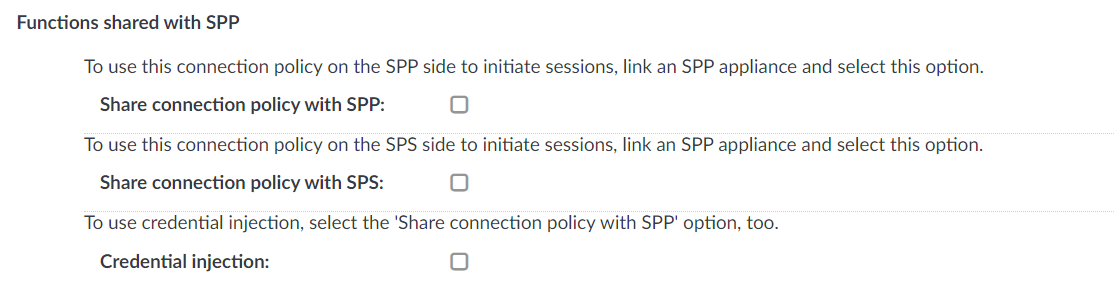
-
Select Share connection policy with SPP.
NOTE: The Share connection policy with SPP checkbox is enabled only if you have linked an SPP appliance to SPS.
For more information on the required connection policy settings, see Sharing RDP connection policies with SPP.
- Select Credential injection and set the following configuration in RDP > Channel policies:
-
In RDP Control > Channel policies, select Drawing.
-
In RDP Control > Channel policies, select Dynamic virtual channel.
-
In RDP Control > Channel policies > Custom > Permitted channels, set rail.
-
In RDP Control > Channel policies > Custom > Permitted channels, set rail_ri.
-
In RDP Control > Channel policies > Custom > Permitted channels, set rail_wi.
-
To save your changes, click Commit.
