The next page provides a list of commonly used grouping criteria. Group Family creates groupings based on the properties you can select on this page or specify later.
Figure 96: Grouping options
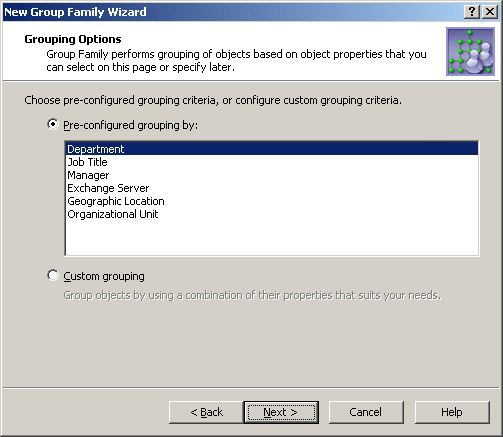
You can choose one of these options:
- Pre-configured grouping Provides a list of commonly-used group-by properties, such as Department, Title, or Geographic Location. Select an entry from the list to specify the group-by properties. Later, on the Group-by Properties page, the wizard will allow you to view or modify the list of the group-by properties you have selected.
- Custom grouping Lets you proceed without selecting group-by properties at this stage. The wizard will prompt you to set up a list of group-by properties on the Group-by Properties page.
The next page prompts you to specify the directory containers that hold the objects to be managed by this Group Family. The scope of the Group Family can be limited to certain containers, thereby causing it to take effect on only the objects in those containers.
The page lists the containers to be included in the scope of the Group Family. Each entry in the list identifies a container by name, and provides the path to the container’s parent container.
To add a container to the list, click Add and select the container. This will cause the Group Family scope to include objects held in that container.
To remove containers from the list, select them and click Remove. This will cause the Group Family scope to no longer include the objects held in those containers.
To view of modify properties of a container, select it from the list and click Properties.
The next page prompts you to specify the type of objects, such as User or Computer, to be managed by Group Family. In this way, the scope of the Group Family is limited to objects of a certain type. The scope can be further refined by applying a filter in order for the Group Family to manage only those objects that meet certain property-related conditions.
Figure 97: Selection of managed objects
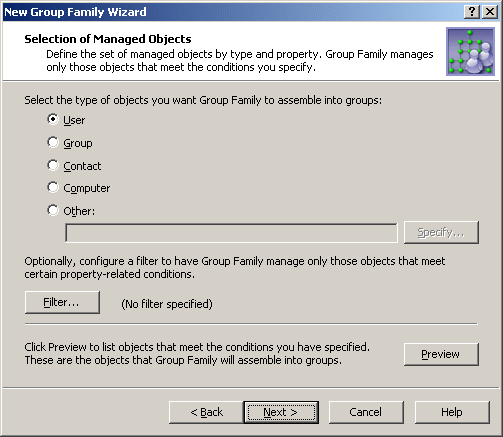
You can select the type of objects you want the Group Family scope to include:
- User The Group Family scope only includes user accounts.
- Group The Group Family scope only includes groups. Note that with this option the Group Family creates groups and adds existing groups to the newly created groups.
- Contact The Group Family scope only includes contact objects.
- Computer The Group Family scope only includes computer accounts.
- Other The Group Family scope only includes the directory objects of the type you select. Click Specify and select an object type.
You have the option to further refine the Group Family scope by applying a filter. To do so, click Filter. This displays a window where you can view or modify filtering criteria. The label next to the Filter button provides a visual indication of whether any filtering criteria are specified.
In the Filter window, you can set up a list of filtering criteria, also referred to as conditions. Each condition specifies a property, operator and value, and evaluates to either TRUE or FALSE depending on the actual value of the property. For example, the following condition evaluates to TRUE for any object that has Description set to Full Time Employee:
Table 63: Filtering conditions
|
Description |
Starts with |
Full Time Employee |
If any conditions are specified, a filter is applied so that the Group Family scope only includes the objects for which all conditions evaluate to TRUE.
With an empty list of conditions, the Group Family scope includes all objects of the specified type held in the specified containers. In other words, this results in no filtering being applied.
When you apply a filter, only the objects that meet the filter conditions are added to the controlled groups. By default, no filter is applied, which causes the controlled groups to include any objects of the specified type. You can configure a basic filter by selecting properties and specifying conditions and values to search for on the selected properties.
In addition, you have the option to configure an advanced filter by entering an appropriate LDAP query. To do so, click the Advanced button in the Filter window. Note that the basic and advanced filter options are mutually exclusive. If you have applied an advanced filter, the basic filter settings are disregarded. To return to the basic filter option, click the Basic button in the Filter window—this will override the LDAP query that the advanced filter is based upon.
By clicking Preview on the Selection of Managed Objects page, you can display a list of objects currently included in the Group Family scope. The Preview window lists the objects the Group Family is going to assemble into groups.
The next page lets you set up the list of group-by properties. The Group Family breaks up the set of managed objects (scope) into groupings, each of which is comprised of the objects with the same combination of values of the specified group-by properties. For example, with Department specified as a group-by property for user objects, each grouping only includes the users from a certain department. Then, the Group Family ensures the members of each grouping belong to the group linked to that grouping.
Figure 98: Group by properties
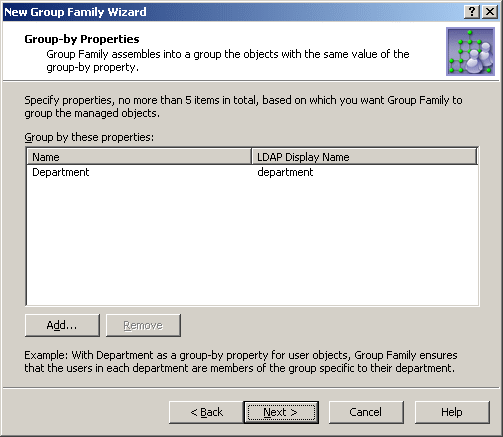
The page lists of the currently selected group-by properties, and allows you to modify the list by adding or removing properties.
|

|
IMPORTANT: The changes you make to the list on this page reset the Group Family options that are dependent on the group-by properties. These options include the group naming rules and the list of groups to capture (see the following two sections). If you add or remove a group-by property, the current naming rules are replaced by the default naming rule and the list of groups to capture is erased. |
