Chat now with support
Chat with Support

Active Roles 7.5 - Administration Guide

Introduction About Active Roles Getting Started Rule-based Administrative Views Role-based Administration
Access Templates as administrative roles Access Template management tasks Examples of use Deployment considerations Windows claims-based Access Rules
Rule-based AutoProvisioning and Deprovisioning
About Policy Objects Policy Object management tasks Policy configuration tasks
Property Generation and Validation User Logon Name Generation Group Membership AutoProvisioning E-mail Alias Generation Exchange Mailbox AutoProvisioning AutoProvisioning for SaaS products OneDrive Provisioning Home Folder AutoProvisioning Script Execution Office 365 and Azure Tenant Selection User Account Deprovisioning Office 365 Licenses Retention Group Membership Removal Exchange Mailbox Deprovisioning Home Folder Deprovisioning User Account Relocation User Account Permanent Deletion Group Object Deprovisioning Group Object Relocation Group Object Permanent Deletion Notification Distribution Report Distribution
Deployment considerations Checking for policy compliance Deprovisioning users or groups Restoring deprovisioned users or groups Container Deletion Prevention policy Picture management rules Policy extensions
Workflows
Understanding workflow Workflow activities overview Configuring a workflow
Creating a workflow definition Configuring workflow start conditions Configuring workflow parameters Adding activities to a workflow Configuring an Approval activity Configuring a Notification activity Configuring a Script activity Configuring an If-Else activity Configuring a Stop/Break activity Configuring an Add Report Section activity Configuring a Search activity Configuring CRUD activities Configuring a Save Object Properties activity Configuring a Modify Requested Changes activity Enabling or disabling an activity Enabling or disabling a workflow Using the initialization script
Example: Approval workflow E-mail based approval Automation workflow Activity extensions
Temporal Group Memberships Group Family Dynamic Groups Active Roles Reporting Management History
Understanding Management History Management History configuration Viewing change history
Workflow activity report sections Policy report items Active Roles internal policy report items
Examining user activity
Entitlement Profile Recycle Bin AD LDS Data Management One Identity Starling Management One Identity Starling Two-factor Authentication for Active Roles Managing One Identity Starling Connect Azure AD, Office 365, and Exchange Online management
Configuring Active Roles to manage hybrid AD objects Managing Hybrid AD Users Unified provisioning policy for Azure O365 Tenant Selection, Office 365 License Selection, and Office 365 Roles Selection, and OneDrive provisioning Office 365 roles management for hybrid environment users Managing Office 365 Contacts Managing Hybrid AD Groups Managing Office 365 Groups Managing Azure Security Groups Managing cloud-only Azure users Managing cloud-only Azure guest users Managing cloud-only Azure contacts Changes to Active Roles policies for cloud-only Azure objects Managing room mailboxes
Managing Configuration of Active Roles
Connecting to the Administration Service Adding and removing managed domains Using unmanaged domains Evaluating product usage Creating and using virtual attributes Examining client sessions Monitoring performance Customizing the console Using Configuration Center Changing the Active Roles Admin account Enabling or disabling diagnostic logs Active Roles Log Viewer
SQL Server Replication Appendix A: Using regular expressions Appendix B: Administrative Template Appendix C: Communication ports Appendix D: Active Roles and supported Azure environments Appendix E: Enabling Federated Authentication Appendix F: Active Roles integration with other One Identity and Quest products Appendix G: Active Roles integration with Duo MFA Appendix H: Active Roles integration with Okta MFA

Separate rule for each naming property

By default, the same rule applies to these naming properties:

  • Group name
  • Group name (pre-Windows 2000)
  • Group display name
  • E-mail alias (if the Group Family is configured to create mail-enabled groups, as described later in this chapter)

You have the option to configure an individual rule for each of these naming properties. To do so, click Fine-tune on the Group Naming Rule page. This displays a window where you can select a naming property and configure a rule for that property the same way as you do for Group name. The window looks similar to the following figure.

Figure 102: Fine-tune naming rule

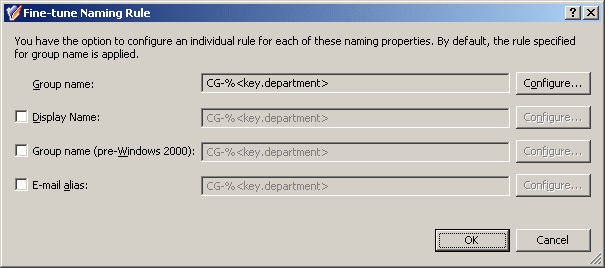
You may need to configure a separate rule for a certain property, considering restrictions imposed on that property. For example, Group name (pre-Windows 2000) must be less than 20 characters. In order to meet this requirement, select the Group name (pre-Windows 2000) check box and click Configure to set up an appropriate rule. When configuring entries to include group-by properties, limit the number of characters in each entry by using the option The first in the Add Entry window.

Group type and scope

On the next page, you can specify the group scope and group type you want to be assigned to the groups generated by the Group Family.

Figure 103: Group type and scope

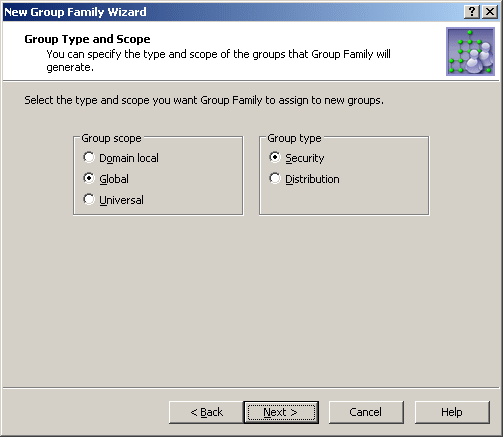
Available are the standard options for the group scope and group type. The Group Family creates groups of the scope and type you select.

Location of groups

On the next page, you can specify the container you want to hold the groups generated by the Group Family.

Figure 104: Location of groups

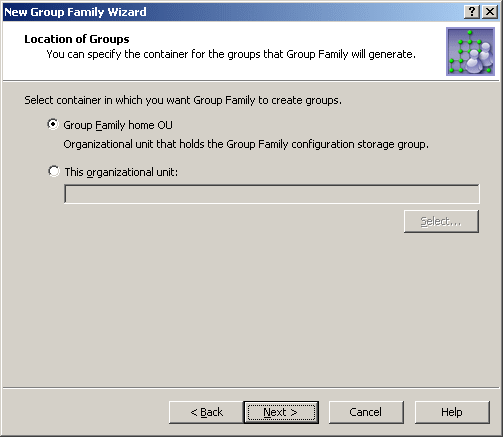
You can choose one of these options:

  • Group Family home OU  The Group Family creates groups in the container that holds the configuration storage group for that Group Family (see Start the New Group Family wizard earlier in this chapter).
  • This organizational unit  The Group Family creates groups in the container specified. This must be an organizational unit or container from the domain of the Group Family configuration storage group. Click Select to choose the desired organizational unit or container.

Exchange-related settings

On the next page, you can specify whether you want the groups generated by the Group Family to be mail-enabled, and set up Exchange-related properties to assign to those groups upon their creation.

Figure 105: Exchange-related settings

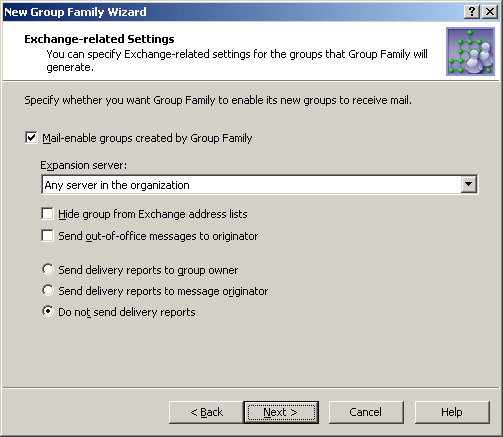
If you want the Group Family groups to be mail-enabled, select the Mail-enable groups created by Group Family check box. Then, you can set up the following Exchange-related properties for the Group Family groups:

  • Expansion server  The Exchange server used to expand a Group Family group into a list of group members.
  • Hide group from Exchange address lists  Prevents the Group Family groups from appearing in address lists. If you select this check box, each of the groups will be hidden from all address lists.
  • Send out-of-office messages to originator  Select this check box if you want out-of-office messages to be sent to the message originator, when a message is sent to a Group Family group while one or more of the group members have an out-of-office message in effect.
  • Send delivery reports to group owner  Use this option if you want delivery reports to be sent to the group owner, when a message sent to a Group Family group is not delivered. This lets the group owner know that the message was not delivered.
  • Send delivery reports to message originator  Use this option if you want delivery reports to be sent to a message originator, when a message sent to a Group Family group is not delivered. This lets the message originator know that the message was not delivered.
  • Do not send delivery reports  Use this option if you do not want delivery reports to be sent, even if a message sent to a Group Family group is not delivered.
Related Documents

The document was helpful.

Select Rating

I easily found the information I needed.

Select Rating