Disabling or Enabling an Azure guest user
If you want to revoke the access of an Azure guest user from the resources, applications and roles assigned to them, you can disable their account without deleting them with the Disable Account action.
Likewise, once the revoked access rights of a disabled Azure guest user can be reinstated, you can re-enable them with the Enable Account action.
To disable or enable a cloud-only Azure guest user
-
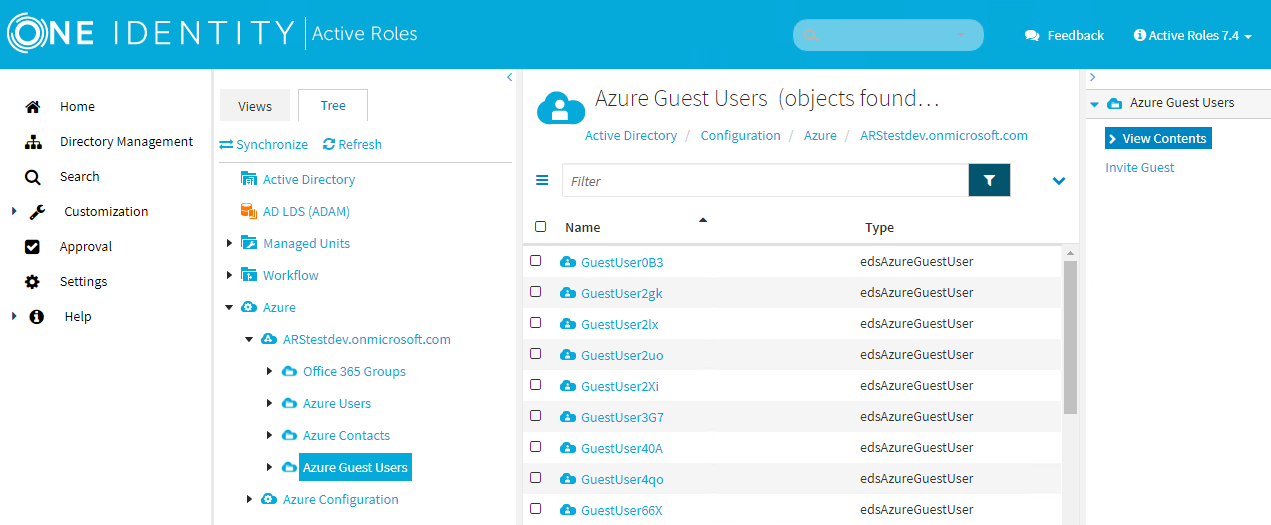
Navigate to Directory Management > Tree > Azure > <azure-tenant-name> > Azure Guest Users.
The list of Azure guest users of the selected tenant is displayed.
Figure 116: Directory Management > Tree View > Azure > <azure-tenant-name> > Azure Guest Users — Listing the Azure guest users in the tenant
-
Select the Azure guest user that you want to enable or disable from the list.
-
Click the applicable option:
-
If the selected Azure guest user is enabled, click Disable Account.
-
If the selected Azure guest user is disabled, click Enable Account.
NOTE: The available option changes depending on the state of the selected guest user account.
-
To confirm disabling/enabling the selected Azure guest user, click Save.
Revoking the session of an Azure guest user
You can revoke the current session of any selected cloud-only Azure guest user of an Azure tenant. When doing so, Active Roles clears the active login tokens of the guest user on all devices they have previously logged in from, forcing them to log in again and validate their credentials.
TIP: If any device that the Azure guest user has been previously logged in from has been compromised (for example, because the guest user has lost their notebook or cellphone), then One Identity recommends revoking their current session.
To revoke the active session of an Azure guest user
-
Navigate to Directory Management > Tree > Azure > <azure-tenant-name> > Azure Guest Users.
The list of Azure guest users of the selected tenant is displayed.
Figure 117: Directory Management > Tree View > Azure > <azure-tenant-name> > Azure Guest Users — Listing the Azure guest users in the tenant
-
Select the Azure guest user whose session you want to revoke.
-
Click Revoke Session.
-
To confirm revoking the session of the selected Azure guest user, click Save.
Resending the invitation to an Azure guest user
It can happen that the invitation email sent out at the end of the Inviting an Azure guest user procedure must be sent again to the Azure guest user (for example, because the guest user cannot access the specified email address for some reason, or because the previous invitation was accidentally deleted). In such cases, you can resend the invitation email.
To resend the invitation to an Azure guest user
-
Navigate to Directory Management > Tree > Azure > <azure-tenant-name> > Azure Guest Users.
The list of Azure guest users of the selected tenant is displayed.
Figure 118: Directory Management > Tree View > Azure > <azure-tenant-name> > Azure Guest Users — Listing the Azure guest users in the tenant
-
Select the Azure guest user for which you want to resend the invitation.
-
Click Resend Invitation.
Active Roles will then resend the invitation to the email address previously specified with the Invite Guest > Email address property.
Renaming an Azure guest user
If an Azure guest user account must be renamed for any reason (for example, to fix a typo or an incorrect first/last name), you can use the Rename option of the Active Roles Web Interface.
To rename an Azure guest user
-
Navigate to Directory Management > Tree > Azure > <azure-tenant-name> > Azure Guest Users.
The list of Azure guest users of the selected tenant is displayed.
Figure 119: Directory Management > Tree View > Azure > <azure-tenant-name> > Azure Guest Users — Listing the Azure guest users in the tenant
-
Select the Azure guest user that you want to rename.
-
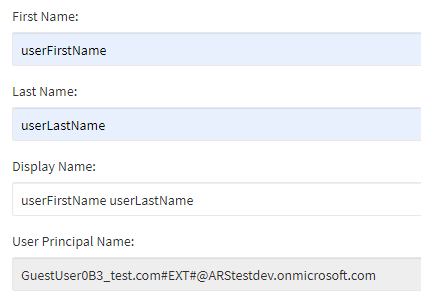
To open the rename form, click Rename.
Figure 120: Azure Guest Users > Rename – Renaming an Azure guest user
-
Update the First Name, Last Name or Display Name of the guest user as needed.
-
To apply your changes, click Finish.
