Configuring the Mail Flow Settings of an Azure guest user
You can set up rules for the emails that the Azure guest user sends or receives in the organization in the Exchange Online Properties > Mail Flow Settings tab of the Active Roles Web Interface. Active Roles supports setting up two types of such rules:
-
Message size settings, specifying the size of the emails that the guest user can send or receive.
-
Email delivery and forwarding settings, allowing the guest user to send emails on behalf of a specified group, or have their received emails automatically forwarded to an additional specified address.
Such mail flow settings are typically configured if the organization enforces specific email messaging policies for users (and guest users).
To configure the Mail Flow Settings for an existing Azure guest user
-
On the Active Roles Web Interface, navigate to Directory Management > Tree View > Azure > <azure-tenant> > Azure Guest Users.
-
From the list in the middle pane, select the Azure guest user that you want to update.
-
To open the Exchange Online properties of the selected Azure guest user, click Exchange Online Properties on the right pane.
-
To open the mail flow settings, click the Mail Flow Settings tab.
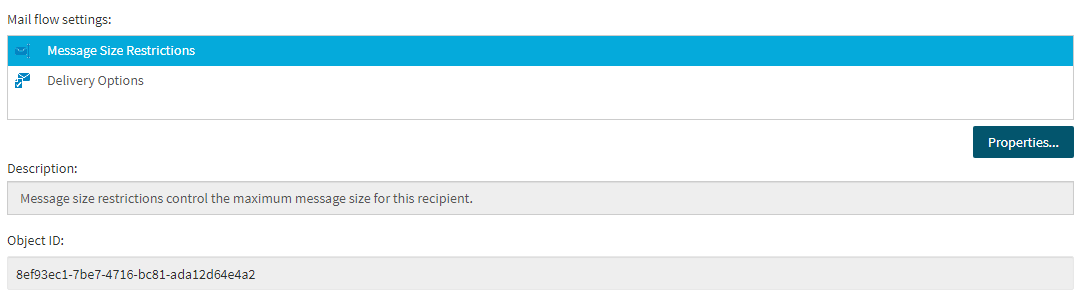
Figure 129: Directory Management > Tree View > Azure > <azure-tenant> > Azure Guest Users > <azure-guest-user> > Exchange Online Properties > Mail Flow Settings — Configuring the message size and forwarding settings of an Azure Guest user
-
Select Message Size Restrictions, and click Properties....
-
Configure the size of the emails (in KB) that are sent or received by the Azure guest user. By default, both the Sending message size and the Receiving message size settings use the default limit of the Azure tenant.
-
To apply your changes and close the Message Size Restrictions dialog, click Save.
-
(Optional) Select Delivery Options, and click Properties... to configure the following email delivery and forwarding settings.
-
Send on Behalf: When configured, the guest user is allowed to send emails on behalf of the specified mailbox or group.
-
Forwarding Address: When configured, the emails received by the guest user are always forwarded to the specified email address.
-
(Optional) To apply any changes you made in the Delivery Options dialog, click Save.
-
To close the Exchange Online Properties window, click Close.
Configuring the Delegation settings of an Azure guest user
You can set up the email account of the selected Azure guest user as a shared mailbox in the Exchange Online Properties > Delegation tab of the Active Roles Web Interface. This is typically performed if the configured email account is used as a group account, such a common support or information email address.
Active Roles supports granting Send as and Full access permissions to the specified users. For more information on shared mailboxes and these permissions, see the Shared mailboxes in Exchange Online page of the official Microsoft documentation.
To configure the email delegation settings of an Azure guest user
-
On the Active Roles Web Interface, navigate to Directory Management > Tree View > Azure > <azure-tenant> > Azure Guest Users.
-
From the list in the middle pane, select the Azure guest user that you want to update.
-
To open the Exchange Online properties of the selected Azure guest user, click Exchange Online Properties on the right pane.
-
To open the delegation settings, click the Delegation tab.
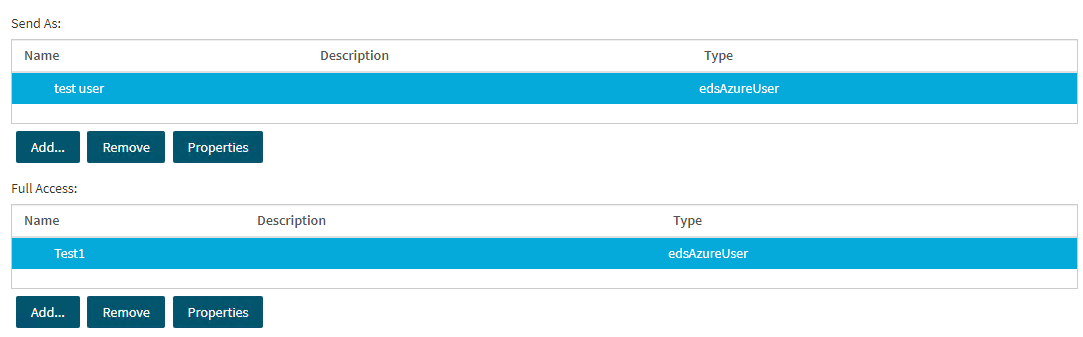
Figure 130: Directory Management > Tree View > Azure > <azure-tenant> > Azure Guest Users > <azure-guest-user> > Exchange Online Properties > Delegation — Accessing the email account delegation settings of an Azure Guest user
-
To delegate Send as permission to a user (or users), click Add... under the Send As list.
-
Select the user(s) you wish to grant Send as rights for the email address of the Azure guest user, then click OK.
-
To delegate Send as permission to a user (or users) click Add... under the Full Access list.
-
Select the user(s) you wish to grant Full access rights for the email address of the Azure guest user, then click OK.
-
To remove a delegated user either from the Send As or Full Access list, click Remove and select the user(s) you want to revoke the permission from.
-
To close the Exchange Online Properties window, click Close.
Configuring Email Address settings for Azure guest users
You can add, edit or remove an email address to or from an Azure guest user in the Exchange Online Properties > E-Mail Addresses tab of the Active Roles Web Interface. Adding, editing, or removing an email address to or from the guest user is typically required when their employment status changes (for example, they are either assigned to a new project, or their contract ends within the organization).
To add a new email address to an Azure guest user
-
On the Active Roles Web Interface, navigate to Directory Management > Tree View > Azure > <azure-tenant> > Azure Guest Users.
-
From the list in the middle pane, select the Azure guest user that you want to update.
-
To open the Exchange Online properties of the selected Azure guest user, click Exchange Online Properties on the right pane.
-
To open the email address settings, click the E-Mail Addresses tab.
Figure 131: Directory Management > Tree View > Azure > <azure-tenant> > Azure Guest Users > <azure-guest-user> > Exchange Online Properties > E-mail Addresses — Accessing the email account settings of an Azure Guest user

-
Click Add.... The E-mail Address dialog then opens.

-
From the E-mail address type list, select the email account type applicable to your organization.
-
In the E-mail address text box, specify the address of the new account.
-
To apply your changes and create the new email account, click OK.
-
To close the Exchange Online Properties window, click Close.
To edit an existing email address of an Azure guest user
-
On the Active Roles Web Interface, navigate to Directory Management > Tree View > Azure > <azure-tenant> > Azure Guest Users.
-
From the list in the middle pane, select the Azure guest user that you want to update.
-
To open the Exchange Online properties of the selected Azure guest user, click Exchange Online Properties on the right pane.
-
To open the email address settings, click the E-Mail Addresses tab.
-
Click Edit.... The E-mail Address dialog then opens.
-
In the E-mail address text box, specify the address of the new account.
NOTE: You cannot modify the E-mail address type of an existing email account. You can only change the existing address.
-
To apply your changes and create the new email account, click OK.
-
To close the Exchange Online Properties window, click Close.
To remove an existing email address of an Azure guest user
-
On the Active Roles Web Interface, navigate to Directory Management > Tree View > Azure > <azure-tenant> > Azure Guest Users.
-
From the list in the middle pane, select the Azure guest user that you want to update.
-
To open the Exchange Online properties of the selected Azure guest user, click Exchange Online Properties on the right pane.
-
To open the email address settings, click the E-Mail Addresses tab.
-
In the E-mail addresses list, select the account you want to remove.
-
Click Remove and confirm the deletion of the account.
-
To close the Exchange Online Properties window, click Close.
Configuring Mailbox Features for Azure guest users
You can enable or disable various Exchange Online mailbox features for the Azure guest user (such as Outlook Mobile Access or support for messaging protocols like IMAP4 or POP3) in the Exchange Online Properties > Mailbox Features tab of the Active Roles Web Interface. This is typically required if the organization supports specific applications and protocols for the user Exchange mailboxes created for the users and guest users.
To enable or disable Exchange Online Mailbox Features for an Azure guest user
-
On the Active Roles Web Interface, navigate to Directory Management > Tree View > Azure > <azure-tenant> > Azure Guest Users.
-
From the list in the middle pane, select the Azure guest user that you want to update.
-
To open the Exchange Online properties of the selected Azure guest user, click Exchange Online Properties on the right pane.
-
To open the mailbox feature settings, click the Mailbox Features tab.
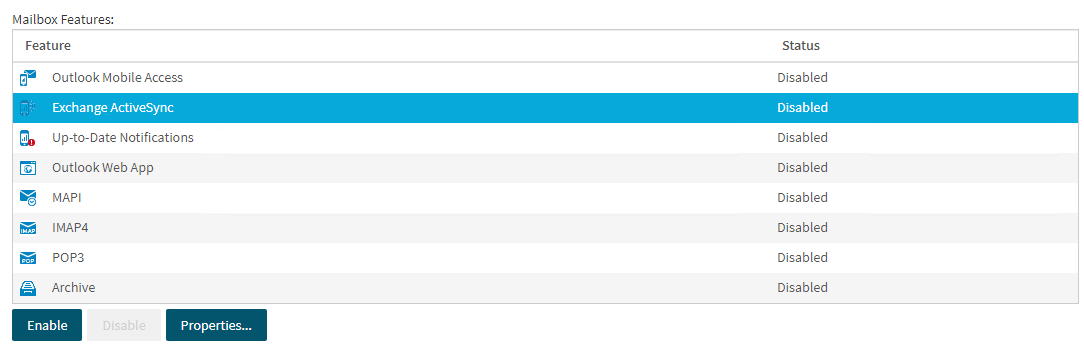
Figure 132: Directory Management > Tree View > Azure > <azure-tenant> > Azure Guest Users > <azure-guest-user> > Exchange Online Properties > Mailbox Features — Configuring mailbox features for an Azure Guest user
-
Select the Exchange Online mailbox feature that you want to enable or disable:
-
Outlook Mobile Access: Enables or disables the Outlook Mobile Access (OMA) mobile browsing service for the account of the Azure guest user. Enabling this settings lets the Azure guest user use OMA on their mobile device to access their account.
-
Exchange ActiveSync: Enables or disables the Exchange ActiveSync synchronization protocol for the account of the Azure guest user. Enabling this setting lets the Azure guest user synchronize their configured mobile device with their mailbox.
-
Up-to-Date Notifications: Enables or disables the Up-to-date (UTD) feature notifications for the account of the Azure guest user.
-
Outlook Web App: Enables or disables access to the browser-based Outlook Web App for the account of the Azure guest user.
-
MAPI, IMAP4, POP3: Enables or disables support for the MAPI, IMAP4 or POP3 protocols for the account of the Azure guest user. If MAPI is enabled, the Azure guest user can access their mailbox through the Outlook desktop app (or other MAPI clients). If IMAP4 or POP3 is enabled, they are also able to access their mailbox with any IMAP4 or POP3 email client.
-
Archive: Enables or disables the archive mailbox feature for the account of the Azure guest user.
-
Click Enable to enable the selected mailbox feature, or Disable to disable it.
-
Once you are done with the configuration, click Close.
-
To close the Exchange Online Properties window, click Close.
