Troubleshooting
If you experience any strange behavior of the web interface, first try to reload the page by holding the SHIFT key while clicking the Reload button of your browser to remove any cached version of the page.
In the unlikely case that One Identity Safeguard for Privileged Sessions (SPS) encounters a problem during the upgrade process and cannot revert to its original state, SPS performs the following actions:
-
Initializes the network interfaces using the already configured IP addresses.
-
Enables SSH-access to SPS, unless SPS is running in sealed mode. That way it is possible to access the logs of the upgrade process that helps the One Identity Support Team to diagnose and solve the problem. Note that SSH access will be enabled on every active interface, even if management access has not been enabled for the interface.
In case the web interface is not available within 30 minutes of rebooting SPS, check the information displayed on the local console and contact our Support Team.
Exporting the configuration of One Identity Safeguard for Privileged Sessions (SPS)
The configuration of One Identity Safeguard for Privileged Sessions (SPS) can be exported (for manual archiving, or to migrate it to another SPS unit) from the Basic Settings > System page. Use the respective action buttons to perform the desired operation.
You also have the option to export the configuration SPS into a local file using the console. For details, see Exporting and importing the configuration of One Identity Safeguard for Privileged Sessions (SPS) using the console.
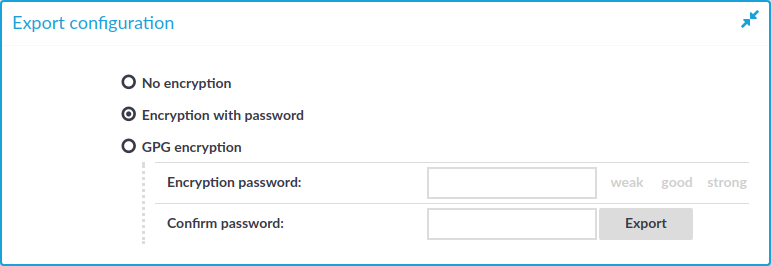
Figure 134: Basic Settings > System — Exporting the SPS configuration
To export the configuration of SPS
-
Navigate to Basic Settings > System > Export configuration.
-
Select how to encrypt the configuration:
-
To export the configuration file without encryption, select No encryption.
|

|
Caution:
One Identity does not recommend exporting the SPS configuration without encryption, as it contains sensitive information such as password hashes and private keys. |
-
To encrypt the configuration file with a simple password, select Encrypt with password and enter the password into the Encryption password and Confirm password fields.
NOTE: One Identity Safeguard for Privileged Sessions (SPS) accepts passwords that are not longer than 150 characters and supports the following characters:
-
To encrypt the configuration file with GPG, select GPG encryption. Note that this option uses the same GPG key that is used to encrypt automatic system backups, and is only available if you have uploaded the public part of a GPG key to SPS at Basic Settings > Management > System backup. For details, see Encrypting configuration backups with GPG.
-
Click Export.
NOTE: The exported file is a gzip-compressed archive. On Windows platforms, it can be decompressed with common archive managers such as the free 7-Zip tool.
The name of the exported file is <hostname_of_SPS>-YYYMMDDTHHMM.config, the -encrypted or -gpg suffix is added for password-encrypted and GPG-encrypted files, respectively.
Importing the configuration of One Identity Safeguard for Privileged Sessions (SPS)
The configuration of One Identity Safeguard for Privileged Sessions (SPS) can be imported from the Basic Settings > System page. Use the respective action buttons to perform the desired operation.
You also have the option to import configuration of SPS from a local file using the console. For details, see Exporting and importing the configuration of One Identity Safeguard for Privileged Sessions (SPS) using the console.
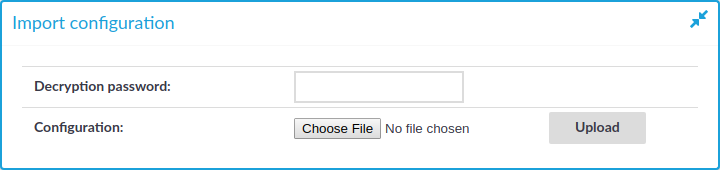
Figure 135: Basic Settings > System — Importing the SPS configuration
|
|
Caution:
It is not possible to import the configuration of an older major release (for example, 1.0) into a newer release (for example, 2.0). |
To import the configuration of SPS
-
|
|
Caution:
Do not export or import configuration between a physical SPS deployment and a virtual one. Because of the differences and limitations between physical and virtual appliances, configure the virtual appliance from scratch to ensure proper functionality. When you migrate a virtual SPS to another one, you can export and import the configuration. |
Navigate to Basic Settings > System > Import configuration.
-
Click Browse and select the configuration file to import.
-
Enter the password into the Encryption password field and click Upload.
NOTE: One Identity Safeguard for Privileged Sessions (SPS) accepts passwords that are not longer than 150 characters and supports the following characters:
Managing the One Identity Safeguard for Privileged Sessions (SPS) license
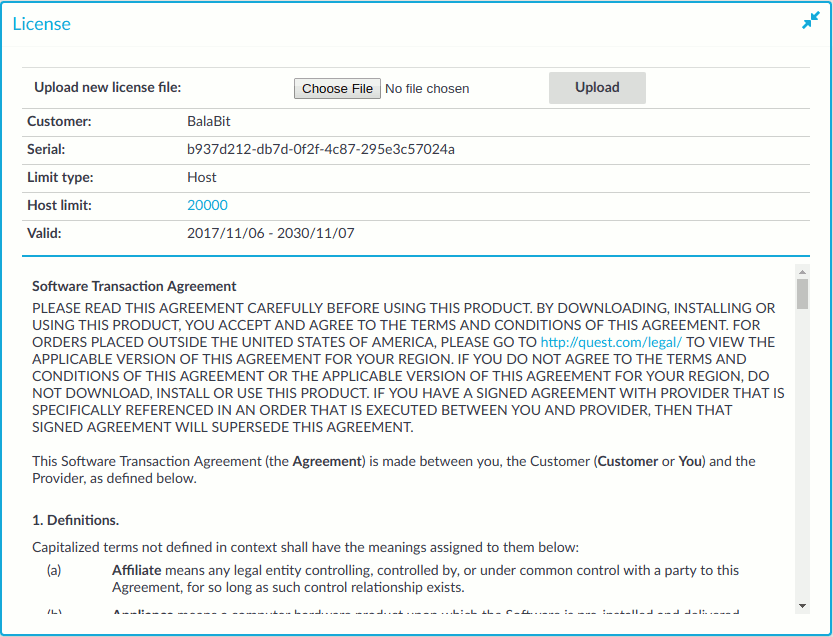
Information of the current license of One Identity Safeguard for Privileged Sessions (SPS) is displayed on the Basic Settings > System > License page. The following information is displayed:
Figure 136: Basic Settings > System > License — Updating the license
-
Customer: The company permitted to use the license (for example Example Ltd.).
-
Serial: The unique serial number of the license.
-
Limit type:
-
Host: Limits the number of servers (individual IP addresses) that can be connected through SPS.
-
Session: Limits the number of concurrent sessions (parallel connections) that can pass through SPS at a time (for example 25). SPS will reject additional connection requests until an already established connection is closed.
-
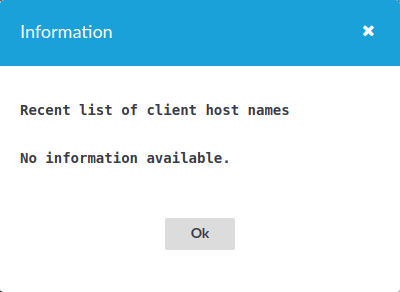
Limit: The actual value of the session or host limit. To list which hosts SPS counts against this limit, click the on the value of the limit.
-
Valid: The period in which the license is valid. The dates are displayed in YYYY/MM/DD format.
The full text of the End User License Agreement is also displayed here.
SPS starts sending automatic alerts daily, 60 days before the license expires. An alert is sent also when the number of protected servers exceeds 90% of the limit set in the license.
