Chat now with support
Chat with Support

Active Roles 7.5 - Administration Guide

Introduction About Active Roles Getting Started Rule-based Administrative Views Role-based Administration
Access Templates as administrative roles Access Template management tasks Examples of use Deployment considerations Windows claims-based Access Rules
Rule-based AutoProvisioning and Deprovisioning
About Policy Objects Policy Object management tasks Policy configuration tasks
Property Generation and Validation User Logon Name Generation Group Membership AutoProvisioning E-mail Alias Generation Exchange Mailbox AutoProvisioning AutoProvisioning for SaaS products OneDrive Provisioning Home Folder AutoProvisioning Script Execution Office 365 and Azure Tenant Selection User Account Deprovisioning Office 365 Licenses Retention Group Membership Removal Exchange Mailbox Deprovisioning Home Folder Deprovisioning User Account Relocation User Account Permanent Deletion Group Object Deprovisioning Group Object Relocation Group Object Permanent Deletion Notification Distribution Report Distribution
Deployment considerations Checking for policy compliance Deprovisioning users or groups Restoring deprovisioned users or groups Container Deletion Prevention policy Picture management rules Policy extensions
Workflows
Understanding workflow Workflow activities overview Configuring a workflow
Creating a workflow definition Configuring workflow start conditions Configuring workflow parameters Adding activities to a workflow Configuring an Approval activity Configuring a Notification activity Configuring a Script activity Configuring an If-Else activity Configuring a Stop/Break activity Configuring an Add Report Section activity Configuring a Search activity Configuring CRUD activities Configuring a Save Object Properties activity Configuring a Modify Requested Changes activity Enabling or disabling an activity Enabling or disabling a workflow Using the initialization script
Example: Approval workflow E-mail based approval Automation workflow Activity extensions
Temporal Group Memberships Group Family Dynamic Groups Active Roles Reporting Management History
Understanding Management History Management History configuration Viewing change history
Workflow activity report sections Policy report items Active Roles internal policy report items
Examining user activity
Entitlement Profile Recycle Bin AD LDS Data Management One Identity Starling Management One Identity Starling Two-factor Authentication for Active Roles Managing One Identity Starling Connect Azure AD, Office 365, and Exchange Online management
Configuring Active Roles to manage hybrid AD objects Managing Hybrid AD Users Unified provisioning policy for Azure O365 Tenant Selection, Office 365 License Selection, and Office 365 Roles Selection, and OneDrive provisioning Office 365 roles management for hybrid environment users Managing Office 365 Contacts Managing Hybrid AD Groups Managing Office 365 Groups Managing Azure Security Groups Managing cloud-only Azure users Managing cloud-only Azure guest users Managing cloud-only Azure contacts Changes to Active Roles policies for cloud-only Azure objects Managing room mailboxes
Managing Configuration of Active Roles
Connecting to the Administration Service Adding and removing managed domains Using unmanaged domains Evaluating product usage Creating and using virtual attributes Examining client sessions Monitoring performance Customizing the console Using Configuration Center Changing the Active Roles Admin account Enabling or disabling diagnostic logs Active Roles Log Viewer
SQL Server Replication Appendix A: Using regular expressions Appendix B: Administrative Template Appendix C: Communication ports Appendix D: Active Roles and supported Azure environments Appendix E: Enabling Federated Authentication Appendix F: Active Roles integration with other One Identity and Quest products Appendix G: Active Roles integration with Duo MFA Appendix H: Active Roles integration with Okta MFA

Validating Duo Multi-Factor Authentication

Follow the steps to validate Duo Multi-Factor Authentication (MFA) in the Active Roles Web Interface.

Prerequisites

To validate Duo MFA in Active Roles Web Interface

  1. In the Active Roles Web Interface, open the Administration site (.\ARWebAdmin).

  2. In the RSTS login page, set the Authentication Provider to External Federation.

    Figure 152: Logging in to RSTS with an example user

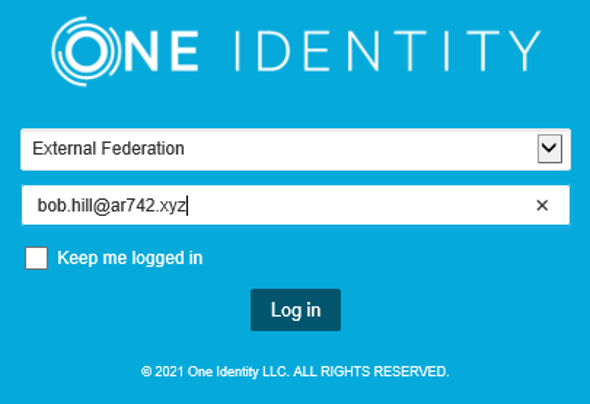
  3. Enter the credentials of the user created in Duo.

  4. You are redirected to Duo. Log in with the same credentials.

  5. To add and verify the identity of the user account on different mobile devices, see Enrollment Guide in the Duo Documentation.

  6. Once you added the user account to the Duo Mobile app, the Active Roles Web Interface opens.

  7. (Optional) Select Remember Me to reduce the amount of all subsequent logins.

Appendix H: Active Roles integration with Okta MFA

Active Roles can be integrated with Okta Multi-Factor Authentication (MFA) to complement and extend identity and access management. For more information about Okta, see https://www.okta.com/.

Okta is a cloud-based identity service offering identity, authentication, and access control functions as a service. To support MFA, Active Roles integrates with the Okta identity management service. This enables you to leverage an additional out-of-band factor (typically through the user’s registered smartphone) when authenticating the user. The additional factor is processed in-line with the connection, so users do not have to switch to an external application to process the additional factor. This results in a seamless and efficient user experience that is readily accepted by the users.

Active Roles can interact with your Okta account and can automatically request strong MFA for your users who are accessing the servers and services protected by Active Roles. Okta supports a broad range of authentication methods, including software, hardware, and mobile-based solutions.

Configuring Okta for Active Roles

To create and configure a new Active Roles application in Okta, see Integrate your SAML app in the Okta Admin Documentation.

Prerequisites

Integrating Active Roles with Okta

To integrate Active Roles with Okta, configure the RSTS Api Admin application.

Prerequisites

To configure RSTS Api Admin for Integrating Active Roles with Okta

  1. In C:\Program Files\One Identity\Active Roles\<version>\Web\RSTS, Open the RStsApiAdmin application.
  2. In Connection Settings, enter localhost in the Server field and click Login.
  3. In the Directory Service Providers pane, right-click and select New to open the Add Directory Service Provider window.
  4. Select RSts.Sts.RelyingPartyConfiguration and click OK.
  5. In the Directory Service Providers pane, open the Standard Options tab to enter the following values.

    • ID: Preferred name, for example Okta.

    • Associated Directory ID: This field is case sensitive, for example ad.

  6. In the Directory Service Providers pane, open the Provider Specific Options tab to enter the following values.

    • Realm: Enter your valid email address domain (on-premises or Office 365).

    • Federation metadata: Insert the metadata obtained during the Okta configuration. For more information, see Integrate your SAML app in the Okta Admin Documentation.

  7. Click Save.
Related Documents

The document was helpful.

Select Rating

I easily found the information I needed.

Select Rating