You can deprovision users with linked mailboxes by using the Deprovision action of the Active Roles Web Interface. When doing so, Active Roles, by default:
-
Disables the user account, and resets the user password to a random value.
-
Removes the user from all assigned security and distribution groups.
-
Disables the linked mailbox.
-
Disables the home folder of the user.
Optionally, deprovisioning also lets you relocate deprovisioned users to a specific folder, and even schedule them for deletion after some time.
One Identity typically recommends deprovisioning users instead of deleting them and their mailboxes, if the user is affected by an organizational change, suspension, or longer periods of time off work. You can undo the effects of deprovisioning later and reinstate the user with the Undo Deprovisioning action of the Active Roles Web Interface.
When a user with a linked mailbox configured via Exchange Resource Forest Management (ERFM) is deprovisioned, Active Roles runs all deprovisioning policies applied to the Active Directory (AD) container holding the shadow account, including any mailbox deprovisioning policies in effect in your organization.
TIP: Besides deprovisioning, you can also disable users by using the Disable Account action. Disabling a user account with a linked mailbox prevents the user from logging in and accessing their resources, but it does not remove the user from their groups, and does not disable the mailbox and the user home folder. One Identity recommends disabling user accounts instead of completely deprovisioning them if the organization still needs to access the user resources (such as the home folder or the mailbox).
To disable a user account, in the Active Roles Web Interface, navigate to the OU where your user is stored in the Directory Management > Tree > Active Directory node, select the user, and in the list of actions available for the selected user, click Disable Account.
Prerequisites
To deprovision users with linked mailboxes configured via ERFM, make sure that the mailbox deprovisioning policies of your organization (for example, the built-in Exchange Mailbox Deprovisioning policy) are applied to the container that holds the shadow accounts in the resource forest, instead of the container of the master user accounts in the account forest. By default, the deprovisioning workflow runs the following built-in policies for users with linked mailboxes:
For more information on deprovisioning policies, see Deprovisioning Policy Objects.
To deprovision a user with a linked mailbox
-
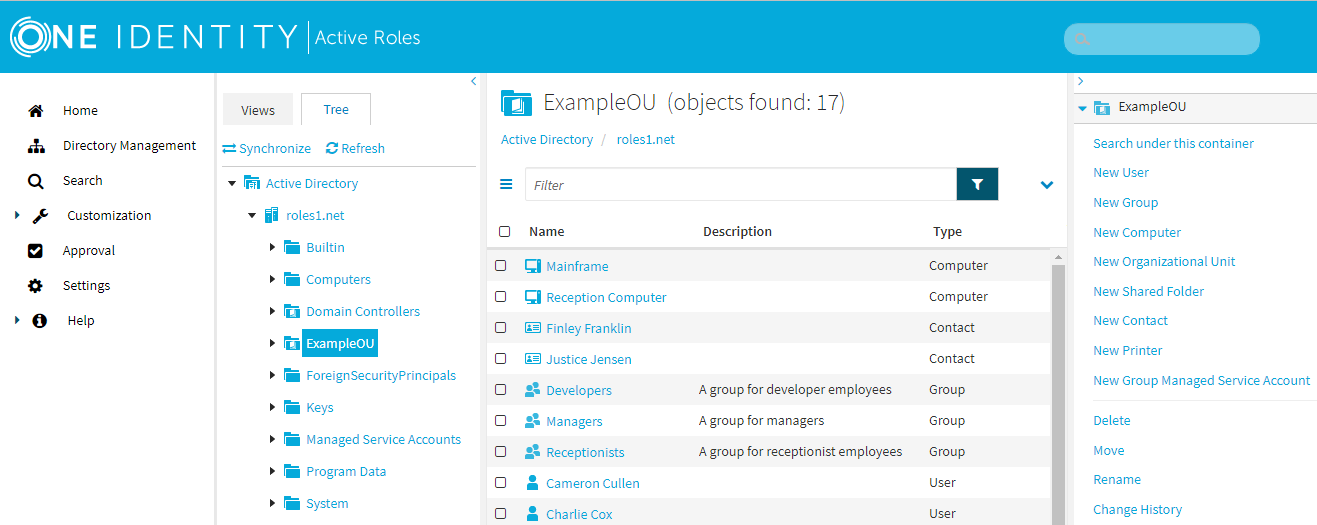
In the Active Roles Web Interface, under Directory Management > Tree > Active Directory, navigate to the OU for which ERFM is configured.
Figure 145: Active Roles Web Interface – Navigating to the OU supporting linked mailboxes
-
Select the master user account that you want to deprovision, and in the list of available actions, click Deprovision.
-
To confirm deprovisioning, click OK.
Active Roles then performs deprovisioning of the master user account and its associated shadow account. After the process is completed, it displays the operation summary of deprovisioning.
TIP: To verify that Active Roles also deprovisioned the shadow account, in the Active Roles Web Interface, navigate to the user container of your shadow accounts in the Directory Management > Tree > Active Directory node of the resource forest, select the shadow account, and from the list of actions available for the shadow account, click Deprovisioning Results.
You can undo the deprovisioning of users with linked mailboxes by using the Undo Deprovisioning action of the Active Roles Web Interface. When re-provisioning a user, Active Roles rolls back the changes of the deprovisioning policies in effect in your organization by:
-
Restoring access to the user account.
-
Reassigning the user to all security and distribution groups it was originally a member of.
-
Re-enabling the linked mailbox.
-
Re-enabling the home folder of the user.
Re-provisioning a deprovisioned user is typically required if the person is reinstated in your organization: for example, their suspension is lifted or they are returning to work from an extended leave.
When re-provisioning a user with a linked mailbox, Active Roles first re-provisions the master account, then re-provisions the shadow account. After the shadow account is re-provisioned, the linked mailbox also returns to its original provisioned state.
Prerequisites
Active Roles can perform the Undo Deprovisioning action on the shadow account of a re-provisioned master account only if the Active Directory (AD) container holding the deprovisioned master accounts is in the scope of the Built-in Policy - ERFM - Mailbox Management policy, or a copy of that policy.
Therefore, if the deprovisioning workflow of your organization moves deprovisioned master accounts to a container separate from provisioned master accounts, make sure that the Built-in Policy - ERFM - Mailbox Management policy is also applied to the container where the deprovisioned master accounts are stored. For more information on configuring the policy, see Applying the ERFM Mailbox Management policy to an OU.
To undo the deprovisioning of a user with a linked mailbox
-
In the Active Roles Web Interface, under Directory Management > Tree > Active Directory, navigate to the OU for which ERFM is configured.
Figure 146: Active Roles Web Interface – Navigating to the OU supporting linked mailboxes
-
Select the deprovisioned master user account for which you want to undo deprovisioning. Then, in the list of available actions, click Undo Deprovisioning.
-
To confirm the restoration of the user account, click OK.
-
In the Password Options dialog, configure the password settings of the restored user:
-
Leave the password unchanged: The user account will be re-provisioned with its original password. Select this option if the user password will be reset by an organizational workflow outside the scope of Active Roles (for example by helpdesk, or another password management solution).
-
Reset the password: Select this option to immediately change the password of the re-provisioned user in Active Roles, either by specifying a new password manually, or generating one that meets the password policy requirements of your organization.
To clear the specified password, click Clear. To spell out each character of the password for clarification, click Spell out.
Figure 147: Active Roles Web Interface – Spelling out the characters of the generated or specified password

-
Account options: Use these options to specify additional security settings for the user (for example, to have them change the configured password during their next login attempt, or have the configured password expire after some time).
-
To apply your changes, click OK.
Active Roles then re-provisions the master user account, the shadow user account and the linked mailbox.
You can delete users with linked mailboxes by using the Delete action of the Active Roles Web Interface. When doing so, Active Roles deletes the master account, then disables the linked mailbox of the corresponding shadow account.
|

|
CAUTION: Hazard of data loss!
After you delete a user, it cannot be recovered. Therefore, One Identity recommends either deprovisioning or disabling user accounts before permanently deleting them. For more information on deprovisioning users with linked mailboxes, see Deprovisioning a user with a linked mailbox. |
To delete a user with a linked mailbox
-
In the Active Roles Web Interface, under Directory Management > Tree > Active Directory, navigate to the OU for which ERFM is configured.
Figure 148: Active Roles Web Interface – Navigating to the OU supporting linked mailboxes
-
Select the master user account you want to delete.
-
In the list of actions available for the selected master account, click Delete.
-
To confirm deletion, in the pop-up dialog, click OK. To deprovision a user instead of permanently deleting them, click Deprovision.
Active Roles then deletes the master account in the account forest, then disables the linked mailbox of the associated shadow account in the resource forest.
Active Roles supports remote mailboxes, that is, managing cloud-only Exchange Online mailboxes assigned to on-premises users. Configuring cloud mailboxes for on-premises users allows your organization to store user mailboxes and mailbox data in the Exchange Online cloud, even if the user accounts in your organization are not hybrid or cloud-only user accounts.
By configuring remote mailboxes for your on-premises users, you can:
-
Improve mailbox availability and accessibility.
-
Improve data security by storing mailbox content in the Exchange Online cloud.
-
Improve mailbox security via the integration of your on-premises Active Directory environment with Exchange Online.
-
Use the flexibility and scalability of Exchange Online cloud mailboxes.
-
Use the feature set of Microsoft 365 (such as real-time collaboration, document sharing, simultaneous editing, and so on).
-
Use the administration automation features of Exchange Online.
To assign a remote mailbox for an on-premises user, you must set the user to a mail-enabled state, then assign a cloud email address to them in the Active Roles Console.
NOTE: Alternatively, Active Roles supports configuring remote mailboxes for existing on-premises users by converting them to hybrid users. After the conversion, you can configure and manage the remote mailbox settings of the new hybrid users either via the Active Roles Console or in the Active Roles Web Interface.
