Viewing or modifying the organization settings of a shared mailbox
You can view or modify the organization settings of a shared mailbox with the Organization Settings option of the Active Roles Web Interface.
To view or modify the organization settings of a shared mailbox
-
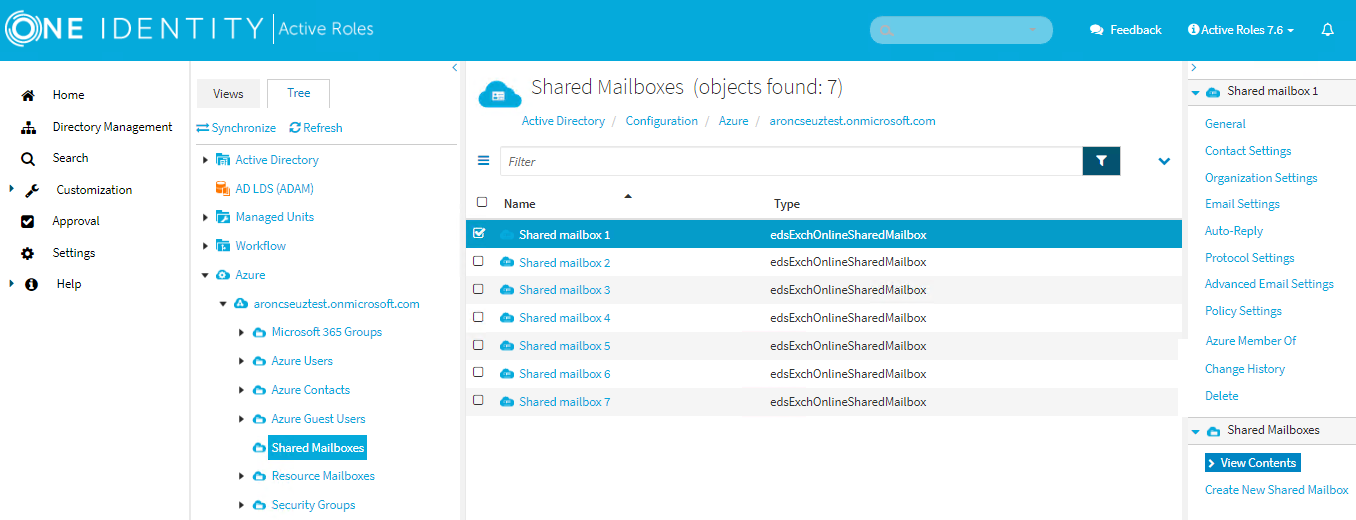
Navigate to Directory Management > Tree > Azure > <azure-tenant-name> > Shared Mailboxes.
Figure 204: Directory Management > Tree > Azure > <azure-tenant-name> > Shared Mailboxes — Listing the shared mailboxes in the tenant
-
Select the shared mailbox whose organization settings you want to view or modify.
-
In Organization Settings, set the following organization settings of the shared mailbox:
-
(Optional) Job title
-
(Optional) Department
-
(Optional) Company name
-
(Optional) Manager:
-
To add or change the manager of the shared mailbox, click Modify, select the user and click OK.
-
To view or modify the Azure properties of the user, click Properties.
-
To delete the manager of the shared mailbox, click Remove.
-
To apply your changes, click Save.
Viewing or modifying the email settings of a shared mailbox
You can view or modify the email settings of a shared mailbox with the Email Settings option of the Active Roles Web Interface.
To view or modify the email settings of a shared mailbox
-
Navigate to Directory Management > Tree > Azure > <azure-tenant-name> > Shared Mailboxes.
Figure 205: Directory Management > Tree > Azure > <azure-tenant-name> > Shared Mailboxes — Listing the shared mailboxes in the tenant
-
Select the shared mailbox whose email settings you want to view or modify.
-
In Email Settings, set the following email settings of the shared mailbox:
-
Primary SMTP address: The primary Simple Mail Transfer Protocol (SMTP) address of a user account to be used for server-to-server authorization or access delegation. You cannot modify this value because it is filled automatically.
-
Email addresses:
-
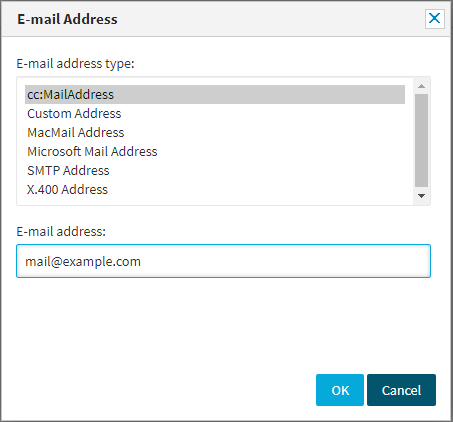
To add additional email addresses (also called proxy addresses) for the shared mailbox, click Add, select the E-mail address type, enter the E-mail address, and click OK.
NOTE: The first SMTP address that you add will be the primary SMTP address (also called the primary email address or the default reply address).
-
To modify an email address that is already added to the list of email addresses, select it and click Edit, modify the E-mail address, and click OK.
NOTE: You cannot modify the E-mail address type of an existing email account. You can only modify the existing address.
-
To remove an email address that is already added to the list email addresses, select it and click Remove.
-
Accept messages from all senders (default: selected)
-
To only accept messages from selected senders, clear the check box and click Add. Select the users you want to accept messages from, and click OK.
-
To remove senders from the list of users you want to accept messages from, select the users and click Remove.
-
Block messages from none (default: selected)
-
To block messages from selected senders, clear the check box and click Add. Select the users you do not want to accept messages from, and click OK.
-
To remove senders from the list of users you do not want to accept messages from, select the users and click Remove.
-
Send message maximum size (0-150 000 KB): Set the maximum size of messages in KB. The default value is 35840 KB.
-
Received message maximum size (0-150 000 KB): Set the maximum size of received messages in KB. The default value is 36864 KB.
-
Maximum recipients (0-1000): Set the maximum number of recipients. The default value is 500.
-
Forwarding address: Specify whether to forward received messages from the shared mailbox to another email address.
-
To disable message forwarding, select None (default: selected).
-
To enable message forwarding, select Forward to, and enter the email address you want the shared mailbox to forward received messages to.
-
To modify the forwarding address, click Modify.
-
Deliver messages to both forwarding address and mailbox (default: not selected)
To forward messages that the shared mailbox receives to the forwarding address you set, select this check box.
-
To apply your changes, click Save.
Viewing or modifying the auto-reply settings of a shared mailbox
You can view or modify the automatic reply (out of office) settings of a shared mailbox with the Auto-Reply option of the Active Roles Web Interface.
To view or modify the auto-reply settings of a shared mailbox
-
Navigate to Directory Management > Tree > Azure > <azure-tenant-name> > Shared Mailboxes.
Figure 206: Directory Management > Tree > Azure > <azure-tenant-name> > Shared Mailboxes — Listing the shared mailboxes in the tenant
-
Select the shared mailbox whose automatic reply settings you want to view or modify.
-
In Auto-Reply, set the following automatic reply settings of the shared mailbox:
-
Automatic replies (default: not selected)
To send an automatic reply to all senders inside your organization from the shared mailbox, select this check box and enter an automatic reply.
-
Send automatic replies to senders outside this organization (default: not selected)
To send an automatic reply to all senders outside of your organization from the shared mailbox, select this check box and enter an automatic reply.
To specify the senders outside of your organization, you can set one of the following:
-
To apply your changes, click Save.
Viewing or modifying the protocol settings of a shared mailbox
You can view or modify the protocol settings of a shared mailbox with the Protocol Settings option of the Active Roles Web Interface.
To view or modify protocol settings of a shared mailbox
-
Navigate to Directory Management > Tree > Azure > <azure-tenant-name> > Shared Mailboxes.
Figure 207: Directory Management > Tree > Azure > <azure-tenant-name> > Shared Mailboxes — Listing the shared mailboxes in the tenant
-
Select the shared mailbox whose protocol settings you want to view or modify.
-
In Protocol Settings, set the following protocol settings of the shared mailbox:
-
Outlook Web (default: selected)
-
Outlook Desktop (default: selected)
-
Exchange Web Services (default: selected)
-
Mobile Exchange (default: selected)
-
IMAP (default: selected)
-
POP3 (default: selected)
-
To apply your changes, click Finish.
