On the default log level, One Identity Safeguard for Privileged Sessions (SPS) logs everything that the plugin writes to stdout and stderr. Log message lines are prefixed with the session ID of the proxy, which makes it easier to find correlating messages.
To transfer information between the methods of a plugin (for example, to include data in a log message when the session is closed), you can use a cookie.
If an error occurs while executing the plugin, SPS automatically terminates the session.
NOTE: This error is not visible in the verdict of the session. To find out why the session was terminated, you have to check the logs.
One Identity Safeguard for Privileged Sessions (SPS) periodically creates reports on the activity of the administrators, its system information, as well as the processed traffic. In addition, you can use the connection database for creating custom reports from connection statistics.
You can specify the following access rights on the Reporting > Configuration page:
- Reporting > Configuration allows you to configure new reports.
- Reporting > Content subchapters allows you to access and create content-based report subchapters.
- Reporting > Search subchapters allows you to access and create search-based report subchapters.
- Reporting > Advanced statistics allows you to access and create advanced statistics report subchapters.
- Reporting > Reports allows you to create the available reports.
For more information on configuring user rights, see Managing user rights and usergroups.
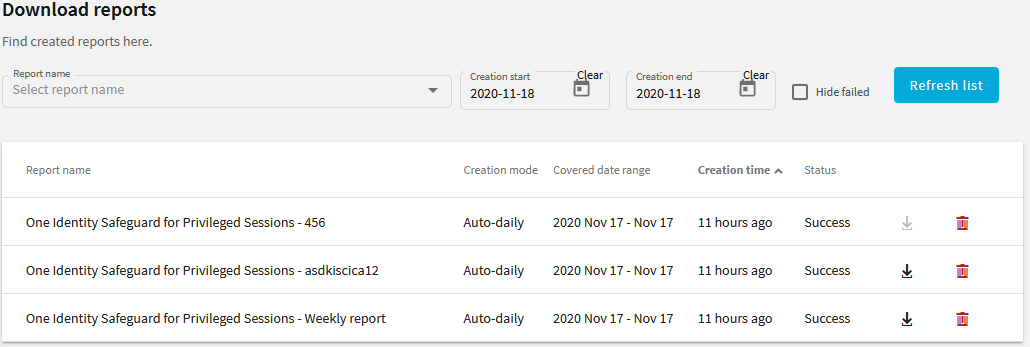
To access reports, select Reporting > Download reports from the Main Menu. The reports are displayed on a search interface. For more information on using and customizing this interface, see Using the internal search interface.
The reports are also sent to the email address set at Basic Settings > Management > Mail settings > Send reports to, unless specified otherwise in the configuration of the report.
NOTE: If the Basic Settings > Management > Mail settings > Send reports to address is not set, the system report is sent to the SPS administrator's email address.
Figure 339: Reporting > Download reports — Browsing reports
Reports can be generated for fixed periods:
-
Daily reports are generated every day at 00:01.
-
Weekly reports are generated every week on Monday at 00:01.
-
Monthly reports are generated on the first day of every month at 00:01.
To access the reports from the SPS web interface, the user must have the appropriate privileges (for custom reports, the default requirement is membership in the search group). In addition, individual reports might have different access requirements configured. For more information on configuring user rights, see Managing user rights and usergroups.
The operational reports of One Identity Safeguard for Privileged Sessions (SPS) are available in Adobe Portable Document Format (PDF), and contain the following information:
-
Configuration changes: Lists the number of SPS configuration changes per page and per user. The frequency of the configuration changes is also displayed on a chart.
-
Main reports: Contains statistics about the total traffic that passed SPS, including the number of sessions that passed for every connection policy, the used usernames, clients, and servers, and so on.
NOTE: Connections that are still in progress when the report is generated are excluded from the report. Sessions that are being indexed and reporting jobs are listed in the Sessions with in progress indexing or reporting jobs section of the report.
-
Reports by connection: Contains separate statistics about every connection policy configured on SPS.
-
System health information: Displays information about the filesystem and network use of SPS, as well as the average load.
To configure a report, create a chapter and assign any of the existing subchapters to it. The following sources (statistics or other queries) are available as reporting subchapters:
To configure SPS to create custom reports
-
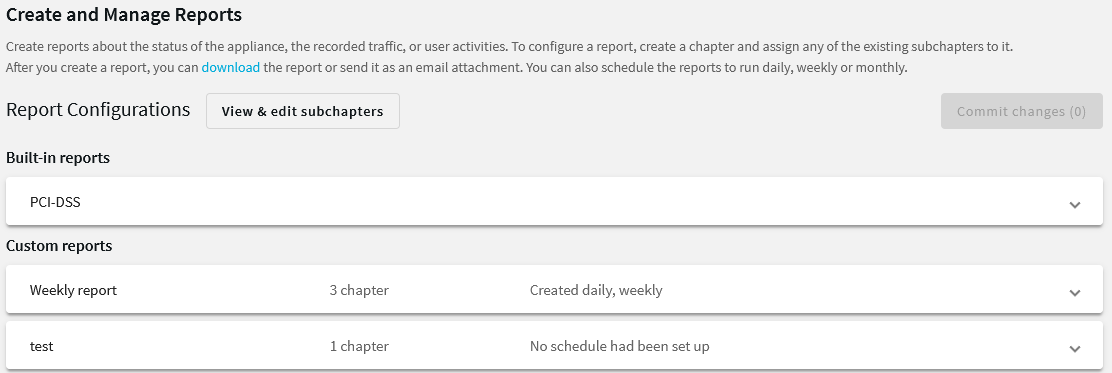
Login to the SPS web interface, and navigate to Reporting > Create & Manage Reports.
Figure 340: Reporting > Create & Manage Reports — Configuring custom reports
-
Click Create new report configuration and enter a name for the custom report.
Figure 341: Reporting > Create & Manage Reports — Configuring custom reports
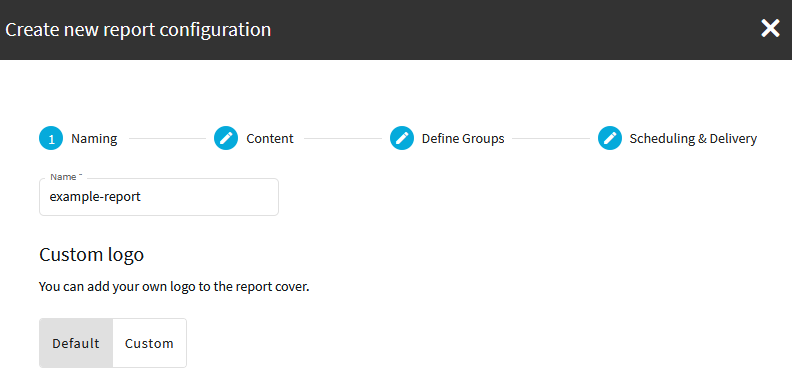
If you want to have the logo of your organization on the cover page of the report (instead of the One Identity logo), select Custom, select your logo file, then click Upload. You can upload GIF, JPEG, and PNG images. SPS will automatically resize the image to fit on the cover page.
-
Select Create new chapter, enter a name for the chapter. Repeat this step to create further chapters if needed.
-
Select Add new subchapter to add various reports and statistics to the chapter. Select any of the existing subchapters or create a new subchapter.
Figure 342: Reporting > Configuration > Add new subchapter — Adding subchapters to reports
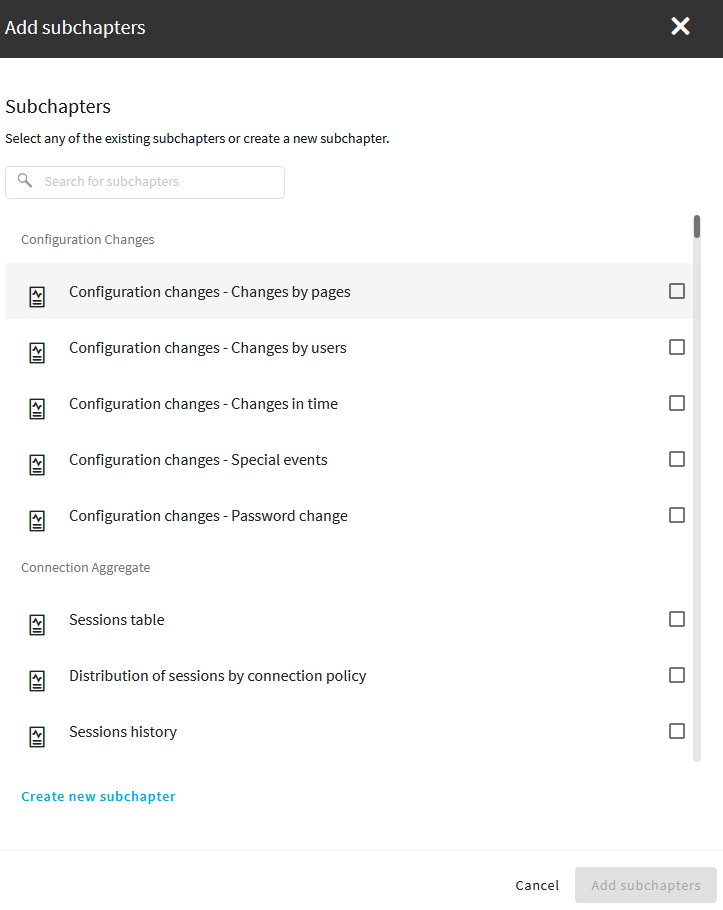
NOTE: When creating a subchapter that searches for keywords in HTTP, only the timestamp of the results will be visible in the report, without data.
-
Once selected, use drag and drop to change the order of the subchapters if needed.
-
By default, members of the report group can access the custom reports through the SPS web interface. To change this, enter the name of a different group into the Groups field.
NOTE: Members of the listed groups can access only these custom reports even if their groups do not have read access to the Reporting > Download reports page. However, only those reports will be listed, to which their group has access to.
-
Select how often SPS creates the report from the Scheduling field. Weekly reports are created on Mondays, while monthly reports on the first day of the month. If you want to create the report only manually, leave these fields empty.
-
By default, SPS sends out the reports in email to the address set in the Basic Settings > Management > Mail settings > Send reports to field.
NOTE: If this address is not set, the report is sent to the SPS administrator's email address.
-
To disable email sending, clear the Deliver in email option.
-
To email the reports to a different address, select Custom, and enter the email address where the reports should be sent. Click Add email to list multiple email addresses if needed.
-
Click Create report.
