-
In the Active Roles Console, in the Active Directory (AD) tree, navigate to Configuration > Access Templates.
-
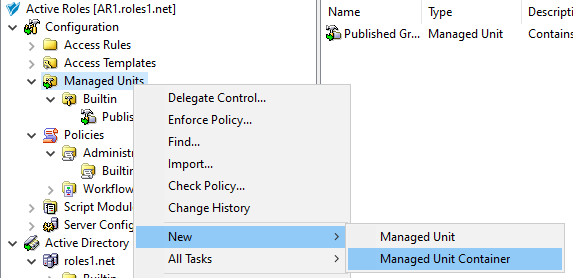
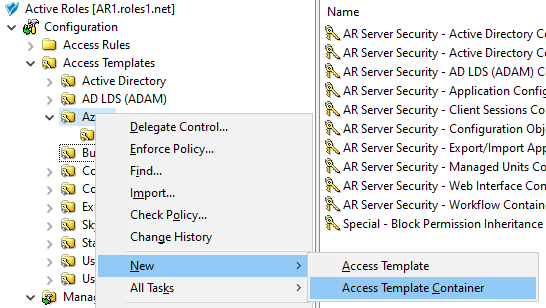
Create a new container where you will store the AT. In this example, the container is created in the Azure sub-container of the Access Templates node. Right-click Access Templates > Azure, then click New > Access Template Container.
Figure 127: Active Roles Console – Launching the Access Templates Container dialog
-
In the Access Templates Container dialog, specify a Name, and optionally, a Description for the new AT container.
-
To create the new container, click Next then Finish.
-
To start configuring the new AT, right-click the Allowed-Azure-Resources container, then click New > Access Template.
-
In the New Object - Access Template dialog, specify a Name, and optionally, a Description for the new AT.
To continue with specifying the required permissions, click Next.
-
In the Access Template permission entries step, click Add. Then, in the Select object classes to apply permissions onto dialog, select Only the following classes, and the EDS-Azure-User-Container class from the list.
TIP: If you cannot find the class in the list, select Show all possible classes.
Figure 128: New Access Template – Selecting the Azure Users container class to allow reading Azure users

To continue, click Next.
-
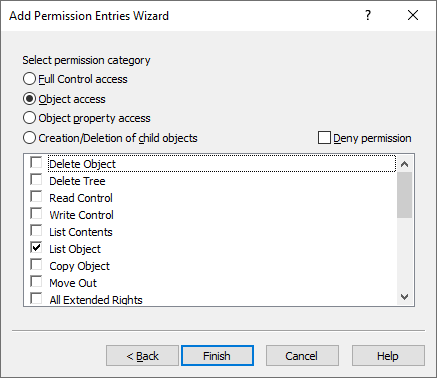
In the Select permission category step, select Object access, then select the List Object access permission from the list.
Figure 129: New Access Template – Specifying the permission to read allowed objects in the Azure Users container
To finish configuring the permission, click Finish. Then, in the Access Template permission entries step, click Add again.
-
In the Select object classes to apply permissions onto dialog, select Only the following classes, then the EDS-Azure-User-Container class from the list again. To continue, click Next.
-
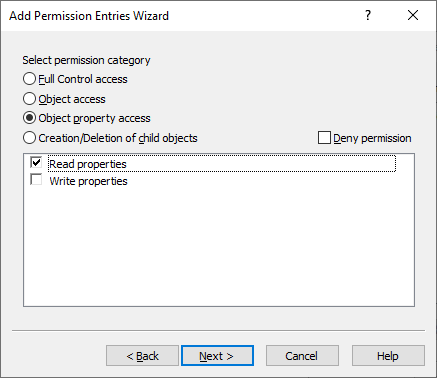
In the Select permission category step, select Object property access, then select the Read properties access permission from the list.
Figure 130: New Access Template – Specifying the permission to read the properties of the Azure Users container
To continue, click Next.
-
In the Select object properties step, leave the All properties option selected, then click Finish. The two permissions configured in the previous steps then appear in the Access Template permission entries step.
Figure 131: New Access Template – Listing the permissions to properly read the Azure Users container

-
To finish configuring the permissions of the AT, click Next, then Finish.
-
In the Create in step, select Display the object properties when this wizard closes, and click Finish.
-
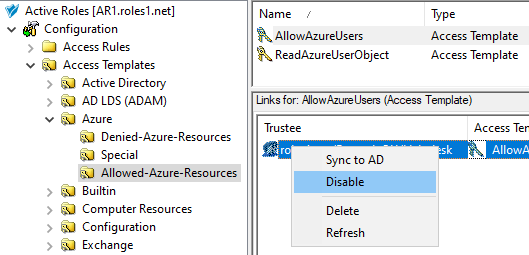
To assign the AT to the helpdesk users and the Azure user container of the Azure tenant, in the Properties page that appears, click Administration > Links.
-
In the Links dialog, click Add, then specify the Azure Users container as the directory object managed by this AT.
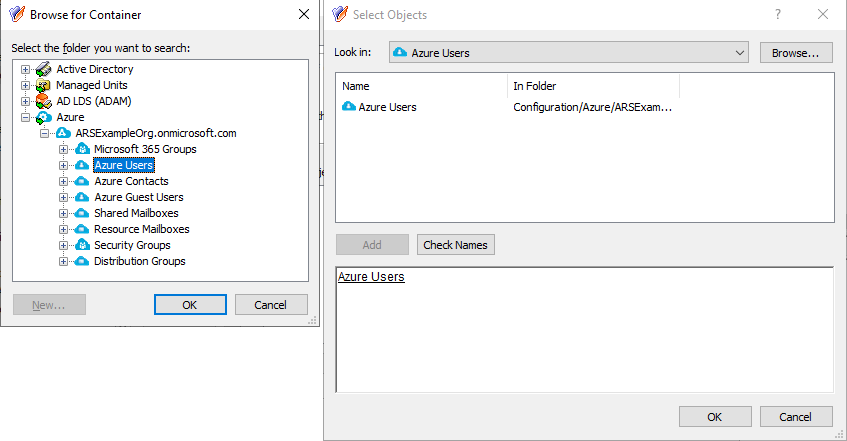
Figure 132: New Access Template – Specifying the Azure Users container as the directory object in scope
To do so:
-
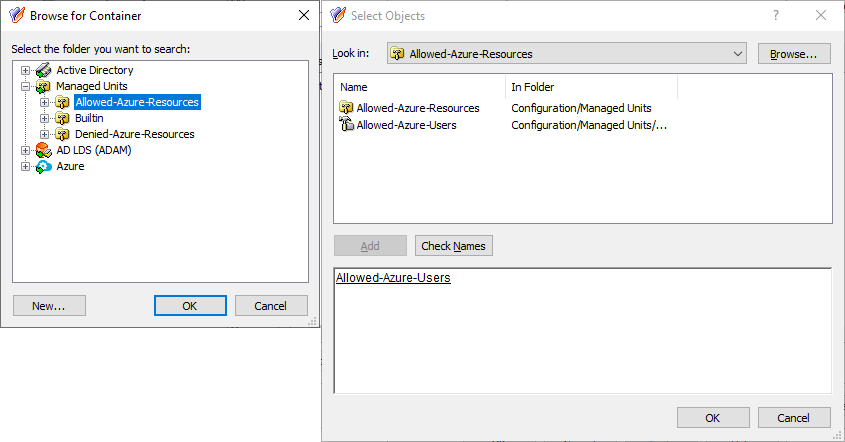
In the Select Objects dialog, click Browse.
-
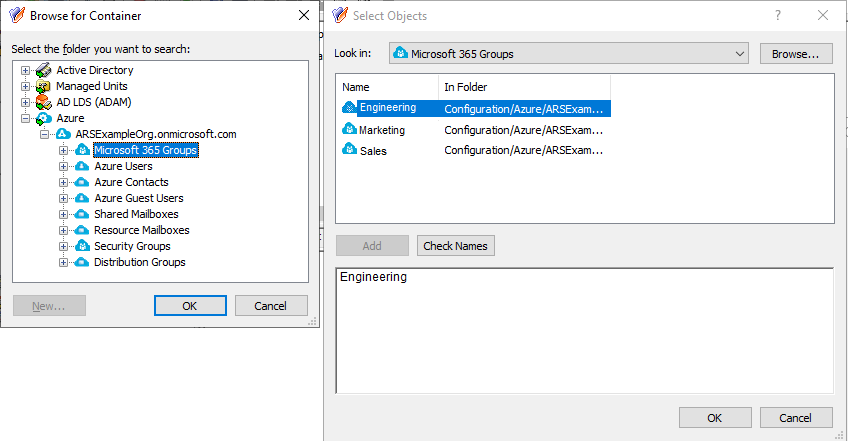
In the Browse for Container dialog, expand the Azure > <azure-tenant-name> node (in this example, the Azure tenant is named ARSExampleOrg.onmicrosoft.com).
-
Select the Azure Users node, and click OK. The Azure Users container and the users contained in it will appear in the Select Objects dialog.
-
In the Select Objects dialog, select the Azure Users container.
-
To apply the selection, click Add and OK.
The Azure Users container then appears in the Objects step. To continue configuring the AT, click Next.
-
In the Users or Groups step, click Add, then select the users to which you want to delegate the permission. In this example, the AT is delegated to the Helpdesk group of an example Organizational Unit (OU). To add the group, click Add, then click OK.
Figure 133: Delegation of Control Wizard – Selecting the Helpdesk group as Trustee
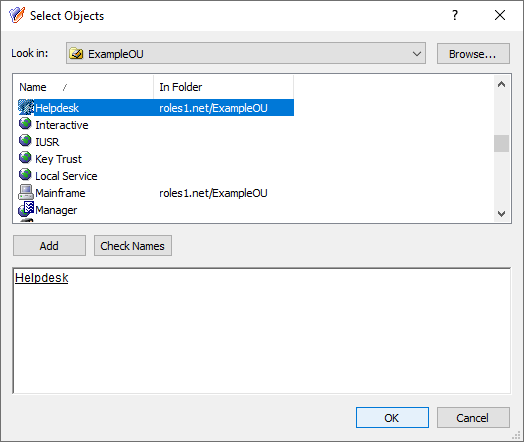
To continue, in the Users or Groups step, click Next.
-
In the Inheritance Options step, make sure that the This directory object and Child objects of this directory object settings are selected. To continue, click Next.
-
In the Permissions Propagation step, leave the Propagate permissions to Active Directory setting in its default state. To continue, click Next.
-
To apply your changes, click Apply and OK.