Chatta subito con l'assistenza
Chat con il supporto

Active Roles 8.1.1 - Administration Guide

Introduction Getting started Rule-based administrative views Role-based administration
Access Templates as administrative roles Access Template management tasks Examples of use Deployment considerations Windows claims-based access rules
Rule-based autoprovisioning and deprovisioning
Provisioning Policy Objects Deprovisioning Policy Objects How Policy Objects work Policy Object management tasks Policy configuration tasks
Property Generation and Validation User Logon Name Generation Group Membership AutoProvisioning Exchange Mailbox AutoProvisioning AutoProvisioning in SaaS products OneDrive Provisioning Home Folder AutoProvisioning Script Execution Microsoft 365 and Azure Tenant Selection E-mail Alias Generation User Account Deprovisioning Office 365 Licenses Retention Group Membership Removal Exchange Mailbox Deprovisioning Home Folder Deprovisioning User Account Relocation User Account Permanent Deletion Group Object Deprovisioning Group Object Relocation Group Object Permanent Deletion Notification Distribution Report Distribution
Deployment considerations Checking for policy compliance Deprovisioning users or groups Restoring deprovisioned users or groups Container Deletion Prevention policy Picture management rules Policy extensions
Using rule-based and role-based tools for granular administration Workflows
Key workflow features and definitions About workflow processes Workflow processing overview Workflow activities overview Configuring a workflow
Creating a workflow definition for a workflow Configuring workflow start conditions Configuring workflow parameters Adding activities to a workflow Configure an Approval activity Configuring a Notification activity Configuring a Script activity Configuring an If-Else activity Configuring a Stop/Break activity Configuring an Add Report Section activity Configuring a Search activity Configuring CRUD activities Configuring a Save Object Properties activity Configuring a Modify Requested Changes activity Enabling or disabling an activity Enabling or disabling a workflow Using the initialization script
Approval workflow Email-based approval Automation workflow Activity extensions
Temporal Group Memberships Group Family Dynamic groups Active Roles Reporting Management History Entitlement profile Recycle Bin AD LDS data management One Identity Starling Join and configuration through Active Roles Managing One Identity Starling Connect Configuring linked mailboxes with Exchange Resource Forest Management Configuring remote mailboxes for on-premises users Azure AD, Microsoft 365, and Exchange Online Management
Configuring Active Roles to manage Hybrid AD objects Managing Hybrid AD users
Creating a new Azure AD user with the Web Interface Viewing or updating the Azure AD user properties with the Web Interface Viewing or modifying the manager of a hybrid Azure user Disabling an Azure AD user Enabling an Azure AD user Deprovisioning of an Azure AD user Undo deprovisioning of an Azure AD user Adding an Azure AD user to a group Removing an Azure AD user from a group View the change history and user activity for an Azure AD user Deleting an Azure AD user with the Web Interface Creating a new hybrid Azure user with the Active Roles Web Interface Converting an on-premises user with an Exchange mailbox to a hybrid Azure user Licensing a hybrid Azure user for an Exchange Online mailbox Viewing or modifying the Exchange Online properties of a hybrid Azure user Creating a new Azure AD user with Management Shell Updating the Azure AD user properties with the Management Shell Viewing the Azure AD user properties with the Management Shell Delete an Azure AD user with the Management Shell Assigning Microsoft 365 licenses to new hybrid users Assigning Microsoft 365 licenses to existing hybrid users Modifying or removing Microsoft 365 licenses assigned to hybrid users Updating Microsoft 365 licenses display names
Unified provisioning policy for Azure M365 Tenant Selection, Microsoft 365 License Selection, Microsoft 365 Roles Selection, and OneDrive provisioning Microsoft 365 roles management for hybrid environment users Managing Microsoft 365 contacts Managing Hybrid AD groups Managing Microsoft 365 Groups Managing cloud-only distribution groups Managing cloud-only dynamic distribution groups Managing Azure security groups Managing cloud-only Azure users Managing cloud-only Azure guest users Managing cloud-only Azure contacts Changes to Active Roles policies for cloud-only Azure objects Managing room mailboxes Managing cloud-only shared mailboxes
Modern Authentication Managing the configuration of Active Roles
Connecting to the Administration Service Managed domains Using unmanaged domains Evaluating product usage Creating and using virtual attributes Examining client sessions Monitoring performance Customizing the Console Using Configuration Center Changing the Active Roles Admin account Enabling or disabling diagnostic logs Active Roles Log Viewer
SQL Server replication Using regular expressions Administrative Template Communication ports Active Roles and supported Azure environments Integrating Active Roles with other products and services Active Roles Language Pack Active Roles Diagnostic Tools Active Roles Add-on Manager

How Policy Objects work

A Policy Object is a collection of administrative policies that specifies the business rules to be enforced. A Policy Object includes stored policy procedures and specifications of events that activate each procedure.

A Policy Object associates specific events with its policy procedures, which can be built-in procedures or custom scripts. This provides an easy way to define policy constraints, implement sophisticated validation criteria, synchronize different data sources, and perform a number of administrative tasks as a single batch.

Active Roles enforces business rules by linking Policy Objects to:

  • Administrative views (Active Roles Managed Units)

  • Active Directory containers (Organizational Units)

  • Individual (leaf) directory objects, such as user or group objects

By choosing where to link a Policy Object, you determine the policy scope. For example, if you link a Policy Object to a container, all objects in the container and its sub-containers are normally subject to the Policy Object.

You can link different Policy Objects to different containers to establish container-specific policies. You may need to do so if each Organizational Unit uses a dedicated Exchange Server to store mailboxes or file server to store home folders.

You can also link a Policy Object to a leaf object, such as a user object. As an example, consider a policy that prohibits changes to group memberships when copying a certain user object.

Policy Objects define the behavior of the system when directory objects are created, modified, moved, or deleted within the policy scope. Policies are enforced regardless of administrative rights of a user performing a management task. It is important to understand that even those who have administrator rights to Active Roles itself are forced to abide by administrative policies once they are enforced.

Policy Object management tasks

This section guides you through the Active Roles Console to manage Policy Objects. The following topics are covered:

Creating a Policy Object

The Active Roles Console provides separate wizards for creating Policy Objects both for provisioning and deprovisioning. You can start the wizards from the Administration container, located under Configuration > Policies in the Console tree:

  • To configure provisioning policies, right-click Administration in the Console tree, and select New > Provisioning Policy.

  • To configure deprovisioning policies, right-click Administration in the Console tree, and select New > Deprovisioning Policy.

If you need to manage a large number of Policy Objects, it is advisable to create containers that hold only specified Policy Objects for easy location: In the Console tree, right-click Administration and select New > Container. Then, you can use wizards to create Policy Objects in that container: Right-click the container and select New > Provisioning Policy or New > Deprovisioning Policy.

On the Welcome page of the wizard, click Next. Then, on the Name and Description page, type a name and description for the new Policy Object. The Active Roles Console will display the name and description in the list of Policy Objects in the details pane.

Click Next to continue. This displays a page where you can select the policy you want to configure. The list of policies depends on whether you are creating a Provisioning Policy Object or Deprovisioning Policy Object.

Figure 38: Provisioning policies

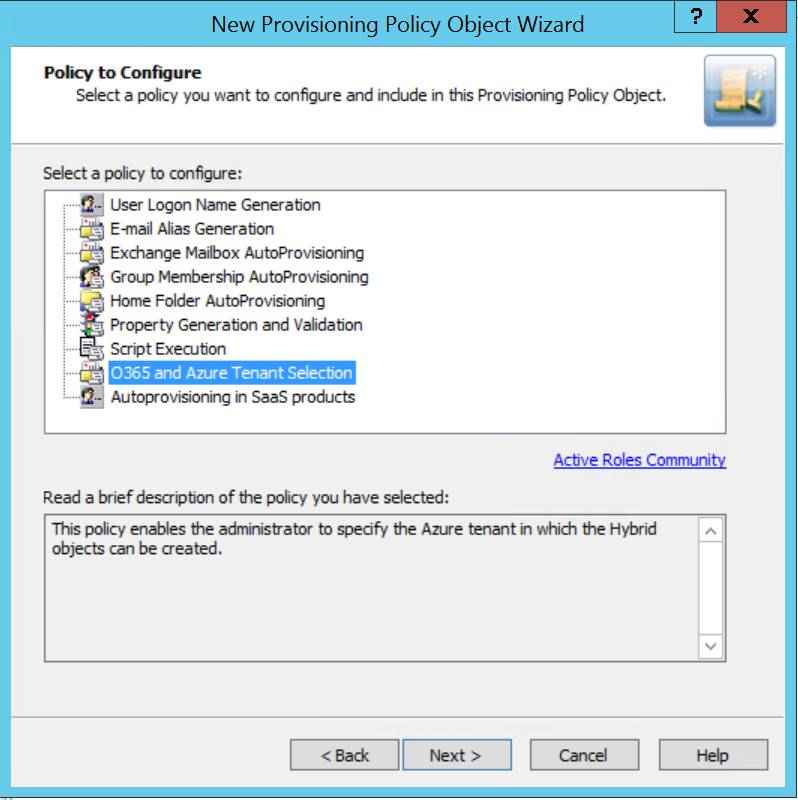
On the Policy to Configure page, select the type of policy you want to add to the Policy Object. When the type is selected, its description is displayed in the lower box.

Click Next to configure the policy. The steps involved in configuring a policy depend on the policy type. For more information on how to configure policies, see Policy configuration tasks.

When you are done with configuring a policy, the wizard presents you with a page where you can specify the policy scope. You have the option to complete a list of containers or Managed Units on which you want the policy to be enforced. This step is optional because you can configure the policy scope after creating the Policy Object. For more information, see Applying Policy Objects.

Click Next, and then click Finish to complete the wizard. This creates the new Policy Object.

Steps for creating a Policy Object

To create a Policy Object

  1. In the Console tree, under Configuration > Policies > Administration, locate and select the folder in which you want to add the Policy Object.

    You can create a new folder as follows: Right-click Administration and select New > Container. Similarly, you can create a sub-folder in a folder: Right-click the folder and select New > Container.

  2. Right-click the folder, point to New, and then click Provisioning Policy or Deprovisioning Policy.

  3. On the Welcome page of the wizard, click Next.

  4. On the Name and Description page, do the following:

    1. In the Name box, type a name for the Policy Object.

    2. Under Description, type any optional information about the Policy Object.

    Click Next.

  5. On the Policy to Configure page, select a policy type, and click Next to configure policy settings.

  6. On the Enforce Policy page, you can specify the objects to which this Policy Object is to be applied:

    • Click Add, and use the Select Objects to locate and select the objects you want.

  7. Click Next, and then click Finish.

NOTE: Consider the following when creating Policy Objects:

Related Documents

The document was helpful.

Seleziona valutazione

I easily found the information I needed.

Seleziona valutazione