When creating or modifying an object, Active Roles checks whether the property values satisfy criteria defined in the policy. If they do not, Active Roles prevents you from the object creation or modification.
In the Object Creation Wizard and Properties dialogs, the properties that are controlled by the policy are displayed as hyperlinks. If you have a policy configured to populate a property with a certain value (generate the default value), the edit box for the property is unavailable for editing, as shown in the following figure.
Figure 43: Object creation
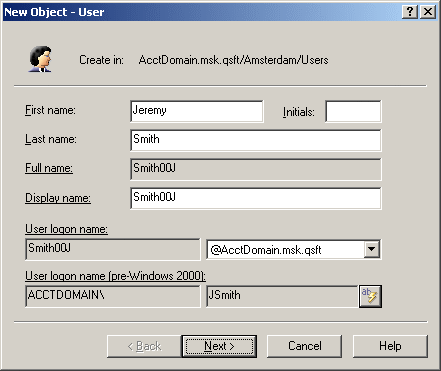
You can click a hyperlink to display the policy details.
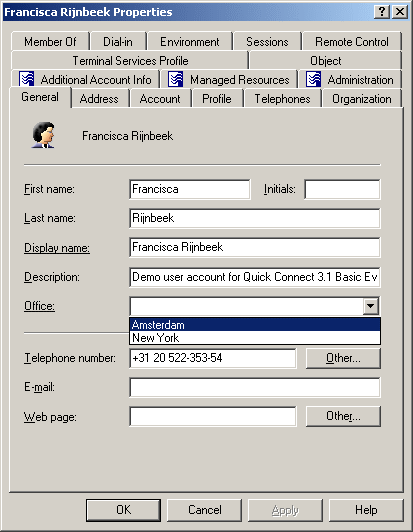
With a policy configured to define a set of acceptable values for a given property, the Active Roles Console provides a drop-down list to select a value when modifying that property. The user of the Active Roles Console can choose an acceptable value from the list instead of having to type a value in the edit box. This feature is illustrated in the following figure: The Office box provides a list of acceptable values that are prescribed by policy.
Figure 44: Acceptable values for a policy
To configure a Property Generation and Validation policy, select Property Generation and Validation on the Policy to Configure page in the New Provisioning Policy Object Wizard or in the Add Provisioning Policy Wizard. Then, click Next to display the Controlled Property page:
Figure 45: New Provisioning Policy Object Wizard
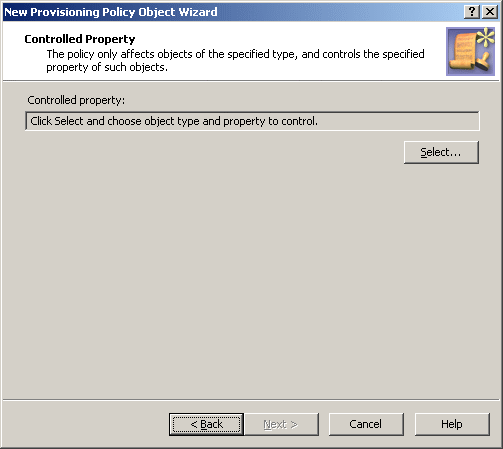
Click Select to choose the object type and object property you want the policy to control. This displays the Select Object Type and Property dialog.
Figure 46: Select Object type and Property
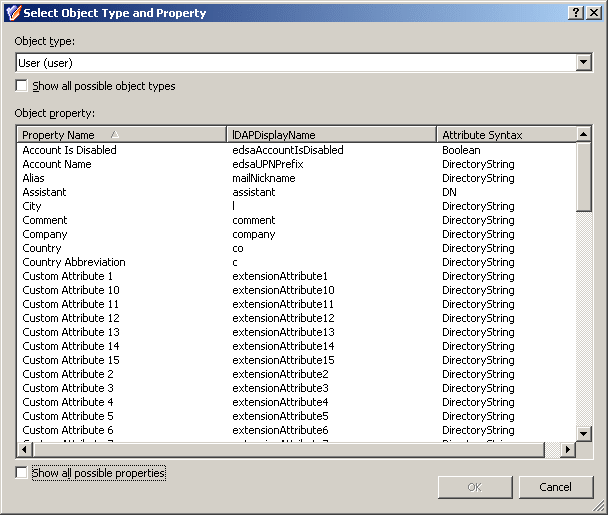
From the Object type list, select the object type. This lets you to specify the type of objects that are subject to the policy control. From the Object property list, select the object property. This lets you to specify the property you want the policy to control. Click OK.
On the Controlled Property page, click Next to display the Configure Policy Rule page:
Figure 47: Configure Policy Rule
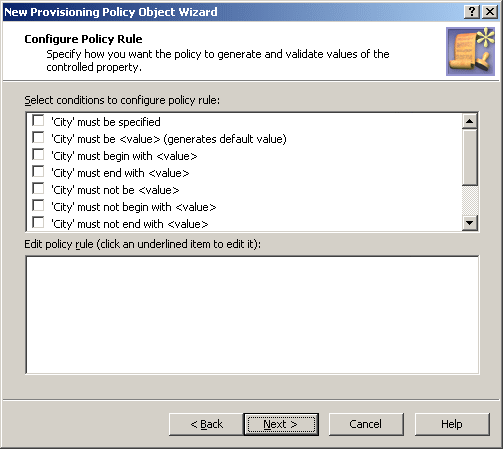
This page allows you to determine criteria used to generate and validate values of the controlled property.
To configure a policy rule, first select appropriate check boxes in the upper box on the Configure Policy Rule page. Each check box label is composed of the name of the controlled property followed by a condition. For example, if you select the check box next to must be specified, the policy will force a value to be assigned to the property.
If you want the policy to generate a default value for the controlled property, select the check box next to must be <value> (generates default value).
For the policy not to distinguish between uppercase and lowercase letters, select the check box next to is case insensitive.
After you selected check boxes in the upper box, the lower box prompts you to configure values, as shown in the following figure.
Figure 48: Edit Policy Rule
In the lower box, click links labeled <click to add value> to configure additional values. If you select several check boxes in the upper box, you must configure value for each condition.
In the Edit policy rule box, you can also:
-
Modify a value. Right-click the value and click Edit. This displays a dialog similar to the Add Value dialog, discussed later in this section.
-
Remove a value. Right-click the value and click Remove.
-
Rearrange the list of values (provided that multiple values are specified for a particular condition). Right-click a value and use the Move Up or Move Down command to change position of the value in the list, or click Sort Items Ascending or Sort Items Descending to sort the list accordingly.
-
Import values from a text file. Prepare a text file containing one value per line, right-click any value in the Edit policy rule box, click Import Items, and then open the file you prepared.
-
Export the values to a text file. Right-click any value, click Export Items, and specify a text file to write the values to.
-
Specify whether you want the rule to generate the default value. Click the Yes or No link to toggle this option.
To combine criteria into the policy rule, use the AND or OR operator. The policy will pass if the property value meets all of the specified criteria or any one of them depending on the operator you choose. To change the operator, click the link labeled and or or.
Clicking a link labeled <click to add value> displays a dialog similar to the following figure.
Figure 49: Add Value
The Add Value dialog allows you to specify a value for the selected condition. You can type a value in the edit box or use the point-and-click interface to configure a value. Clicking Configure displays the Configure Value dialog, shown in the following figure.
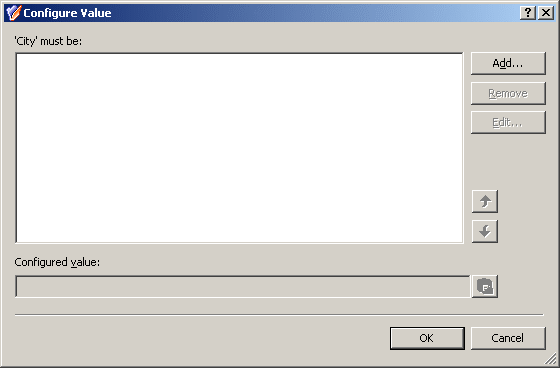
Figure 50: Configure Value
Each value is a concatenation of one or more entries. In the Configure Value dialog, you can:
-
Add any number of entries to the value. Click Add to display the Add Entry window, discussed later in this section.
-
Remove entries from the value. Select entries from the list and click Remove.
-
Modify entries included in the value. Select an entry and click Edit. This displays a window similar to the Add Entry window, where you can view and modify the entry properties.
-
Move the selected entry up and down in the list, thereby rearranging the entries in the value. Click an entry in the upper box, and then click the arrow buttons next to the box to move the entry.
-
Paste the text from the Clipboard at the end of the value. If the text includes a valid syntax implementing an entry of a type other than Text (see the table below), the syntax is treated accordingly. Copy a text to the Clipboard, and then click the button next to the Configured value box to paste the text at the end of the string in that box.
In the Add Entry window, you can select the type of the entry to add, and then configure the entry. The following table summarizes the available types of entries.
Table 17: Types of entries
|
Text |
Adds a text string to the value. |
|
<Object> Property |
Adds a selected property (or a part of a property) of the object being managed by the policy. When displaying this type of entry the Console substitutes for the <Object> placeholder the actual category of objects that are subject to the policy control.
For example, with the policy configured to control a certain property of user objects, you can use this type of entry to populate that property of a user object with data stored in other properties of that same user object. |
|
Parent OU Property |
Adds a selected property (or a part of a property) of an Organizational Unit in the hierarchy of containers above the object being managed by this policy.
For example, with the policy configured to control a certain property of user objects, you can use this type of entry to populate that property of a user object with data stored in properties of the Organizational Unit containing that user object (immediate parent OU). |
|
Parent Domain Property |
Adds a selected property (or a part of a property) of the domain of the object being managed by this policy.
For example, with the policy configured to control a certain property of user objects, you can use this type of entry to populate that property of a user object with data stored in properties of the domain in which the user object resides. |
|
Mask |
Adds a syntax that determines what characters are allowed in the property controlled by this policy. You can use this type of entry to enforce a data format like numeric, postal/ZIP code, or telephone number. |
The steps to configure an entry depend on the type of the entry. The following sections elaborate on the procedures for each of the entry types occurring in the Add Entry window.
When you select Text under Entry type in the Add Entry window, the Entry properties area displays the Text value box.
In the Text value box, type the text you want to include in the value, and then click OK.
When you select <Object> Property under Entry type in the Add Entry window, the Entry properties area looks as follows.
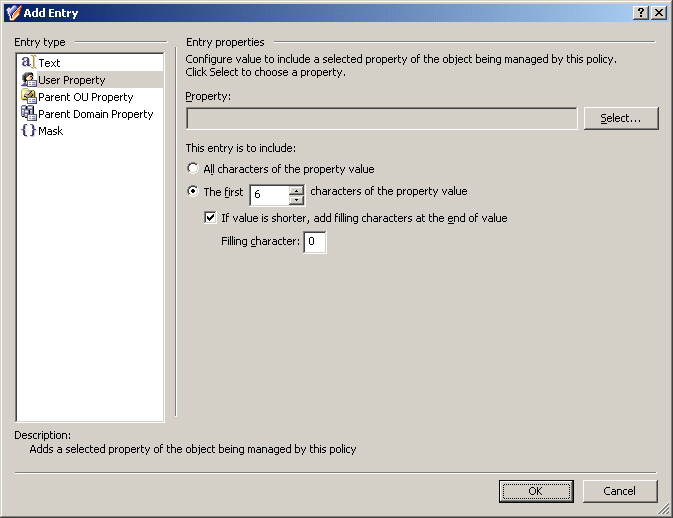
Using this entry type, you can configure a value based on a property of the object itself. To choose a property, click Select.
If you want the entry to include the entire value of the property, click All characters of the property value. Otherwise, click The first, and specify the number of characters to include in the entry.
In the latter case, you can select the If value is shorter, add filling characters at the end of value check box, and type a character in the Filling character box. This character will fill the missing characters in the value of the object property if the value is shorter than specified in the box next to the option The first.
When you are done configuring an entry, click OK to close the Add Entry window. The entry is added to the Configure Value dialog.
