Use the following step-by-step instructions to configure an entry in the Add Entry dialog. The same instructions apply when you are making changes to an existing entry.
To configure a Text entry
-
Under Entry type, click Text.
Use a Text entry to add a text string to the value you are configuring.
-
In Text value, type the text string you want the value to include.
-
Click OK.
To configure an <Object> Property entry
-
Under Entry type, click <Object> Property.
Use an <Object> Property entry when configuring a value to include a certain property (or a part of a property) of the object that is under the control of the policy. In these instructions, <Object> stands for the type of object, such as User, Group, or Computer.
-
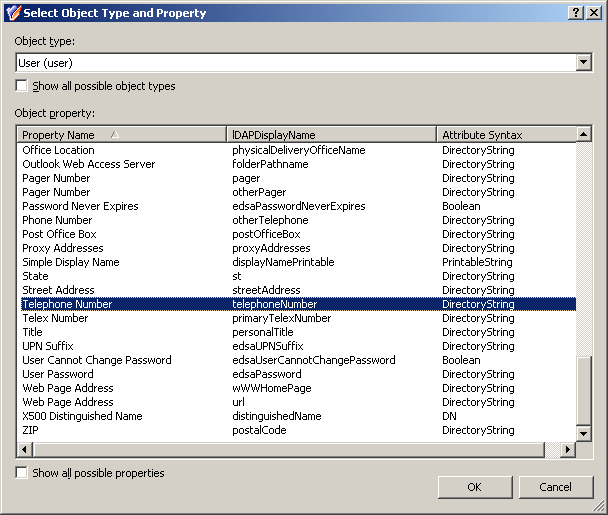
Click Select, click the property to include in the value, and then click OK.
-
If you want the entry to include the entire value of the property, click All characters of the property value. Otherwise, click The first, and specify the number of characters to include in the entry.
-
If you selected The first, then, optionally, select If value is shorter, add filling characters at the end of value, and enter a character in Filling character.
This character will fill the missing characters in the value of the property if the value is shorter than specified in the box next to The first.
-
Click OK.
To configure a Parent OU Property entry
-
Under Entry type, click Parent OU Property.
Use a Parent OU Property entry when configuring a value to include a certain property (or a part of a property) of an Organizational Unit (OU) in the hierarchy of containers above the object being managed by the policy.
-
Click Select, click the property to include in the value, and then click OK.
-
If you want the entry to include the entire value of the property, click All characters of the property value. Otherwise, click The first, and specify the number of characters to include in the entry.
-
If you selected The first, then, optionally, select If value is shorter, add filling characters at the end of value, and type a character in Filling character.
This character will fill the missing characters in the value of the property if the value is shorter than specified in the box next to The first.
-
Choose one of these options:
-
To use the property of the OU in which the object resides, click Immediate parent OU of the object being managed by this policy.
-
To use the property of a parent OU of a different level, click More distant parent OU and then, in Level, specify the level of the OU.
Lower level means greater distance from the managed object in the hierarchy of containers above that object. OU level 1 is an immediate child OU of the domain.
-
-
Click OK.
To configure a Parent Domain Property entry
-
Under Entry type, click Parent Domain Property.
Use a Parent Domain Property entry when configuring a value to include a certain property (or a part of a property) of the domain of the object being managed by the policy.
-
Click Select, click the property to include in the value, and then click OK.
-
If you want the entry to include the entire value of the property, click All characters of the property value. Otherwise, click The first, and specify the number of characters to include in the entry.
-
If you selected The first, then, optionally, select If value is shorter, add filling characters at the end of value, and type a character in Filling character.
This character will fill the missing characters in the value of the property if the value is shorter than specified in the box next to The first.
-
Click OK.
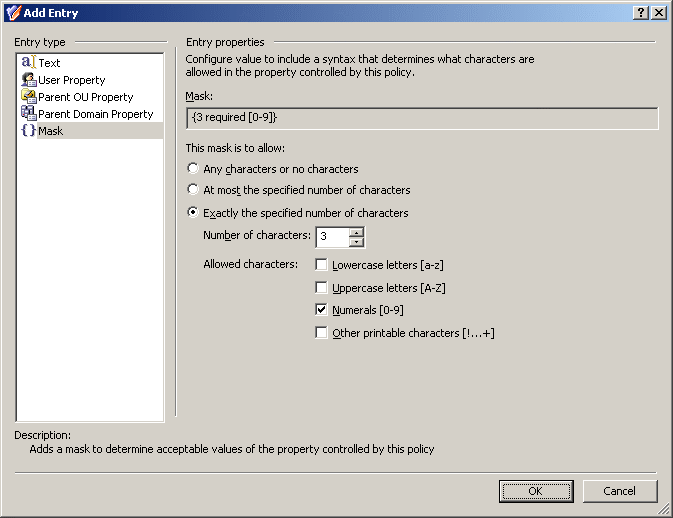
To configure a Mask entry
-
Under Entry type, click Mask.
Use a Mask entry when configuring a value to include a syntax that determines how many and what characters are allowed in the property controlled by the policy.
-
Select one of these options:
-
Any characters or no characters: Allows the entry to include any series of characters.
-
At most the specified number of characters: Specify the maximum number of allowed characters the entry may include.
-
Exactly the specified number of characters: Specify an exact number of allowed characters that the entry must include.
-
-
If you selected At most the specified number of characters or Exactly the specified number of characters, then in Number of characters, specify the number of characters allowed in this entry.
If you selected At most the specified number of characters, the entry may include any number of characters not exceeding the number specified.
If you selected Exactly the specified number of characters, the entry must include exactly the specified number of characters.
-
Under Allowed characters, select check boxes to specify what characters are allowed in this entry.
-
-
Click OK.
To configure a Date and Time entry
-
Under Entry type, click Date and Time.
Use a Date and Time entry when configuring a value to include the date and time of the operation performed by the policy (for example, the date and time when the user was deprovisioned).
-
In the list under Date and time format, click the date or time format you want.
-
Click OK.
To configure an Initiator ID entry
-
Under Entry type, click Initiator ID.
Use an Initiator ID entry when configuring a value to include the ID of the Initiator, that is, the user who initiated the operation performed by the policy (for example, the ID of the user who initiated the deprovisioning operation). You can build the Initiator ID based on a combination of properties of the Initiator.
-
Select one of these options:
-
User logon name (pre-Windows 2000) of the Initiator, in the form Domain\Name to set the Initiator ID to the pre-Windows 2000 user logon name of the Initiator.
-
User logon name of Initiator to set the Initiator ID to the user logon name of the Initiator.
-
Initiator ID built using a custom rule to compose the Initiator ID of other properties specific to the Initiator.
-
-
If you selected Initiator ID built using a custom rule, click Configure, and use the Configure Value dialog to set up the value to be used as the Initiator ID: Click Add and specify the entries for the value as appropriate.
You can configure entries of these categories: Text (any text string), Initiator Property (a certain property of the Initiator user object), Parent OU Property (a certain property of an Organizational Unit that holds the Initiator user object), Parent Domain Property (a certain property of the domain of the Initiator user object).
-
Click OK.
To configure a Uniqueness Number entry
-
Under Entry type, click Uniqueness Number.
Use a Uniqueness Number entry when configuring a value to include a number the policy will increment in the event of a naming conflict. For example, in a policy that generates a user logon name or email alias, you can add an entry of this category to the generation rule in order to ensure the uniqueness of the name or alias generated by the policy.
-
Click one of these options:
-
Add always: The value includes this entry regardless of whether or not the policy encounters a naming conflict when applying the generation rule.
-
Add if the property value is in use: The policy adds this entry to the value in the event of a naming conflict; otherwise the value does not include this entry.
-
-
Specify how you want the entry to be formatted:
-
To have the entry formatted as a variable-length string of digits, clear the Fixed-length number, with leading zeroes check box. In most cases, this will result in a single-digit entry.
-
To have the entry formatted as a fixed-length string of digits, select the Fixed-length number, with leading zeroes check box, and then specify the number of digits you want the string to include. This will result in an entry prefixed with the appropriate number of zeroes, such as 001, 002, 003.
-
-
Click OK.
NOTE: Consider the following when configuring entries:
-
You may need to configure an entry when configuring a policy such as Property Generation and Validation (see Configuring a Property Generation and Validation policy), User Logon Name Generation (see Steps for configuring a User Logon Name Generation policy), Group Membership AutoProvisioning (see Configuring a Group Membership AutoProvisioning policy), E-mail Alias Generation (see Configuring an E-mail Alias Generation policy), User Account Deprovisioning (see Steps for configuring a User Account Deprovisioning policy), or Group Object Deprovisioning (see Configuring a Group Object Deprovisioning policy).
-
The contents of the Entry Type list in the Add Entry dialog depend on the type of the policy you are configuring.