You can view or modify the Exchange Online properties of a hybrid Azure user via the Exchange Online Properties action of the Active Roles Web Interface. This is typically required during organizational changes or when the personal information of the user is updated.
NOTE: If the hybrid user is in a Synchronized Identity domain or Federated domain, you can edit most of their Exchange Online attributes with the Exchange Online Properties action of the Active Roles Web Interface. However, you cannot edit the Email address attribute, as that attribute is synchronized only through native Microsoft tools.
To view or change the Exchange Online properties of hybrid Azure user
-
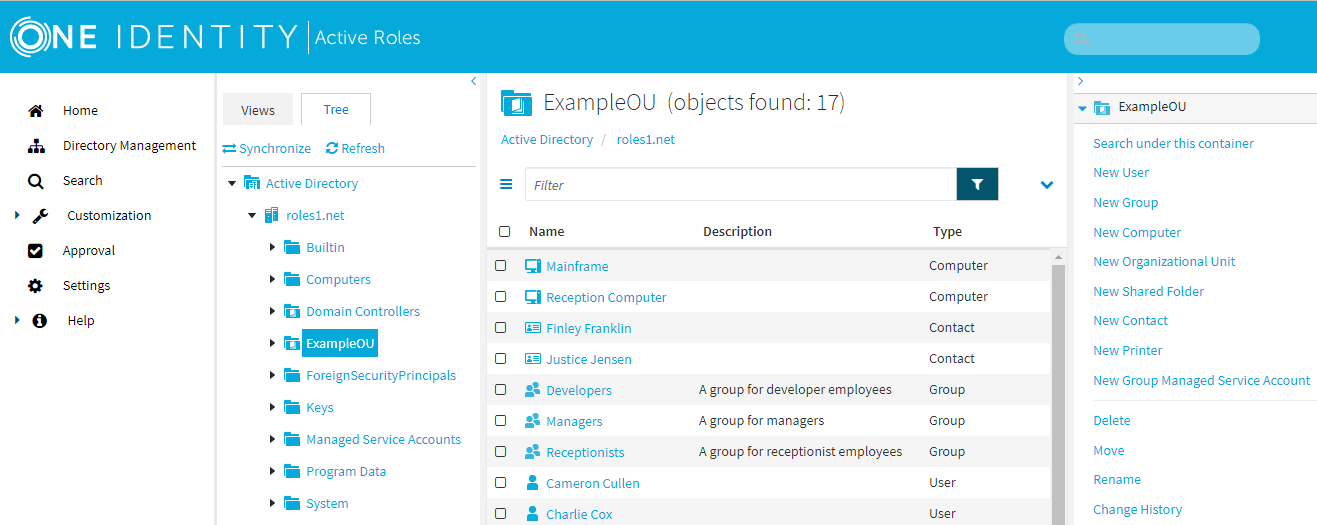
In the Active Roles Web Interface, under Directory Management > Tree > Active Directory, navigate to the OU of the hybrid user whose Exchange Online properties you want to view or modify.
Figure 198: Active Roles Web Interface – Navigating to the OU of the hybrid user
-
Select the user whose Exchange Online properties you want to check, then in the list of actions, click Exchange Online Properties.
-
In the available Exchange Online Properties tabs, configure the Exchange Online mailbox settings as you need.
Table 113: Available Exchange Online properties
| Mail Flow Settings |
View and configure rules for the emails that the mailbox sends or receives via the Exchange Online service. |
| Delegation |
Configure the email account as a shared mailbox. |
| General |
View and configure the email addresses associated with the mailbox. |
| Mailbox Features |
View and configure various Exchange Online mailbox features, for example mobile access, additional mailbox protocols, or archival settings. |
| Mailbox Settings |
View and configure Messaging Records Management (MRM) settings for the mailbox. |
-
To apply your changes, click OK, then Finish.
You can set up rules for the emails that Exchange Online mailboxes send or receive in the organization with the Exchange Online Properties > Mail Flow Settings tab of the Active Roles Web Interface. Active Roles supports setting up two types of such rules:
-
Message size settings, specifying the size of the emails that the guest user can send or receive.
-
Email delivery and forwarding settings, allowing the guest user to send emails on behalf of a specified group, or have their received emails automatically forwarded to an additional specified address.
Such mail flow settings are typically configured if the organization enforces specific email messaging policies for users and guest users.
To configure the mail flow settings for an Exchange Online mailbox
-
On the Active Roles Web Interface, navigate to Directory Management > Tree View > Azure > <azure-tenant> > Azure Users (or Azure Guest Users).
-
From the list in the middle pane, select the Azure user or Azure guest user that you want to update.
-
To open the Exchange Online properties of the selected Azure user or guest user, click Exchange Online Properties on the right pane.
-
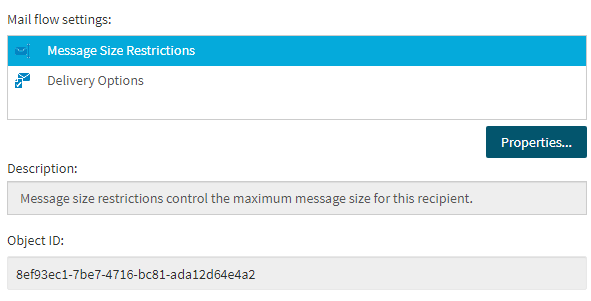
To open the mail flow settings, click the Mail Flow Settings tab.
Figure 186: Exchange Online Properties > Mail Flow Settings — Configuring the message size and forwarding settings of an Exchange Online mailbox
-
Select Message Size Restrictions, and click Properties....
-
Configure the size of the emails (in KB) that are sent or received by the mailbox. By default, both the Sending message size and the Receiving message size settings use the default limit of the Azure tenant.
-
To apply your changes and close the Message Size Restrictions dialog, click Save.
-
Select Delivery Options, and click Properties to configure the following email delivery and forwarding settings.
-
Send on Behalf: When configured, the mailbox can send emails on behalf of the specified mailbox or group.
-
Forwarding Address: When configured, the emails received by the mailbox are always forwarded to the specified email address.
-
To apply any changes you made in the Delivery Options dialog, click Save.
-
To close the Exchange Online Properties window, click Close.
You can set up an Exchange Online mailbox as a shared mailbox in the Exchange Online Properties > Delegation tab of the Active Roles Web Interface. This is typically performed if the configured email account is used as a group account, such a common support or information email address.
The Active Roles Web Interface supports granting Send as and Full access permissions to the specified users and guest users. For more information on shared mailboxes and these permissions, see Shared mailboxes in Exchange Online in the Microsoft Exchange documentation.
To configure the email delegation settings of an Exchange Online mailbox
-
On the Active Roles Web Interface, navigate to Directory Management > Tree View > Azure > <azure-tenant> > Azure Users (or Azure Guest Users).
-
From the list in the middle pane, select the Azure user or Azure guest user that you want to update.
-
To open the Exchange Online properties of the selected Azure user or guest user, click Exchange Online Properties on the right pane.
-
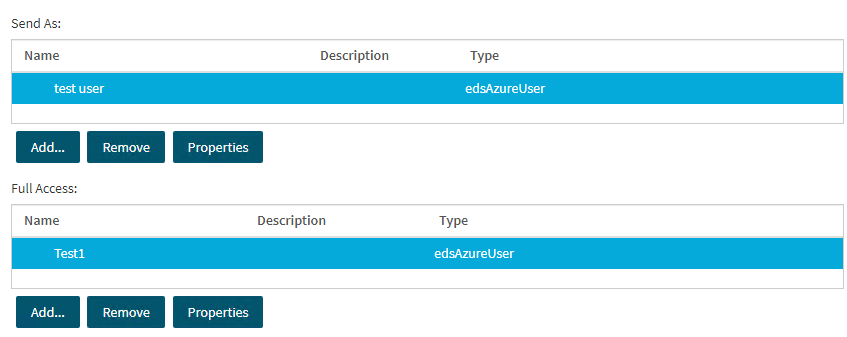
To open the delegation settings, click the Delegation tab.
Figure 187: Exchange Online Properties > Delegation — Accessing the email account delegation settings of an Exchange Online mailbox
-
To delegate Send as permission to a user (or users), click Add... under the Send As list.
-
Select the user(s) you want to grant Send as rights for the email address, then click OK.
-
To delegate Full Access permission to a user (or users) click Add... under the Full Access list.
-
Select the user(s) you wish to grant Full access rights for the email address, then click OK.
-
To remove a delegated user either from the Send As or Full Access list, click Remove and select the user(s) you want to revoke the permission from.
-
To apply your changes, click Save, then Close.
You can add, edit or remove email addresses to or from an Exchange Online mailbox in the Exchange Online Properties > General tab of the Active Roles Web Interface. Adding, editing, or removing email addresses is typically required in case of organizational changes (for example, the mailbox user is assigned to a new project, or the contract of a guest user ends within the organization).
To add a new email address to an Exchange Online mailbox
-
On the Active Roles Web Interface, navigate to Directory Management > Tree View > Azure > <azure-tenant> > Azure Users (or Azure Guest Users).
-
From the list in the middle pane, select the Azure user or Azure guest user that you want to update.
-
To open the Exchange Online properties of the selected Azure user or guest user, click Exchange Online Properties on the right pane.
-
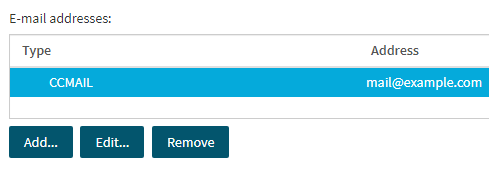
To open the email address settings, click the General tab.
Figure 188: Exchange Online Properties > General — Accessing the email account settings of an Exchange Online mailbox
-
Click Add.... The E-mail Address dialog then opens.

-
From the E-mail address type list, select the email account type applicable to your organization.
-
In the E-mail address text box, specify the address of the new account.
-
To apply your changes and create the new email account, click OK.
-
To close the Exchange Online Properties window, click Close.
To edit an existing email address of an Exchange Online mailbox
-
On the Active Roles Web Interface, navigate to Directory Management > Tree View > Azure > <azure-tenant> > Azure Users (or Azure Guest Users).
-
From the list in the middle pane, select the Azure user or Azure guest user that you want to update.
-
To open the Exchange Online properties of the selected Azure user or guest user, click Exchange Online Properties on the right pane.
-
To open the email address settings, click the General tab.
-
To open the settings of an email address, select the email address, then click Edit....
-
In the E-mail address text box, modify the current email address.
NOTE: You cannot modify the E-mail address type of an existing email account. You can only change the name of the existing address.
-
To apply your changes, click OK.
-
To close the Exchange Online Properties window, click Close.
To remove an existing email address of an Exchange Online mailbox
-
On the Active Roles Web Interface, navigate to Directory Management > Tree View > Azure > <azure-tenant> > Azure Users (or Azure Guest Users).
-
From the list in the middle pane, select the Azure user or Azure guest user that you want to update.
-
To open the Exchange Online properties of the selected Azure user or guest user, click Exchange Online Properties on the right pane.
-
To open the email address settings, click the General tab.
-
In the E-mail addresses list, select the address you want to remove.
-
Click Remove and confirm the deletion of the email address.
-
To close the Exchange Online Properties window, click Close.
